Silver Seed - Starless and Bible Black Source: IT-HE Labs (Last synchronized 2 July 2005)
Doug and Ian proudly present:
The Silver Seed - Starless and Bible Black
A rock operaMade using:
DR-DOS
DOSbox - A fantastic free DOS
emulator for Windows and Linux!
U7run for Windows -
Run Ultima 7 inside Windows 9x and NT
Exult - the top Ultima 7 engine for
Unix and Windows
1.
To kick off, we need to go to Moonshade as soon as possible.
First
we have to get into Monitor. There are two ways to do this.
First, we can
just ask nicely at the gate. This is the most reliable way. But if you have the
patience, we can enter through foul means.
This is strictly optional, so if
you can't be bothered, just skip to 4.
Recommended soundtrack: Dancing with the Moonlit Knight by Genesis (Selling England By The Pound)
2.
Go to the West gate. Have Shamino drop all his weapons and ask him to
leave.
Save, in case it doesn't work. Assail Shamino just outside the gate
so that the guardsman sees it. When the guards arrive, disarm yourself but keep
hitting Shamino.
If you're unlucky the guards will just slay you. But if it works correctly, Shamino will open his mouth and say:
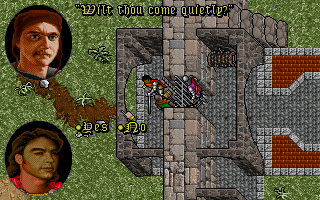
Wilt thou come quietly?
3.
Say 'Yes'.
Now you have been arrested by your faithful
companion and are rotting in jail.
Fortunately there is a secret exit. Break
jail and open the West gate using the winch (don't talk to the gatekeeper). Have
Shamino join your party and head to the local.
Speak to Lord Marsden, who will explain that all the knights have gone to the pub to bury their fallen comrades.
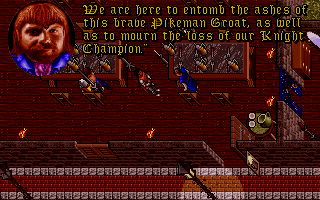
"We are
here.. hic.. to interr the ashesh of Pikemen Groat.."
Just say 'bye' and go back to the West gate; make sure it's
open.
Now ask the gatekeeper to open it. He will do the exact opposite, and
also call your escort. Marsden and company will now all be moved to the Crypt,
where they shall stay in eterna.
4.
Rescue Iolo by talking first to him and then to Marsden, and bribing
Spektor with 30 monetari.
To get this amount we need to collect some
donations for the Free Iolo fund. Walk around the houses and steal the small
amounts of change you find in people's cupboards and nightstands.
Okay. Go to the North Gate at Monitor and go up on the battlements on the eastern side, where the ramparts meet the mountain.
There build a staircase out of bread up on to the crenellations. You should need only three pieces of bread to make the ladder, which we are building now for later use.
5.
Now get you some Halberds and two-handed swords, these will be very
useful when we need to kick some ass.
Finally, get 15 more loaves of bread, which are needed to build a second set of stairs. Keep these in a bag or something, as the staircase needs to be built out-of-town.
You may also wish to pillage the town to your satisfaction just prior to leaving.
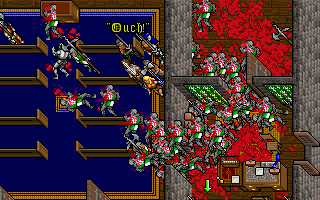
You're
sitting in your comfort, you don't believe I'm real
You cannot buy protection
from the way that I feel
6.
Go directly to the Bank, do not pass Sleeping Bull, do not
collect Selina.
We have no need for keys or such nonsense as we are going to
do a slightly more traditional break-in.
As you approach the bank, build a stairway to the roof using the 15 loaves
and Save.
Now the interesting part begins. Walk around the roof and the
magic traps within the bank will be activated. You should get beamed out to the
grass beside the bank.
7.
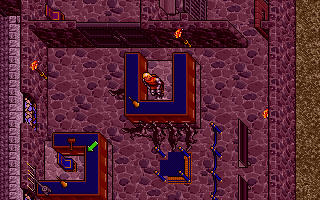
Run quickly to the south-east spell (see screen shot) and you should get
teleported INTO the bank. This can be fiddly, so you may need to reload a few
times before it works properly.
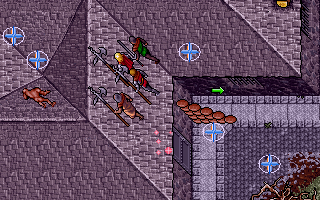
The
spells in the bottom-right will take you into the bank
Now, strip the bank clean, and run around aimlessly inside until you are teleported out. This may take a while, but be patient and it will happen eventually.
8.
Go to the Sleeping Bull, and talk to Flindo. If Selina approaches you,
tell her to piss off.
Get Hawk released. Make sure you are only carrying ONE
of the gold bars when you do this or they will ALL go to the pikemen, which we
Do Not Want.
Recommended soundtrack: When rides the Scion of the Storm by Bal Sagoth (Battle Magic)
9.
Go to Moonshade and talk to Flindo, picking up some blood-moss along
the way (it's in the South-East swamp).
Ask to be introduced to the Magelord,
and then dither around talking to the mages until Rotoluncia's servant appears.
Talk to Flindo again, and ask him about the appointment. You should then get sucked into the banquet hall, no matter what the time of day (or night).
Leave the banquet and then ask Bucia the provisioner about Pothos. Now find
Pothos again and get him to arrange a visit to Erstam, in exchange for some
blood moss you just happen to be carrying.
As a by-product this will trigger
the Rotoluncia sub-plot. It is interesting to see what happens if all your
followers are dead at this point, but that is optional.
When you confront Roto, steal her Ritual Blooding device and keep it with you.
If you ever come across any dragons, use it on them to make them say 'Ow!'.
10.
Do Erstam and get the Fire-Parrot's egg. Create Boydon and get the
Jawbone from Erstam's potting shed. Take his scrolls if it pleases you.
You may wish to have Boydon join your party; I didn't, because we have
another follower lined up later on.
You can acquire various potions by watching Vasel work, and stealing them as
he puts them down.. this does make everyone present quite upset, however. Obtain
a green potion using this method.. it may come in handy later.
If you can get
a second one, give it to Shamino at an inappropriate moment to turn him into the
'Glowing Man'.
11.
Go to Monk Isle via the gate (again, in Erstam's potting shed) and get
3 'fresh' mandrake root. Back at moonshade, trade these in for a spellbook from
Fedabiblio.
To get the Mandrake successfully, you must wait for the Salt Tides
to be in phase or whatever. This means consulting the nameless monk
who seems to have read too much Stephen King, and badgering him
continually. To make him easier to identify, shove a green potion
down his throat to make him glow green.
Go to Pothos' house and get the hidden key. Open the secret door in the stairs leading to his house. Go downstairs. Take the lightning whip and open the secret door in the north. Open the steel door with Pothos' key and go to the Football Pitch. Grab all the neat stuff and let the beasts kill you (otherwise you'll be trapped).
Steal the comb of beauty from the chest in Columna's garden.
12.
Now beam out to Silver Seed from Moonshade.
Talk to the keeper and
try to appear as fraudulent as possible to instill his doubt.
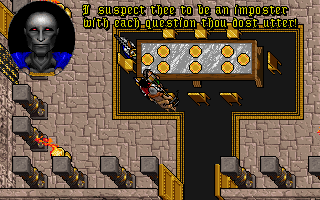
Yes, I
am the Champion of Balance. What's Balance?
Take the keyring and sleep for 168 hours (fourteen 12-hour
sessions), ignoring the screams of agony from your followers. If you have
Boydon, ask him to leave first, otherwise he may explode from starvation.
Get
Boydon to re-join as necessary, and then beam out to Moonshade. Feed the party
quickly before they all die.
13.
Go to Stefano's old house outside the western town wall (the key is in
a hollow tree outside). Get False Coin and transcribe it - we'll use it to pay
for the other spells we will need.
Finally, to reset the Silver Seed, go back to the Gate and try to use the amulet again. Then sleep for another 168 hours in the first bed you come across.
14.
Go to Bucia the provisioner. Make a pile of 100 monetari, and place it
at her feet. Now cast False Coin on it repeatedly, creating 500 monetari
(approximately 1500 guilders) with each shot.
Pick them all up, and get her
to change them into guilders. Do this whenever you need cash. Buy all the spells
in town without bothering to haggle.
From hereon, whenever you need to buy something use False Coin to create
piles of 100 gold, glowing things or bottletops, depending on the city.
Create the money right in front of the face of the guy you're dealing with.
(We both know I'm going to defraud you and you do can't do nuttin'! Hah!)
15.
Make sure you get the following spells. As you can see, Mortegro the
death-mage is our main supplier:
- Telekinesis (Mortegro)
- Fetch (Melino)
- Mass Death (Mortegro)
- Restoration (in Mortegro's desk)
- Serpent Bond (Mortegro)
- Mind Blast (Mortegro)
(You may also want Death Vortex, also from Mortegro.)
These spells contain such power that the game itself is unable to withstand their might.
16.
Go to the Silver Seed, making sure you have plenty of gold coins
first.
Buy the spell Vibrate from the magelady. We're going to have a lot of
fun with this spell.
Start by doing the maze.
Everyone who traverses the maze gets 1000 experience points, so take the entire party through instead of just the Avatar. This is easy: lead the party close to the maze boundary, but not so close that they all run off and leave you to it. Tell them all to leave; enter the maze and then, when your weapon vanishes from your hand, call over to your milling minions and ask them to rejoin you. They follow you through the maze, and are a thousand points richer for it..
17.
To gain experience quickly, have a chat with Stumpy the dragon (third
stairwell in the Aram-Dol area) and solve his riddles. Again, this boosts all
present.
Do the Fiend and the Outpost next. In the Outpost, do not use any gunpowder: two blows of a halberd will clear the rubble. We will need the powder for other tasks later on.
You should have hit level 6 by now. Go and do Aram-Dol.
As you approach the Liche himself, SAVE. Now, cast Vibrate on him. All his spells will plop out onto the floor, rendering him considerably less dangerous. Beat him up and then take the key. Get the goodies.
The Vibrate trick works on any spell-casting enemies.
18.
Now go back to the Keep, and plant the Silver Seed. If you kill some
of the three witches immediately (two barrels of powder should do the job) you
are treated to a very interesting conversation in which some or all of the
speakers are in fact, dead.
Once the Silver Seed is planted, you should have made level 8. If not, go back to Aram-Dol's place and keep killing man-spiders until you have.
JM: I think I need to reprogram the Avatar, he isn't killing properly.
IM: Make the Avatar go berserk
JM: It doesn't seem to be an option.
IM: Your followers are berserk though, aren't they?
JM: I don't think so.
IM: Well they LOOK pretty berserk.. they're all jumping up and down
shouting 'KILL! KILL!'
19.
We are now going to make use of a 'lEEt ExPlOiT in the Silver Seed.
First, rearrange or temporarily discard possessions so as to give the Avatar 20 stones of spare carrying capacity. Make sure he still has lockpicks, spellbook (plus the Ring of Shaal to drive it) and a fairly good weapon.
Go to the northern room where the Keeper hangs out. Notice the grey pillars all around it. Double-click on any one of these pillars.
For reasons never fully explained you should now be in the Test of Purity. Go to the Dupre room and kill the worms with the hammer provided. When the last worm appears, hit it once and kill Dupre with a suitable weapon from your backpack (only the hammer works on the worms, unfortunately). He'll defend himself with a glass sword - quickly Vibrate him and pocket it. (You can sometimes acquire several glass swords in this way). Take his body. Pick the lock on the door and go to the Shamino room; kill him and then everyone else, then press the left button to have your way with the corpses. Finally do Iolo's room, taking the bodies of Dupre and Shamino back with you to reality (I used them to redecorate the Sleeping Bull).
20.
When you leave, the testmaster congratulates you, but when you speak
to him again he suffers from an attack of amnesia (Who are you? Are you the
Promised One?). He is obviously going senile, so you may wish to put him out of
his misery.
Now you are in Furnace, get the Serpent tooth from the skeleton among the
mushrooms.
Look around and find 6 Chill scrolls, three loaves of bread and
various other oddments to build two stairways. One requires 15 objects, the
other needs just three.
Build the large stairway next to the brass door between the two northern buildings.
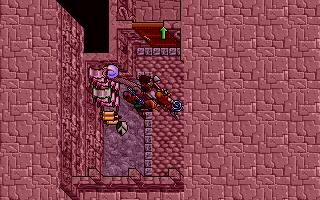
21.
Get onto the wall and head north until you come to the
mountains. Follow the mountain edge west until you come to Monitor. Build a
little ladder with the three loaves onto the crenellations and go down the
ladder on the other side, which you made last time you were in Monitor[4].
You are now in Monitor. At this point you may wish to visit the Sleeping Bull and talk to Ensorcio. You can buy spells from him after some lengthy negotiation: ask about Hawk, Batlin and his Mentor. He has the Spiral Missile spell, which may be amusing.
22.
Ignore Marsden and DO NOT apply to become a knight, but go to the
knight's test anyway.
You should find Schmed somewhere about. If not, you may
need to talk to Spektor first, about being a Knight, but that should be all. Do
not get Marsden's permission, however.
Now turn on your 16 tracks, Eddie. In the words of Greg Lake, a bit of vibin' is all it lacks, so cast Vibrate on Schmed and take the key from him.
When using Vibrate in this manner, take care that the victim's feet
are not obscured.. otherwise you'll lose the object you're trying to take.
Now it is time to let Schmed know who the Daddy is, so cast Mass Death.
Walk over his corpse to the Test of Knighthood. Cast heal, unlock the door
and lead your followers to glory.
This should be much easier, especially with
the tremendous Power at your disposal. You can now, for example, retrieve the
key in the snake room using Fetch, instead of banging rocks together.
23.
Take the Claw, and make your way to the final room. Now, just pocket
the Urn of ashes. Leave the test using the key that you stole from Schmed. You
will probably need to backtrack and go out the front way.
With the Urn and
the Claw, you will never again be alone, for you may call upon your lupine
brethren to comfort you.
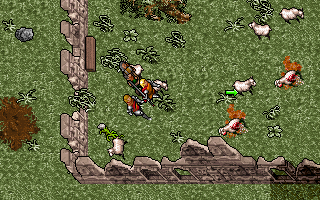
In other words, you can now summon an unlimited number wolves whenever you want.
I love
the company of wolves..
24.
Now, let's step into the Twilight Zone. Head off to Gorlab
Swamp, and wait just outside. Make sure you have amongst your followers (NOT
including the Avatar) approximately 20 stones of carrying capacity.
Just before you enter the swamp, cast Serpent Bond. You will now turn into a snake and your followers will go away. Slither into the swamp and enter the dream world.
The game will now short-circuit and your followers end up in the Dream Realm as well. But most importantly, we can smuggle some very useful contrabands in and out of the Land of Dreams!
It is advisable that you do not die while in the Dream Ream,
so save often.
In any case, under no circumstances should you give posessions to
the Avatar. because if he dies, whatever he is carrying will vanish forever.
Since you've got 3 or 4 brutal henchmen backing you up against all comers,
dying shouldn't be a problem for the most part.
25.
Go to Lord British's castle and get the chest of cool stuff (infinity
bow, complete suit of magic armour). Find the juggernaut hammer, and go to the
arena southeast of the Castle, where there are some gargoyles.
Go into the lower building and get the second infinity bow. Find Stefano's
dream of naked women. Nearby is a chest full of gold. Remember, give all the
booty to your followers: do not carry it yourself.
Finally, go to the circle
of stones. To the northwest is a brass chest, which is trapped, but contains a
lightning whip.
Again, give it to your followers.
In the Dreams Of Your Enemies arena, Batlin is wielding an Ophidian Sword.
If it were possible to extract it from him and take it with you, a large
chunk of the game could be skipped. Unfortunately I haven't been able
to do this (without using Hackmover).
26.
When this is done, make sure the Avatar is carrying
NOTHING.
Move all posessions to your followers. Now consign your body to the
flames and rejoice, for the cool weapons and heaps of gold you dreamt about have
become real!
Now, there are a couple of errands to run. Go to the Western Forest and look for the Serpent Crown in a hollow tree.
Then go into Furnace (via the cave near Monitor) and retrieve the Serpent Stick.
27.
With these tasks completed, it's time to visit the Frozen Wastes.
We'll use a slightly unorthodox method. (Indeed, we have little choice now)
Go to the Sleeping Bull. Cast Vibrate on Selina to get her key, and the Gwani
cloak. Have the Avatar wear this. In the basement of the inn you should find
some cloth.
Take 10 pieces and go to the Serpent Gate, also in the basement.
Go to the Silver Seed, and pick up three barrels of gunpowder from the Outpost.
Now go back to the 'Bull using the amulet.
28.
Go outside. South of the 'Bull you should find some Ophidian ruins.
Northeast of that is a small tower of wood and stuff.
Take one of the many
pieces of wood you should find in a stack, then go back to the Ophidian ruins
and walk south along the western wall.
Keep pressing yourself against the wall until you find the 'soft spot' which the Avatar can climb up on. Now, this isn't normally possible, but in this particular case the drop is low enough that we can place the wood on the other side of the wall and climb down off the wall. Do so.
29.
Take the orange teleporter. Walk west and round to the blue
teleporter, but do not stand on it. Instead, take out your pieces of cloth and
build a ladder onto the wall.

Walk onto the wall and follow it until you see a room with some alchemy apparatus and a bed of furs on the floor.
Look carefully at the bedding.. in the NE corner a key is poking out. Cast Fetch to make the key yours. Now go back down your ladder and unlock the doors with your ill-gotten key. Go up the stairs and look for the Great Brass Door in the southwest.
30.
Now, transfer one keg of powder you took from the Outpost to some
inconsequential serf, such as Dupre. Press him against the brass door as hard as
possible, and detonate the keg.
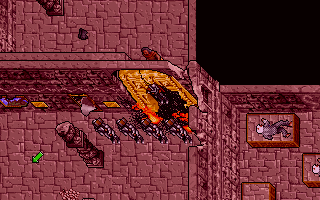
Bei zwei hundert grad fr
fnfzehn minuten baken.. und KEINE EIER!
Find Vasculio's digs and read the scroll using Telekinesis
(!).
Render Vasculio helpless with Vibrate, and then kill him. Steal his
teeth. Also take the Philanderer's Friend and the Flux Analyser.
Recommended soundtrack: Thwarted by the dark by Bal Sagoth (Battle Magic)
31.
When he's dead, build a staircase leading up to the wall of Vasculio's
prison (preferably the south wall, between the two braziers. By the lamp post
will be fine). There are a lot of crates kicking about, these will do nicely,
bales of cotton will also work. Make sure it is possible to get onto the wall
using the ladder.
Now head to the northern forest using the jawbone, and find
the Trapper's lair. Get the Gwani cloak and give it to someone. Leave the
others, and head into the cave.
When you approach the dying trapper, cast Death Vortex on him and you will be treated to another one of those interesting conversations with the dead. Take his furs. In the second cave on the left are some dead trappers, take their Gwani cloak(s).
32.
Find the Gwani place. Head off to the icy realm where Hazard the
Trapper lives. We need a suitable entrance, so blow the doors away with
gunpowder. (You must use two kegs simultaneously for this to work.)
Open Hazard and then open the chest using his key (Vibrate won't work). He
babbles something strange about the Gwani being extinct.. not yet, they
aren't.
Take the amulet you find, some of the glass swords perhaps, and
anything else that looks nice. There should be some fur hats too. Put these on.
33.
Go to the Gwani settlement and find Yenani. Give him the amulet, and
he should present you with a tooth.
Now. If you ran into any Gwani on the
way, you may have found that they take great delight in slaying the rare and
endangered ice-dragons (and I quote, "Kill! Kill!").
This will not continue. Cast Mass Death, and with a wave of your hand, the Gwani learn what being an endangered species is like the hard way.
One last time shall the False Prophet come.
This time, the False
Prophet will come with a band of warriors.
And they will destroy all that
remains of the Gwani Race.
34.
Now we have the Gwani tooth, we may as well use it. The
nearest Gate is by Vasculio.. we just need to get there. Today we will use 'Poor
Man's ethereal travel'.
Build a ladder on to the mountains, using 15 loaves of bread, gold coins or whatever junk you can lay your hands on.
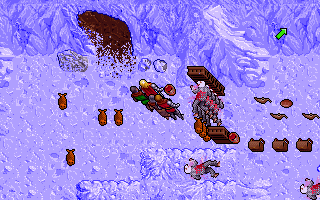
"No, no. Move the fish closer
to the corpses.."
Climb upon the mountains, and follow them East until you spot some lava. Walk out into thin air(!) and look for Vasculio's house. Find the wall and walk around it and down the stairs you made earlier. Now there's something you don't see every day.
Find the Serpent Gate and beam off to Sunrise Isle for a quick reconnaisance mission.
35.
Get the icons and put them on the opposing altars, e.g. the Torch of
Ethicality on the Swamp of Tolerance.
It is possible to substitute Frigidazzi's rose for the Rose of Enthusiasm,
and the abacus from the Temple of Order will work on the Dead Forest of Emotion.
You'll be given a magical book which allows you into the temple proper. The brass chest in the west wing contains a third infinity bow - take it, and anything else which looks good. Get the ice diamond and fire token and open the first set of doors.
36.
Go through the doors into the next room. Press the following
buttons:
- Both those at the top of the stairs on the west side
- The button in the Southern-most room on the first floor of the west side (using telekinesis)
- The button under the stairs (through the illusion) on the west side
- The button in the middle first-floor room on the east side (telekinesis)
- The button in the now-open room on the ground floor of the west side
Open the ice cube store in the west side using the fire-key and take two cubes. Take the ice-key and get two fire-cubes.
Dump the four cubes on the pedestal. Go through the teleporter if you like, but you'll just get kicked out again.
The remaining cubes make great staircases.
To progress, we need the Serpent Armour (which we don't have) so you'll have to kill yourself in a fire field (try the Fire Zone to the south). You reappear back in the real world.
The next time you use a Serpent Gate, the game will become
somewhat distressed and ask you to tell Origin where you are.
Ignore this and carry on.
37.
When you've finished, go back to Moonshade and find the Trial
Room.
Look into it from outside, and cast Telekinesis on the secret door in
the North wall.
Go around and into the room. Cast Fetch at get the key. Now open the gate, and go through the teleport with your followers.
When you arrive, you are accosted by an automaton who tells you that you are in the `Mountains Of Freedom', and seems to believe you are some kind of criminal. Vibrate this automaton for your cell key, and hightail it back to Moonshade. Make sure you get the Black Sword.
36.
Now. Find Frigidazzi and wait until midnight.
Go to her chamber,
and cast Serpent Bond. You are now a snake.
Wake up the magelady; your party will snigger and run away. Now, close your eyes because what's about to happen will give you nightmares.
Recommended Soundtracks:
- The Lamia/Silent Sorrow in Empty Boats by Genesis (The Lamb lies down on Broadway)
- Counting Out Time or Back in New York City/Hairless Heart by Genesis (The Lamb lies down on Broadway)
- The Castleford Ladies' Magic Circle by Jake Thackeray (The Very Best of Jake Thackeray)
Frigidazzi will begin frantically dancing naked for Beelzebub.
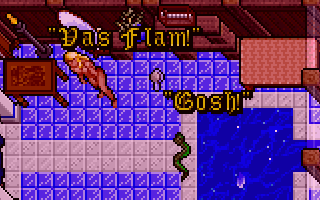
"Gosh!"
37.
Halfway through the perverse deed, your party sneaks back in
to watch.
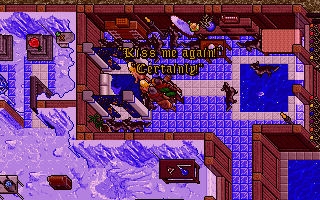
"Hehehe.. hehehe.. hehehe.. He said 'deed'!"
Filbercio arrives and is understandably horrified by the preternatural adultery now in progress.
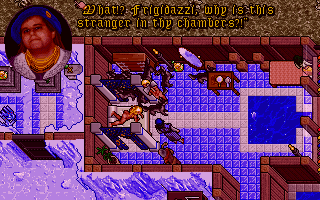
"And
where did all those wolves come from..?"
38.
A trial is hastily convened and the Avatar is summarily
condemned to rot in the inescapable Mountains of Freedom.
The Jury gasps. Cries of despair are heard from your followers, but there is no reprieve. Filbercio seizes control of your body, propelling you inexorably towards the teleporter which leads to your doom.
Helpless, you step onto the platform, and...
...nothing happens.
Go back to the trial room. Everyone seems to have gone a bit funny during the few seconds spent in the other room. Do not talk to Shamino until further notice, and take great care not to double-click on him by accident. If you talk to him, he will corner you with no chance of escape until he has pierced your ears and attached the Serpent Ear-rings to both lobes. What a nice guy.
Find a bucket and go down into Gustacio's basement. Place it on the altar to get some water of Tolerance. Put the bucket of water in your backpack(!).
If you want Gustacio's spells (delayed blast in particular)
this is your last chance to do his experiment and get them.
This is entirely optional.
39.
Now, that trial wasn't much good. I would go so far as to say we have
been cheated. Fortunately there is another possible venue.
Head off to Fawn and go in. When Ruggs appears, agree to take the
letter.
As soon as you cross the drawbridge, head to Alyssand's shop as fast
as possible. As the lute appears, dive into Alyssand's basement. From
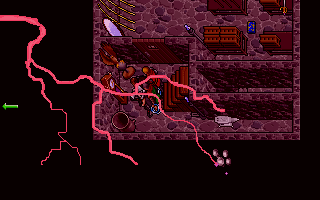
underground, the lightning flashes and all these people appear out of nowhere to
hear Iolo's Early Morning Singing-song.
40.
Find Ruggs and talk to him. Do the letter thing, then unlock
the jail so you can commit crime with impunity.
Talk to Delin and then
Alyssand about the ring and join her cause to overthrow the corrupt government
and replace it with a true communist state.
The Seneschal should follow you around. He'll go almost anywhere with you if you're patient - lead him on a merry chase over the vales and hills.
Suggested soundtrack: The Knife, Genesis (Trespass)
41.
When you get bored, or he panics and tries to escape, ask for an
Audience with Lady Yelinda and then accuse him of following you. Go back to Fawn
and talk to Garth. After you have spoken to enough people there should be an
attempt on your life.
Try to get the assassin to shoot some of the Fawn
residents by hiding behind them. When you get bored, smash him with Death Vortex
or mind-blast.
You should now get a summons to see Lady Yelinda.
Talk to her and get b*ll*cked.
42.
Go to the trial. Do what thou wilt. During recess, talk to Alyssand
again and get the key.
Now break into the Oracle 8.0 control centre and kill the guy you find there. Reboot the Oracle server and write an SQL query to make it say that Dupre is innocent and the trial is a sham.
It is tempting to set the Oracle to say that Dupre is guilty, but we are going to do something infinitely worse.
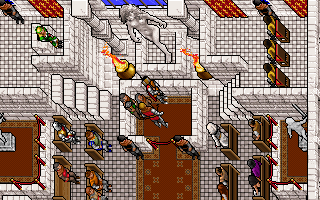
Some of you are going to die,
(martyrs of course) for the freedom that I shall provide!
43.
Leave Fawn via the Serpent Gate in the palace (there is a
brown key in the Northeast wing, and the door is in Yelinda's throne
room).
Beam off to Monitor, and then to Spinebreaker via the Cow Place south
of the 'Bull.
Head towards the extreme northeast of the map.
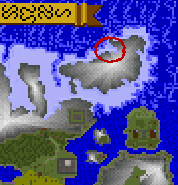
Head
here
44.
If you head immediately North from the Skullcrusher exit
cave, you should eventually find an illusiory mountain wall leading to
Silverpate's treasure. Stop off here to grab the blackrock serpent amongst the
loot.
Now, continue to the area marked above. There should be a single cave of mud which seems to go nowhere. Enter it and look for secret passages.
The correct cave has an illusiory wall leading to a chamber with lots of dead stuff. Head southeast. If you get accosted by the great white kitties, Mass Sleep can be very useful. Kill the gazers (or disarm them using vibrate) and open the door you come to (this will appear as a black strip that is labeled 'door') with the keyring.
This is the delivery entrance to the Shrine of Order.
Recommended soundtrack: 'As the Vortex illumines the crystalline walls of Kor-Avul-Thaa' by Bal Sagoth (Starfire Burning Upon The Ice-Veiled Throne Of Ultima-Thule)
45.
Head east and go to the Wall Of Lights chamber. Selina should appear.
As soon as the words 'TO ARMS!' appears, hit 'B' and cast Mass Death. They won't
stand a chance. Now take the scroll from her body and transcribe it.
If you engage Selina in regular combat, note that Selina WILL NOT DIE unless ALL the
cyclopes she creates have been killed. If one of them retreats into a corner and is
ignored, you can hack and slash away at her until the floor is red with blood to no avail.
Go past, and Thoxa should bring Dupre to you by some kind of Astral Travel.
Go forward carefully until your followers say 'We must hurry'.
Ask all your
followers to leave, but be careful of Shamino. As soon as you talk to him, he
gives you some ear-rings which allow you to hear the wisdom of the Great Balance
Serpent. We do not want to hear this drivel, so as soon as the conversation
ends, hit 'I' quickly and slam those ear-rings onto the ground as fast as
you can!
Now go forward to Batlin, and all hell breaks loose.
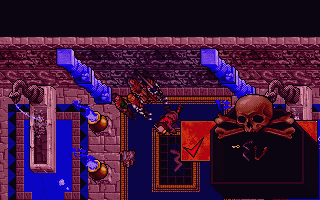
And beyond the Vortex, the churning black waters of the void did disgorge
the Dwellers-In-Eternal-Shadow.
And upon a horde of winged horrors,
brandishing swords of ebon flame, They rode out from the gate..
..and a
Terrible Silence fell upon Kor-Avul-Thaa.
46.
In spite of the Banes, your followers should still be
there. Get them back into the party, take Batlin's teeth (and the blackrock
serpent), and head to the encampment just outside Fawn.
Find a bed and sleep in it so one day has passed. Make sure it is afternoon. Now save, and head back to the trial.
47.
The people of Fawn are now in a 'Schrdinger's Cat'-like state, being
neither alive nor dead, but somewhere in between until they are observed.
In
practice this means that they are alive until you see them, at which point they
will suddenly drop stone dead before your eyes.
For this reason, you must take great care that you don't see anyone on the way to the trial, as the game will not be happy if it has to summon a corpse to the proceedings.
It is probably best to save before you enter Fawn, as mentioned above, and
reload if you see anyone croak on the way in.
If you can't make it work, look
for Yelinda in Gorlab Swamp; then skip to 50.
A good tactic seems to be to keep to the right of the map as much as
possible and follow the right edge of Fawn (i.e. anti-clockwise) until you
get near the temple.
This seems to keep you out of the way of critical people (Jorin, Alyssand)
and you should be able to get through the trial.
48.
The trial should now proceed as normal, unless a critical person has
been Observed, and thence fallen dead. Lady Yelinda presides, minus her skin,
although somehow this doesn't make any difference to her portrait. Once the
trial is concluded, she goes completely insane if you speak to her.
49.
I lied.. there is no 49.
50.
Give Yelinda the comb of beauty, then make your way carefully to the
Fawn Treasure chamber, then the Serpent Gate. You may notice that the game is
now spitting teeth: Jorin and company are not quite dead, and the game will be
interrupted by error messages as you move around the town.
In the Fawn treasure chamber, nick the Serpent Armour and anything else you fancy. (There is a fourth infinity bow.)
Now go back to Sunrise Isle again, via the Gate beneath the palace.
51.
Cross the bridge of fire once more.
Now we are going to wrestle
with the Great Serpent of Balance, and steal one of his Eyes.
Recommended soundtrack: 'And Lo, When The Imperium Marches Against Gul-Kothoth, Then Dark Sorceries Shall Enshroud The Citadel Of The Obsidian Crown' by Bal Sagoth (Starfire Burning.....)
Go up to the teleporter. Make sure the Staff, Crown and Armour are in your
backpack.. i.e. you are not wearing them.
There are a couple of other
'problems' as well; but without the ear-rings we won't know what they are. For
one, we don't have the blackrock Order serpent.
Go through to the altar. Red stuff will appear as the Great Serpent demonstrates his displeasure at the lack of Serpent Tat, by banishing you from his innermost sanctum.
Quickly, put the three Serpent Knick-Knacks (staff, crown, armour) on the altar. This may take more than one go, keep going back through the teleporter until all are in place.
As soon as this is done, some very interesting things take place. You may black out a couple of times, keep disappearing and you will likely see a lot of green magical fluff. The Great Earth Serpent is not a happy bunny.


"What art thou doing?!?"
52.
If all has gone well, you should have not one, but two sets of Serpent knick-knacks in your bag. Go through the teleporter
once more, and you may even find a third set of kit, plus the Eye.
Take the eye and all the kit. You will be teleported out. Now go back in, and
stand before the altar.
Clear the candles off the table, and place a suit of
Serpent Armour on it. As soon as the purple floss appears, press 'I' and place
another suit of armour on top (they will stack). Again, press 'I' quickly to
pause the game.
Now, place two Serpent Staves on the table. Place a crown on
the table and pause with 'I' once more.. you may need fast reflexes for this
one. Assuming you make it, place a second crown on the table and the ritual will
continue.
You will get teleported out again, and some of the stuff will disappear. You will end up by the doors, run though (this may not be necessary, but seems to help) and you should black out again. In the confusion you should find that another set of equipment has been created! Keep doing this to get as much kit as you want. It may amuse you to dress the entire party as Great Hierophants:
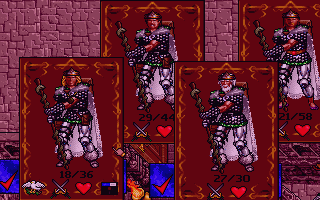
Now there's something else you don't see every day..
53.
Now go through the doors and cross the bridge. You should
get a personal call from Phil 'Order' Sulak, the lead programmer. Destroy the
Servants of Order with Mass Death. Say 'Hi' to the Balance Serpent, dump the Eye
and head back out.
On the pedestals nearby are scrolls containing some of the
game's most powerful spells. Transcribe any you haven't already picked up.
There's also a 5th infinity bow.
Pocket the Serpent Bond scroll (we will need
this later) and return to the foyer. There you must burn the Avatar as an
offering to the Gods.
54.
You will probably appear in the Icy Wastes of Hell. Find your bridge
to Vasculio's house and go back to the Serpent Gate nearby. On the way, use the
Flux Analyser on the Black Sword to perform a quick botch repair. Then throw the
Analyser away.
Via the gate, head to one of the Order temples, and find your way back into the Shrine of Order (via the back route). In the Wall of Lights chamber, find the Powder Room and take four kegs. Now head back to the nearest temple and beam yourself to the Northern Forest.
55.
In the forest, go south to the Castle of the White Dragon. Go inside
and open the double-door, then save.
First try the simple approach. Place one
keg of powder against the door, and cast Explode on the keg.
The combined
force should take down the door. If it doesn't, reload and try again. If it
still doesn't work, load back and try this instead:
Place a keg of powder by
the eastern door to the library. Cast Explode on the keg and this door
should give way. Pick up all the books you can find. Put one of the books in
front of the troublesome door, Save and read the exploding book, from a safe
distance.
Hopefully you should now be inside. Use the books (or a single keg and Explosion) to take down all the doors that stand between you and the Banes.
56.
By the hall of the Banes, go into the torture chamber first. There is
a healing fountain. Top yourself up.
Lead your followers around the edge of
the room to avoid the traps and then trigger the script that causes the banes to
attack. Lead them round to the door, and try to get it so that only one comes
round into your area. Kill it with the Black Sword and top yourself up with the
fountain. Save as necessary and kill them all one by one.
Note that when a Bane dies, the corresponding party member will also die and the two coalesce into a single corpse. When all three Banes are dead, use the hourglass. Dupre, Shamino and Iolo will spring back to life and join your party; when you talk to them they rave and gibber, but they seem quite content to follow you around.
57.
Find the nearest Serpent Gate and beam off to Monk Isle. Grab six
buckets and then go to the Temple of Logic.
Negotiate the ice-maze (ignoring
everything else) and go through the teleporter (the sequence is Red, Yellow,
Blue, Red, White). Start a translation service and spell the word BCOW on the
floor. For some reason the doors now spring open.
Now you must use your powers of logic and reasoning.
You are in a room with six automata.
Only one of them has the key that you need.
What is the least number of automata that you need to kill
to be certain of getting the key?
Get all the automata on screen and cast mass-death. Sift through the pieces
until you find the key.
Open the western door and ignore the poncy logic
puzzle; just cast Dispel Field.
Now pocket the key, take the waters of logic. Do not pour them on Iolo or
anyone else. Put the bucket in someone's backpack.
Now leave, and on your way
back, find and repair Automaton #7, who is somewhere in the maze. He'll tell you
that one of the other Automata must be stopped: we've certainly done that.
That's our good deed for the month done, so head back to the Gate.
58.
Go to the Temple of Ethicality.
Move the Ring of Shaal and your
spellbook to one of your followers, and then use the Serpent Bond scroll that
you took from Sunrise Isle. Now that you are a snake, meditate on the mat.
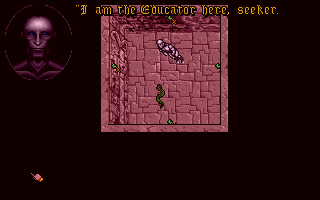
I am
the Educator here, seeker. We don't like your kind around here.
Answer the questions and you'll get let loose on the practical
test.
Hang around until you become human again and your followers arrive.
Attack the chest as a snake if you like, it's fun to watch.
Get your spellbook and ring back and enter the central chamber. Cast Mass Death to kill the man you're supposed to save, and use telekinesis to push the button. The Educator will congratulate you.
In the second test, just put all your gold (but not your followers' gold!) onto the pedestal. If you brought the chest from the first test with you, put that on the pedestal too for kicks. Press the button.
As soon as you arrive in the third test, press 'B' and consider your
options.
Mass Death is fun, and a stack of gunpowder doubly so, but you run
the risk of spending eternity in the test of Ethicality, as only Batlin can
release you.
Instead, send him to sleep and carry on as normal. It may help
if you have a Blooding Device to bleed yourself about 6 times.
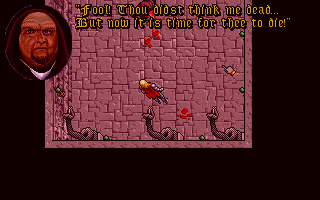
Fool!
Thou didst make me dead..
Once the test is completed, go upstairs to get some Water of Ethicality. Again, take care not to get any on you or your followers.
59.
For the Test of Discipline, we need to get drugged up. A good source
of potions is the mage in the Silver Seed: as she puts them down you can steal
them away without her screaming for your blood.
You can also cast Vibrate to
get a job lot of potions out of her. I got enough potions to build a large set
of steps in a quite short space of time. The present task, however will
naturally take longer, as we are only interested in yellow potions.
Obtain about 9 yellow potions by whatever means you see fit, and beam off to
the Temple of Discipline.
If possible, shut down the security system: there
is a user manual in the main study upstairs.
When you're ready, go down the central stairwell and go to the test of
discipline. If you have Boydon, the acid may cause him to explode, so get him to
leave temporarily.
Move in short but energetic bursts.. use the longest mouse
pointer to cover as much ground as you can with each step. But after each step,
check your health and take drugs as necessary.
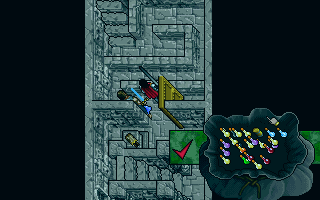
Only
users lose drugs..
At the foot of the stairs it is very nasty: try to avoid stepping there, as you can get onto the lowest step sideways which is probably easiest.
Get two buckets of discipline. Then save (just in case the game crashes) and go downstairs. Dissolve yourself and then make your way to the nearest Serpent Gate, probably Vasculio's.
60.
Beam off to the Temple of Tolerance and go in. Lower the drawbridge
and talk to Mortegro. If he leaves the temple, he will be annihilated by unknown
forces, but there is a simple way around this.
Ask Mortegro to join your party, and then, without leaving the temple, strip off all his clothes so he dies of exposure. Carry his body out of the temple and go to Hazard's place to get some Gwani fur, boots and other paraphenalia to keep the death-mage alive.
When you're ready to have him join, use the Hourglass and back he comes. Make sure that you do NOT go anywhere NEAR the Temple of Tolerance or he will be utterly destroyed.
Mortegro is a bit of a wimp, but he looks impressive, especially when given the Black Sword or something, and he has one overriding factor: in his backpack is the Death Bolt spell from Ultima 7! Drop his scythe and enter combat mode, so he wields this forbidden spell. Break off combat and transfer the spell to the Avatar. Pass the Axe of Killing or whatever your current weapon is to someone else. Give Mortegro the Belt of Strength and some magical armour so he has a fighting chance.
61.
Now go to the Temple of Emotion. Find the pillar in the middle of the
room and zap it with Death Bolt. Don't bother talking to the spirit. Grab the
orbs and get the water of Emotion.
62.
Find a Serpent Gate and go to the Temple of Enthusiasm. Enter the
doors and look at the maze. Notice there is a U-shaped piece of floor one storey
above your head. Double-right click on this and the Avatar will automatically
find his way there.
Go up the stairs and head southwest. Find the little
pulpit overlooking the Magic Lens, and double-click on the roof below to your
left. Once again, the Avatar should find the way all by himself. If not, try
breaking it down into smaller journeys.
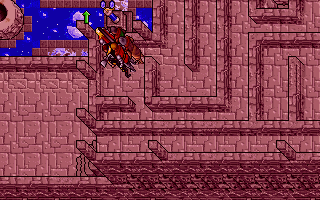
Go down the concealed stairway to your right and find the brass door. Go in and get the water. Also take the hammer of Dedification and give it to someone as their primary weapon.
Once again, let the Avatar take the strain as you cross back out of the maze, and make your way to the Serpent Gate.
64.
We should now have all the water necessary, so we must use it. Beam
off to Vasculio and grab the gwani horn. Then cross the bridge to the Gwani
territory. Find the Death Temple and resurrect Gwenno. Throw a bucket of water
over her (Discipline) and she should stop being crazy.
Unfortunately she is
in the wrong place, so un-resurrect her and carry the body to Monk Isle, where
she can be installed in the library.
At the monastry, talk to Gwenno again and pursue all conversation threads to find out about the Soul Trapping.
65.
Now go down to the Serpent Gate and beam off to Monitor or the Bull.
Find the Powder-Maker's house in the northeast, and talk to the False Chaos
Hierophant.
Go back to the nearest Gate and beam off to Moonshade. Use the Philanderer's Fiend on Fedabilio, and then talk to Torrissio. Give him the wand in exchange for the Soul Prism spell.
Talk to Ducio and get three Gems made.
Once you have done this, put the three on the ground and cast Make Soul Prism
on them all. Now water them with Emotion, Enthusiasm and Tolerance.
Put them
somewhere and pour the buckets of water over your followers head's (Logic for
Iolo, Discipline for Dupre, Ethicality for Shamino) and you should get sucked
back to Monk Isle, for the second coming of Xenka: Warrior Priestess!
66.
Talk to Xenka about sacrifice and she should tell you to kill
yourself. Obviously we don't want that, so we're going to sacrifice Dupre to
Baal instead.
Suggested soundtracks:
The coda from 'Shadow of the Hierophant' by
Steve Hackett (Voyage of the Acolyte), preferably at full volume.
'Saviour - Vocal mix' by VNV Nation (Burning Empires)
Get the tooth off Xenka as well, using the keyword 'instructions'.
Go to
Monitor, via the Gate. Just outside the gate, turn Dupre into chowder using the
Mind-Blast spell. Leave the body where it is.
Go into the Crematorium and Thoxa should create a copy of Dupre for you. Cast Telekinesis on the lever, and the Dupre will give some spiel before spontaneously combusting. Pick up the urn and go back into the crypts to Dupre's body. Have Thoxa resurrect the real Dupre and give the ashes of the fake to him.
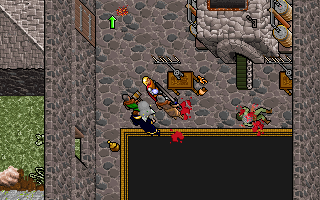
Dupre
undergoes spontaneous human combustion
67.
Now go to the Temple of Choss.. the Cow Place south of the
Bull is probably the quickest way. Once in the complex, keep going downstairs
until you can't anymore and then keep going upstairs until you find the brass
double-doors. Open them and find the ritual chamber that someone helpfully
designed in the off chance that Chaos ever got broken.
Put the prisms on the proper pedestals, and the Cuppa-Dupre on its pedestal.
Force the bent serpent stick into the hole and watch the fireworks.
Xenka
appears and gives you a sword, but there is something she forgot.. the Blackrock
Order Serpent!
The quickest way out is probably the suicide express. Find a monster, any
kind of foe will do.. and cast Mass Death. This should give you 2 health points
(it won't work at all without a foe onscreen). Cast mind-blast on yourself a
couple of times and die.
You should be resurrected in Moonshade, which is
just where we want.
68.
Find Stefano, and talk to him. He will ask you to rescue him from the
Death Knight. Agree, and the Knight will appear. Point and laugh as it kills
him. Then destroy it and take Stefano somewhere quiet so that Thoxa can
resurrect him via the hourglass.
Take the key he gives you and get the serpent stick from the shed in the
western part of the island.
Then go back to the Serpent Gate, and beam off to
the Isle of Crypts using Xenka's teeth.
69.
At the Isle of Crypts, just go in and get the Eye. Don't bother with
the Great Balance Heffalump.
Now, beam back to Sunrise Isle one final time.
Go straight through all the doors and up to the Balance Serpent.
Recommended soundtrack: 'Battle Magic (The Song of the War-Wolves of Caylen-Tor)' by Bal Sagoth (Battle Magic)
Okay, now shove the Eyes on the altar, stick the serpent sticks in their respective holes, and the Serpent should begin to sway drunkenly, unless you are using Exult in which case it will probably have been swaying drunkenly anyway.
Summon a whole pack of wolves using the Claw and Urn.
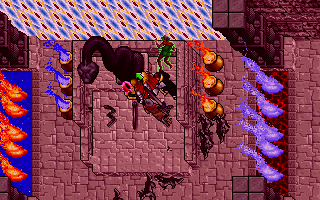
Now there's something you see
every day..
Wield the Serpent Sword that Xenka gave you and 'do' the Balance Serpent. Cue telecine, roll credits, end.
The Cutting-Room Floor
Chickens
Cast vibrate on chickens. The meat and bones will be sucked out through
the beak. Not a pleasant thought. The chicken however takes no notice and
goes about its business. Put the chicken's interior in your food bag.
This also works quite well on cows. The five legs dribble incontinently out of
the body as it wanders around.
...use Create Automaton to give youself a new follower, preferably Rotoluncia's
servant who tried to kill you. Today we're going for the evil biker look so
dress him in leather and the Helm of Courage.
City of Chaos
You should now be in the City of Chaos.
Find and kill Vasculio and dump enough posessions to carry 3 crates
which you should find to the south.
Root around for the keys and go NE. Leave the area and go out into the NE
plains.
Find the City Of Order and enter. Kill the batlin-automaton and nick it's
key. Nick the keys from the other dead automatons.
Go E using telekinesis and findthe secret passage to the N.
Go around, South and then W to get out.
Find the secret door in the NE and go through. Now you are in the City
properly.
The library complex is in the middle, we need to get in.
Build a staircase out of crates and bales of wool. You will need to go
back to the entrance where the Batlin-Automaton was and go E, find 3
more crates and you should be able to finish the structure.
Jump down the stairs and find the Automaton. Tell it you're the hierophant
and take the staff. Put the staff on the green pedestal upstairs, and you'll
be in the actual library. Read a few books and find the keys.
Leave the library complex and find the exit to the SE. Go through and answer
the riddle, Structure of Order.
If you have Midnight Mushrumps by Gryphon and you are very clever,
it is possible to sync Batlin's death with The Ploughboy's Dream so
the Guardian's voice replaces that of Satan.
E.g.
The thunder roared from underground, the Earth it seemed to gape
Blue
flames broke forth and in those flames appeared an awful shape
"SEE HOW I
REWARD THOSE WHO FAIL ME!" ..with a voice so clear and deep,
And quivering
like an aspen leaf I woke out of my sleep..
The Dream Realm
This is going to involve some very strange stuff, so we need to prepare.Beam off to Moonshade, and acquire one each of the following reagents.
Yes, I know we have the Ring of Shaal, just do it anyway.
You will need to get: Blood Moss, Black Pearl, Garlic, Spidersilk, Worm Heart and Serpent Scale.
Now get 15 loaves of bread or whatever and go to Gorlab swamp. Give your
spellbook, the Ring of Power, and the 15 bits of ladder to your followers.
But make sure the Avatar is carrying the reagents.
Turn into a snake
Now, go to the mad bloke's castle in the southwest.
Build a staircase of
the fifteen loaves you brought and go down the battlement stairs.
This is the part of the Dream Ream where you are most likely to be killed, so use extreme caution.
Find the mad bloke and cast Vibrate on him. Take the key.
Open the door
and find the other key. Then go fetch the crystal.
If you keep getting killed by the mad mage, don't bother..
We don't really need to do that part.
Silver Seed immortality
From: Joseph P Morris <JPMREMOVE@IT-HE.ORG>
Subject: Silver Seed vulnerability warning
Newsgroups: rec.games.computer.ultima.dragons
Organization: IT-HE Software
IT-HE labs has recently discovered a severe vulnerability with the
Silver Seed. This may lead to malicious local Avatars becoming
trans-mortal and gaining root privilege for the entire system.
We are currently working with Ophidian Inc to try and implement a
fix for this problem, in the meantime it is recommended as a
workaround, that you prevent local Avatars from entering the
Silver Seed by confiscating the Amulet of Balance.
To see if you are vulnerable to this issue, try the following steps:
1. Enter the Silver Seed as a normal user.
2. Kill Suthos the Healer.
3. Engage in combat with Isstanar. Your Avatar should die.
4. You will probably find that your Avatar, having been resurrected
in an abnormal fashion has become trans-mortal and can not die.
Under normal circumstances this is only a nuisance problem, since
the trans-mortality only takes place within the chroot jail and
the user will lose this privilege once they log out of the Silver Seed.
However, when combined with another exploit, it becomes possible for
the user to escape the Silver Seed and thus gain root privilege for
the entire system:
5. Enter Isstanar's chamber and double-click on any one of the grey
pillars. If your Avatar has not yet left Moonshade, it should appear
in the Test of Purity.
6. On completing the Test of Purity, regardless of the outcome
the Avatar will have exited the Silver Seed abnormally and their
enhanced priveleges have not been rescinded. An Avatar in this state
has permenant trans-mortality and superuser access to the entire game.
