Karl Jan Clinckspoor's Walkthrough - Formatting by Ganesh (Bootstrike.Com)
Welcome to my walkthrough of Ultima VII: The Black Gate (+ Forge of Virtue)
To get where you want, search it. To get to a part, type in the search “0.1” for example to go to the presentation.
Index
0.1 Presentation
0.2 Introduction
0.3 Ultima for dummies
0.4 Storyline (does not include either Underworlds, World of Ultima or any game further than Ultima VII)
1.0 Process of walkthrough
1.1 General explanations about the game (controls, etc)
1.2 Beginning
1.3 Trinsic
1.4 Paws
1.5 Britain
1.6 Cove
1.7 Minoc
1.8 Jhelom
1.9 Vesper
2.0 Isle of Fire
2.0.1 Test of Truth
2.0.2 Test of Love
2.0.3 Test of Courage
2.1 Vesper II
2.2 Moonglow
2.3 Terfin
2.4 Spektran
2.5 Moonglow again - Yew and Empath Abbey
2.6 New Magincia
2.7 Skara Brae
2.8 New Magincia, again?
2.9 Yew and Time Lord
3.0 Equipping and Serpent's Hold
3.1 Shopping spree
3.2 The Sphere generator.
3.3 The Tetrahedron generator
3.4 Sphere again
3.5 The cube generator and Ambrosia
3.6 Buccaneer's Den
3.7 Isle of the Avatar
3.8 Appendix
3.8.1 Tables
3.8.2 Cheats and other illegal stuff
3.8.3 Funny things to do
3.9 Final words
0.1 Presentation
You must wonder why someone would write a walkthrough. There are many reasons. Some are those who pursue knowledge and experience on writing things. Walkthroughs must be really well-written, for they tell you what to do. I have seen many walkthroughs, and many aren't good. They didn't even tell the most important parts.
For me, I wrote this walkthrough only because I finished the last Ultima games, and thought they were incredible. I wanted to contribute to the world of Ultima, knowing that its last, non online game was published 6 years ago. Also, I must apologize, my English is very poor. I'm not native American, English or whatever. This may be long, but is only like this because it can be read as a story. Many things that are not too important for your quest were added here. I took a large effort to hide the future in my walkthrough. Only at the end, many questions are answered, but not necessarily about this game.
0.2 Introduction
In the introduction scene, you can a red face talking to you, saying she will dominate Britannia. Making even you, the Avatar, kneel. You see your orb of the moons glowing and a map of Britannia. Going outside, on your circle of stones, a red moongate is already there. You enter it and arrive at... 1.3
0.3 Ultima for dummies
You have bought (or downloaded) Ultima VII, The Black Gate. But, what is Ultima? Well, many years ago, a guy called Richard Garriott studied programming and wrote his own game, Akalabeth - World of Doom! This is really the beginning of the Ultima series, being called by many the Ultima 0.
After some time, Ultima I was developed, with some enhancements. They didn't know Ultima would become a series, so there's not so much information about well, things.
Then, Ultima II, III were launched. They only had some enhanced graphics and a better storyline.
Ultima IV was when the Stranger from Another Land became known as the Avatar. The word "Avatar" is very old. It comes from the Sanskrit, meaning something like "The Savior" or "The Incarnation of a deity". I don't have the exact meaning of it, but it is something related to the goodness itself.
0.4 Storyline
Sorry if this storyline isn't long and with lots of details, but I did my best.
Ultima I - In a distant world, known as Sosaria, a wicked mage known as Mondain was aspiring for power. He killed his father to get his gem that made him immortal. With the power of this gem, Mondain spread terror throughout the land. The Stranger from Another Land was summoned by Lord British to get rid of Mondain and his evil army. His skull was sent to its doom. And his gem, shattered. This unlocked many powers and shaped the land.
Ultima II - Revenge of the Enchantress - Mondain's lover Minax (who I think was only 14) felt a great pain for having lost her lover and used her magical powers which were even greater compared of his and ravaged the world for the second time. Again, the Stranger from Another land was summoned to get rid of her, traveling through time and space. Finally, she was vanquished and the Stranger went back to his home. This time was the first recorded use of moongates. The land was again shaped.
Ultima III - Exodus - The offspring of Mondain and Minax was a beast, being not a machine, nor a human, only called Exodus. It had such a power that could summon an even greater army. The person who would be known as the Avatar needed help from a mysterious being called the Time Lord to confront Exodus. When the Avatar finished dealing with Exodus, the land was shaped for the third time.
Ultima IV - Quest of the Avatar
Lord British was looking for someone to become the champion of virtues. This champion should master all the virtues Lord British ratificated and be what the people needed, a template, example to what they should become. To prove someone to be the Avatar, this person had to Travel to the Depths of the Stygian Abyss, in the Isle of The Avatar (this isle became apparent at that time) and get the Codex of Ultimate Wisdom.
Ultima V - Warriors of Destiny
Removing the Codex from its lair chained frightful events. The gargoyles became furious and the three Shadowlords rose from the shards of the black gem of Mondain. These beings got Lord British and chained him in a dungeon. Believing LB was dead, Lord Blackthorn became regent and his good nature, corrupted by the Shadowlords. Very rapidly, he commanded the land with iron fists and declared Martial Law. The Avatar was summoned by his companions to rescue LB from his dungeon on the underworld. As soon as this happened, many things changed and a great destruction came to the underworld. The gargoyles, who lived for many years there, came to the surface because they had no more space to live.
Ultima VI - In the book of prophecy, from the gargoyles, it was written that the Avatar was the False Prophet. The Gargoyles made a Moongate trap and the Avatar was nearly assassinated by his enemies. A great challenge came to him. Struggling to face this great challenge, The Avatar discovered the Codex was actually property of the gargoyles and they wanted it back. He met Lord Draxinusom, the supreme leader of the gargoyles and made peace. The Avatar put the Codex into the Ethereal Void and made two lenses. One concave and the other convex, giving them to LB and Lord Draxinusom. Thus was how the problems were solved.
Ultima VII - Now.
1.0 Process of this walkthrough
You may notice this walkthrough is different from many others. Here, each character has much of what he says written here. This adds some information to the one who is reading, also, for further reference if the player forgets something, he can go back and see what a specific character said at a specific time. As the game goes on, I will let the player freer to explore. It can seem pretty early that just in Britain I'll leave the player alone to explore the city, it is better to do it here than do it later, in the wilderness. If you follow this walkthrough step-by-step, you shouldn't have many problems.
I must add, when I say "turn left" you should turn to the Avatar's left side. If I say "to the left" it means "west", the same to "to the right". The directions are simple. North is up, South is down, East is right and West is left. If I say some coordinates like 169S 27E, I'm referring to the sextant position. To know where you are, just double-click on a sextant when you can see the sky. You must have a sextant to see your position in the map.
All what I write like "go east, west, north, east, south" when you are following a road or in a city, I want you to turn that side when you can, when there are crossroads. If there are on crossroads, I'm just making you comfortable to know you are going in the right direction.
When I say "go east, enter the stone house on your right" I want to say "go east from where you are and when you see a building made of stone and a door, enter that house that is in the right corner of the screen because there is something you should see there!""
1.1 General explanations about the game
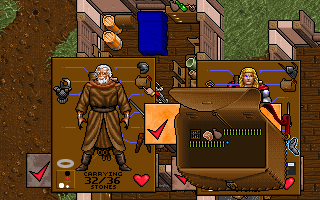
The first time I played The Black Gate, I felt a bit lost. After having mastered the mouse controls and keyboard shortcuts, the game flowed smoothly and didn't cause frustration with endless clicks just to change combat mode. You should use a mouse when playing The Black Gate, for using the keyboard to control is a bit tiring and wastes time. First of all, learn this hotkey, I. The I (it is i, not L). This hotkey opens the Avatar image with some armor/weapon slots and icons. You can see those blue lines going out from the Avatar? They are slots where you can put armor/weapons. The right hand of the character (supposing he is right-handed) is on the portraits right side, what should be his/her left hand.
1.3 Trinsic.
As soon as you finish your travel through the red moongate, you'll see Iolo, your old companion talking to Petre, a peasant. Iolo will recognize you and will say 200 years have passed since your last visit. Petre will remember Iolo why he was there, taking his momentaneous happiness away. A murder had happened, and the task to investigate it is now yours. IF you have FOV, the earth will shake and Iolo will tell you something is not right and you must consult Lord British (LB).
From now on, the story will be told in the present.
Finnigan rushes to you side, saying he must talk to you. Iolo tells him you are the Avatar but Finnigan, who never saw the Avatar, suspects if you really are. Finally, he accepts it. Now, answer you will search the stables and you had not yet investigated them. Walk north, just a bit, 3 or 4 steps and enter the stables. A terrible murder has happened! The body is mangled, with candles on each hand and toe. There's a bucket of blood on a side and a golden key near the hip. Get it. Now, going a bit north again, enter a small room with a dead gargoyle, Inamo. You can get his bag, but it is not needed.
(Time to sort your items.) I would say it's better to leave all the gold and torches with Iolo. Important quest items should be with you. It is better if you get a bag and place the keys which you don't know where they belong to. In another bag, this time with another character, keep the keys you know where they belong to. Drop your bottles and cups, breads and such on the ground.)
Exit the stables south and go a bit west, entering the fellowship hall. There, talk to the branch leader, Klog and Ellen, his wife. You'll discover an organization called the fellowship had been created and its leader, Batlin, has been kind of a spiritual father when you weren't on Britannia. Klog and Ellen tell you that they were at their home all night. Also, you'll discover that Christopher is the name of the victim and he got into a petty argument, and assaulted the fellowship member verbally, threatening to leave the fellowship. This is pretty suspicious and Klog says his companions, Elizabeth and Abraham had gone to Britain.
You have a clue! But that is not sufficient. Go a bit south, following the street and enter the house. Get what you want and then, up and turn west. Keep going, past some trees and you'll see the healer. Enter and get the yellow, blue and red potions. Talk to the guard, Gilberto, and discover he was knocked out in the night of the murder. When he woke up, the Crown Jewel, a ship, had already departed. Exit the healers and go north.
Enter the shop. This is the weapon store. If you want, you can buy some supplies or get them directly from the ground. There's a lever near a wooden shield. Move it and use the lever, so a secret door will be revealed. Inside it's the shop's deposit. Get what you want and go east. In a building, there's a trainer, Markus, that will increase your combat skill for 20gp. Go north from its entrance and then, west. Enter Spark's house. Spark is a fellow and is 14 years old. Talk to him and discover that Spark was Christopher’s son. His mother died when he was a child and actually, he dreamt that his father was going to die.
He says that when he finished dreaming, he woke up very hectic and saw that his father was not sleeping, nor in his house. He went to the stables and saw a man with a hook and a wingless gargoyle running to the docks. Accept him to join on your party, for he will become very strong.
On the second floor, use the golden key you found in the chest and get the Medallion, the scroll and the money. Ask Spark about those items. He suggests you to speak with Klog. Go to the fellowship hall, following the road east, south, past the trainer, south, south and turn east near the town hall. Talk to Klog and he will say he does not know anything about your items. Now go to the town hall and speak with Finnigan. From the entrance of the Fellowship hall, go north, west, and south. There's a pedestal and two fountain on its entrance.
Talk to Finnigan and ask about the murder. Say you want to do your report. Answer:
Blacksmith; key; chest; all of them; yes; hook; Crown Jewel.
The mayor will be pleased with your report and will ask if you want to know the password. Say yes and answer the questions correctly. Their answers are here:
Question Answer
What is the latitude of the northernmost point of the island Spektran? 120
What is the latitude of the northernmost point of the island Spektran? 60
What longitude runs through the center of the island Terfin? 120
What latitude runs through the center of Dagger Isle? 0
What latitude runs through the center of Skara Brae? 30
What latitude runs through the center of the Deep Forest? 60
What latitude runs through the center of Buccaneers Den? 60
What longitude runs through the center of Skara Brae? 60
Ok, now exit the town. You should go to the east gate, for there's some loot there. As soon as you get out, go to the docks and explore the ship's hold. In it, you should get the flounder, for it fills you well, but not as much as meat, but it's in great quantity.
Go north, following the outer wall of Trinsic until you find a dirt path with wheel marks on it (some lines). Keep following it. You should find a theater in the middle of nowhere. You should ignore it, because there is no good information and you must pay to see it. Iolo will complain about you having paid the theater. Now, keep following the path and you'll find something that looks like a green lake. It's Paws swamp and to cross it, keep to the middle of the road, because if you touch the green of the lake, you may very well get poisoned.
Now, arrive at Paws.
1.4 Paws
You can jump this part, going directly to Britain, but its better, because there's a good quantity of money here (concentrated) and if you do subquests, you'll win experience points.
As soon as you arrive at Paws, you should see a sign written paws, obviously. Go east and enter the Salty Dog, the pub/inn of Paws. There, you can find Beverlea, who runs the House of Items. This shop is usually open on the afternoons.
Talk to Polly, the barkeeper. She doesn't have much information. Only the same thing again, "someone stole venom from the merchant!"
Go out the inn and a bit north, until you find a building to the west. This is the slaughterhouse. It may also be identified only by looking the only house in Paws that has some cows and sheep near it. In it, talk to Morfin. Don't say you're the Avatar, he'll insult you. Keep asking him what comes to your mind and offer to look for the culprit of the crime. Meat here is also very cheap (Mutton).
By the way, the crime that happened was that someone stole venom from Morfin, who runs the slaughterhouse. Silver Serpent venom is known that, when in a small dose, it can enhance you strength, quickness and stamina, and a sensation of euphoria. The effect can wear off some time, making its user to feel he's out of energy, causing the user to want more venom. With time, this can deteriorate the skin, making it rot away. In big doses, the venom can kill.
Look carefully and you'll find a key under a bucket full of blood. Get it.
Go out of the slaughterhouse (I always think there's no name better than that one) and go north, following the path, until you find the House of Items. It is near the left margin of the road. There, you can buy items for a really good price. You should get the hourglass, it will be used in the future. As I said before, this house is open for business in the afternoons.
Go a bit north and you should see a man without legs and one with crutches. Talk to them. Their names are Fenn and Komor. They ran farms with Merrick. Merrick abandoned them to join the fellowship, only because he saw the opportunity to sleep on cozy beds and have good meals.
They hate the fellowship. They ask this question. If you are here to help, why do you let us starve because we didn't want to join? Well, they don't starve. Camille sends her son, Tobias, in a while to give them food. They think that there are worse jobs than begging for money. For example, being a fellowship member and trying to convince people to join.
They hate Garritt, son of Ferridwyn and Brita (the branch leaders), for he just ignores them, thinking they are inferior. Fenn and Komor suspect that the Fellowship is acting too nice and it's not a good signal.
Ok, now, a bit north of the beggars, there's a house. Morfin's house. You can notice that on the upper side of the vase, there's something strange. It's a key. Get it. Nothing more too interesting here.
Now, go west, from the entrance of Morfin's house. There's a house near a river, on the right its right side. It's the mill. It's run by Thurson. Talk to him and discover he has a crush on Polly, the barkeeper. Rush to the inn and say that to Polly, discover she thought Thurson was too much for her. Go back to the miller and say what Polly said. Nice, Thurson will court her. Also, Thurson does not like the Fellowship. He just doesn’t like them. Does not have any clues about the theft.
Cross the river, through the bridge or through the swallow area (near the mill). Go s bit south and enter the house. In it, you will probably find Andrew. He hasn't anything to say much important about the theft. Camille, the mother of Tobias, follows the principles of the Eight Virtues, so many in town don't feel much comfortable for her.
Go north and enter the Fellowship shelter. It's big with a door in the middle of the east wall. In it, talk to Merrick, who wears red clothes. He will tell a story about Komor, Fenn and he. Fenn (I think) was a son of rich parents, and lived pretty well, but when they (Fenn, Komor and Merrick) lost their farm, they all got poor. They lived for many years on the streets begging for money, until one day Merrick joined the Fellowship only to have shelter. He will too, say that it was Tobias who stole it.
Now, talk to Brita. Nothing too much important. Except that Alina, who also lives in the shelter, is married to a thief.
Talk to Alina, and discover her husband was locked up for stealing apples from the Royal Orchard, but he was there only to buy some fruits. It was the fellowship who accused Weston (the husband) from stealing and now she has a serious doubt. In some days, if she does not join the Fellowship, probably they will ask her to leave. If she joins the fellowship, she will fell she is betraying her husband. If she does not join and is asked to leave, she'll starve. Alina does not have anywhere to go.
Talk to Ferridwyn and discover really, nothing important. He'll say his son, Garrit, is really talented with the panpipes and will grow better.
(Notice that the only locked chest has some panpipes near it)
If you find Garrit in the shelter, talk to him. Else, go outside and try to find him playing in the flowers. He will say that the poor have weak characters and don't want to work, that's why they are poor. Also, he'll tell you Camille and Tobias are stupid, because they don't join the Fellowship.
Now, go north a bit and enter the house on the left. In it, if you find Tobias and her mother, talk to them. If not, go outside in the field and try to find them. Camille will automatically see you are the Avatar and Tobias will suspect you are not. If you tell him you are, he'll tell you're lying. If you say you're not the Avatar, he'll say he always knew it. Discover that Tobias thinks Garrit is a cretin and hates the Fellowship.
Go out, what now? You've already talked to everybody and do not even have a clue who might be the thief. Go south and enter the Shelter again. Ferridwyn will rush and say his son just say Tobias with some venom. Go north and now, it's Camille who will rush in your direction. She'll tell you the venom was planted there. Talk to Tobias and he'll say he's innocent and it was Garritt who planted.
Now, go to the slaughterhouse and talk to Morfin. He is going to say he saw Garritt acting strange lately. One time being agitated and the other being slow and seemingly sad. Morfin gives you a green key, saying Garritt dropped it one day when he was playing somewhere near.
Now, life was made easier. Go back to the shelter and open the only locked chest with the green key. There, open the bag and find it, the Venom! In a small flask, by the way. All venom is like this. Get it and talk to Ferridwyn, telling him the case was solved and the thief found. Ferridwyn will be sorry and say he will punish his son. Go talk to Garritt and say you found him out. He'll admit and ask you not to tell his parents (you did this already). Say you will, and he'll tell you have a weak character for not being able to understand why he did that.
Finally, go to the slaughterhouse and talk to Morfin. Return the Silver Serpent venom. Now, using the keys you found on his house and under the bucket, open the door and the chest with their keys (White and "Brown"). You'll find some gold bars, which can be traded for money in the Mint of Britain. They are worth 100 Gold for each bar. I think they look better being bars, so I don't normally trade them.
Subquest done!
1.5 Britain
I must say, that writing what all the people of Britain have to say is tiring and useless in a way. The characters will have their description, but when you need it. All the directions in Britain, when I say "north, west" I mean is when the road branched that way. Ok, first of all, from Paws, go north, from the west side of the river. Cross some field with wheat and soon you'll arrive at Britain. Turn east and then north. This road I like to call the merchants road. Obviously, I call it because most of the merchants are located here. There's a jeweler, to whom you can sell gems, a shipwright, where you can buy and ask information about ships, two shoppes that sell weapons. One sells melee weapons and armour. The other, Iolo's Bows, sells, well, bows, crossbows, arrows, bolts, triple crossbows, etc.
Keep going north, until you arrive at a pub. It has a mug with ale in a highly informative piece of wood hanging on the wall. Enter it and probably, you'll find Shamino. He's wearing a green shirt and some black/brown trousers. Ask him to join your party and get your pocketwatch you forgot last time. He finally is on his forties and has a love with Amber, who is an actress in the Royal Theatre
Now, go out the pub, but by the door on the north. Right above it there's the museum. Enter it. You can talk to Candice, who is a Fellowship member. She is the curator of the museum and will say a new section was opened with things of the Avatar. Also, she will tell, but try to pretend she does not, that she has something with the mayor, Patterson. Also, Iolo will say he dislikes stealing, but those virtue stones might be useful to you. Since it was he who proposed this, well, steal the virtue stones (the colored stones, near some bones, a harpsichord and a musket). These stones are very useful, or will be. With them you can travel through Britannia very fast, by casting a 4th circle spell "Mark" on them, marking the position where you are, and then, casting another 4th circle spell "Recall" to go to where you marked it. Keep track of your stones, and their destinations, on a little book. Be organized! (For more information, read at the beginning some unspoiled tips and how magic works)
Continuing, exit the museum and go a bit west. In a crossroad where you can see a big female statue, turn north and keep going. Iolo say they are playing a play about you. Simply, you can ignore this comment or walk in and see Shamino's love, Amber. North, north until you arrive at a place between the southwestern tip of a river (or moat) and some children playing. From here, cross the playing area, going a bit west and turn left, going south.
Keep going south until you find the first stone building to your left. Enter it, going around a bit. Here you will find another old companion, Sentri. He is very useful. Ask him to join your group. He is a master swordsman and can train your dexterity for free. There's an interesting bug here. Sentri is using a 2-handed sword, but when he joins, the space left for the shield is opened, so put the spiked shield on it (or the kite shield). In his sleeping room, get a long key from his drawers and open the locked room with an iron door. Get that beautiful plate armour. Be fair, equip Sentri with it, because he owns it.
Go back to the playing area, going north from sentri's house. From here, go east, cross a river (moat) and find a drawbridge. Enter. This is LB castle. Talk to the first person you see, Chuckles, the jester/trickster. Play the game with him. This game consists on, I can't tell, discover for yourself. The answers are here.
1. I know the Game
2. Of what do we speak?
3. a joke / thou
4. food
5. Where is Blue Boar?
6. Clue
7. Hi, Chuck
8. too much
9. Yes, I do.
10. (first answer)
11. Smile
If you finish correctly, he will give you a clue. Read the scroll and discover his -clue-. You should visit Margareta in Minoc, to have your fortune told.
Nice, now, explore Castle British. You can go straight and talk to Lord British, but I'll list some of the humans or not humans in the castle.
Talk to Wislem, a Gargoyle. Discover the gargoyles have emigrated to an isle called Terfin and most people do not like the gargoyles, for they are ignorant (my opinion).
Talk to Nystul, the mage. He is mad. He can sell you some spells and reagents, but his products are too expensive. Wait for some time.
Talk to Miranda, who should be in a room east from the fountain (Ah, I forgot, this fountain heals you when you want). Talk to Miranda and say you're going to travel to Cove and can get the signature of Lord Heather. It seems that something or someone is getting rid of waste illegally on the Lock Lake.
Talk to Inwislocklem. He is a gargoyle, extremely intelligent, per se, and says he is one of the two gargoyles in the great council. He is one of the survivors from the cataclysms of the War of the false prophet and the collapse of the underworld. He wants a better life for all the gargoyles in Britannia, for many are disrespected.
Finally, talk to LB. If you have the Forge of Virtue, these lines will appear. Ask him about the rumble when you arrived at Trinsic. He will tell that the Isle of Fire, the lair of the hellspawn Exodus, rose up from the depths of the sea. Lord British set 3 Great shrines in the Castle of Fire, each one dedicated to the Principles of Love, Truth and Courage. You must use an amulet to use the shrines, and you will be tested before being able to get these talismans. If you want to visit it, you can go by LB's ship, the golden Ankh, which is docket in Vesper. Be careful, though, that the remains of Exodus still reside on the Castle!
If you don't have the FOV, an equal conversation will happen, except for the part of Isle of Fire, Exodus, etc. The land is nice, but the people not. He says the Fellowship is good and believed they can bring something better to the people. Also, it wasn't LB who sent the Red moongate to fetch you, who could it be? There have been some problems with magic and with moongates, lately. Rudyom, a mage from Cove, is also mad, and the intelligent monarch sees there might be a connection between Nystul, Rudyom and magic. Rudyom is working with a substance called "blackrock", discovered recently and that mineral can solve the problems with magic.
Some murders have happened of late. According to LB, the victim was mutilated in a ritualistic fashion and there might be a serial killer at loose. LB, again, will send you to get rid of this problem. Adding to this incredible large conversation, LB says there is some equipment stored for you in his storeroom. You can get it when you want. The key to the storeroom is in the study.
Now, talk to Geoffrey. He hasn't anything of much importance to say, except that he has been busy, being the captain of the guard and LB personal bodyguard.
This thing now, is interesting. Go to chuckles room, in the southwestern part of the castle, and enter his room. There, use a mallet on the parrot and get the coordinated of a treasure. They are 169South, 28 East. If you wonder how to get these measured, try using a sextant when you are outside the castle.
Find the study. It is a small room with some animal heads hanging on the walls. Get the Ankh-shaped key on the nightstand and go to LB room. It is just west from the throne room. In it, go to the room with a big painting on the wall. Near the table, use the lever to reveal the secret doors, opening them. You can easily notice secret doors because, if you pay attention, you will see that right in their middle, there are some stones which are darker (or what is around them).
Keep going round the castle, opening the secret doors. When you find a barrel beside a crate on the east side of the castle, move the barrel and discover a secret lever. Use it. Now, when you find some stairs, go up and then, to the east side of the castle. Here, go northeast and find a secret room the lever under the barrel revealed. Get these armour and now, go west (really, go south, and then west), so you can go directly to Weston. Talk to the man locked up and discover he is the husband from Alina. He admits he stole some apples from the royal orchards.
Figg, the caretaker of the orchards, put an exorbitant price on them. Weston knows Figg gives apples for free to the Fellowship and thought that was unfair. He stole some apples and got caught. Mr. Guard will always make harsh accusations towards Weston. You can simply ignore them all. Tell Weston you will talk to Lb about that.
Go north and use the key you got from the study in the iron door. There, be sure to get your spellbook, the bag with reagents and the bedroll. These items are extremely important to your quest. Go now and talk to LB. Tell him Weston's case and he will be freed.
Now, your quest in Britain is, for now, half solved. Go to the drawbridge in the entrance of the Castle and follow the road east until the road ends on dirt or grass. Go back a bit and turn right, south and then west. You can see a solid building with a locked metal door. This, my friend, is the Royal Mint. There is plenty of money in here and it all can be stoles, but you're the Avatar and you can't steal it! It is not so hard, you'll see.
Continue south, after one house on the east, go west and there'll be a stone building. Enter on the left side of it (go round to the south and a bit west, there's a door on the "left" side of the house. Keep going through the rooms, always maintaining yourself on the left side and talk to the Mayor.
The Mayor is called Patterson. He claims he is extremely honest. Mr. Pat won the election in an overwhelming victory, got 84% of the votes. He says his opponent, Brownie, couldn't win, since he hadn't enough money to promote himself and hadn't enough support, even from the peasantry (Pat claims there's no class system in Britannia, it has been abolished). Apart from being the mayor, he is also the President of the Britannian Tax Council. If you've already talked to Candice, he'll say she is just a 'brother' from the Fellowship, while talking this, he seems to be very nervous. You tell him what happened (the murder) and he'll say another murder like that happened some time ago. The body was mutilated in a ritualistic way. The man murdered was called Finster. He was against the Fellowship and wanted more power for some of the government areas (which I don't recall).
Mr. Mayor is also a Fellowship member (you should have noticed that already) and likes very much it. His honesty is great, his leadership is unchallengeable and the love for his wife is irreproachable. And, his wife is called Judith and runs the Music Hall as a teacher.
Now, since you should be mature enough (or I'm not in the mood of writing so much) you can explore the biggest town in Britannia. Be careful, though, to not get lost! I'll list here some of the characters you can find. If you don't find anyone in the city, you should visit the Blue Boar (inn and pub) for many people can be there eating.
Mack. He is a farmer and people call him a lunatic. He sees constantly creatures from space and once, one of this creatures appeared on his fields. Inside it's ship glowing red hot spaceship, there as a big, ugly tigerlion/liontiger. And Mack has a proof, go and see it on his fields (don't go now).
Clint, the shipwright. Nothing much important about him. Sells sextants and ships with high prices. The Crown Jewel didn't come to Britain in a big deal of time. Well, how strange...
Cynthia, the Mint teller (what a strange job name). She exchanges your gold bars and nuggets for gold coins. If I recall right, a bar is worth 100 gold coins and a nugget, 10. If you are wondering, gold nuggets are easy to find and gold bars are not. The system is the following, says Cynthia. They get you gold and use it to do/make/forge more gold, very simple. Also, everyone who wishes to make money must sign in a paper (she'll give you one) and pay taxes. The taxes are to maintain the roads, provide fresh water to the people, equip the guards correctly, some other things and the most important of all, maintaining the estates of rich people (also called public estates). Corrupt system, don't you think?
Brownie, the farmer. Remember him? Patterson told he won the elections with 84% of the votes. Pat got all the Fellowship votes, and they are many. Brownie doesn't like the FS. If you are not with them, you're against them! He says. Brownie, being much move virtuous than Patterson, had a secret about him, but since he didn't want to win so bad, he didn't tell the secret. And the secret is, well, Brownie says we should follow Pat after the meeting. Changing the subject, you can work for Mr. Brown. Just get the pumpkins on the north side of his field and bring them back to him. 1 gold piece for each pumpkin.
Millie. She is just nothing, just a FS member. Her work is to recruit, err, convince people to join the FS. She wants to go to the Meditation Retreat, located at the southern part of Britannia, for meditating of course and trying to hear the 'inner voice' (you head it some times, didn't you?)
Neno, the musician. The most humble musician I've ever seen, thinking he is the best bard and all. He plays at the Blue Boar on the evening, with the 'The Avatars'.
Gaye, the clothier. She is just a clothier and a FS member.
Raymundo, the director of the Royal theatre and sometimes a playwright. Tell him you want a part on his play and tell him you've already played on parts. For some reason, you're going to play the Avatar, strange... Go get you Avatar costume (if it is really needed) with Gaye.
Figg, the Royal Orchards caretaker. Mr. F says he knows people a lot and considers himself intelligent enough to judge people from what they say (which he says they mean exactly what they say). He arrested Weston when he was trying to steal some apples from the Royal Orchards. MR. F is also a FS member (remember Alina in Paws, saying it was the fellowship who locked up her husband?). If you accuse him of giving free apples to the FS, of course he'll deny anything (and for you to know, he sells apples for 5 gold coins EACH. Mutton can cost 3 gold coins!).
Judith, the music teacher of the Music Hall. She loves to teach and play her instruments and has a pupil, Neno. She is not happy with her husband, Patterson, saying he comes back every night very late. This deserves some investigations, no?
Kessler, the apothecary. From times to times, people get very stupid and begin to ingest dangerous things for fun. This time, people are ingesting Silver Serpent venom and some diseases like skin deterioration by consuming venom are beginning to get dangerous. Since magic is dying, Potions were created! You can buy some with him. Many are useful, but I prefer the blue potions since they cost only 15G and do a devastating effect on people (see the potions chart below)
After so much exploring, you can rest a bit and wait until its 9 o'clock night for the FS meeting. The FS hall is just west from the museum. You can talk to Batlin and discover something from him.
Batlin, FS 'master'. Ask him where Elizabeth and Abraham have gone, and discover they've gone to Minoc to do something about FS funds. Once, Batlin was a druid, very nice. I don't need to describe all the teachings of the Fellowship, the Triad of Inner Strength and so... If Batlin asks you whether you want to join, say yes and answer some questions. No matter what you answer, he will say you're the exact type the FS was searching for. He will ask you to deliver a sealed package to Elynor in Minoc unopened. Accept and take the package.
When it's 9 o'clock, many people will begin to arrive at the FS Hall. You can't talk to them, since they won't answer anything. When everybody is seated, Batlin will begin the ceremony. You can talk to him, but he won't direct to yourself directly. He'll explain the Triad of Inner Strength, ask what the FS changed on their lives. Finally, when it's 12a.m., the gathering will arrive at an end. Now, if you have talked to Candice, Judith and Patterson, you can do the following.
The game has a bug that after this meeting has finished, you can just talk to Patterson (the man in blue robes) and it seems he will be on the same bedroom as Candice. You and Iolo will give him a scold for not being loyal. Pat will say he's sorry and stop to do what he has been doing. Or else, you can just follow Patterson until he arrives at Candice's house with her.
For now, your job in Britain is done! To make things easier, I'll begin to give the directions from the entrance of the castle. Go east, south, east. Don't enter this field and go south, you should see a house. This is Brownie's house, where you can deliver his pumpkins. Now, near his house on the south, you should see a road (the same type of road you followed from Trinsic to Paws) and cross the river. Keep following the path and when you see some fields to the north, enter them.
There are Mack's fields. Search a bit and discover the ship Mack was talking about, what a great surprise! Exit the fields and go south a bit. You should see Mack's house. Enter it and say you've seen the proof (say that if he is inside, of course). Mack will tell you the story of how it happened. Many nights, Mack keeps staring at the sky and from times to times, he sees some things flying. When one of these fell on the ground, that liontiger got out and seemed to try to kill Mack, but as soon as he/she/it got nearer, Mack's hoe seems to have killed it (or what I've interpretated). Now, he tells his story of how he got that hoe.
One day he asked a mage, Mumb, to enchant his hoe. At the same time, a warrior asked the mage to enchant his sword, making it the "Sword of Death". The illness that has been affecting the mages recently (which you have already seen) confused the mage and, well, Mumb created the Hoe of Destruction and a sword that was good at cutting weeds. But now, his hoe is lost, for he lost his key when he was fishing near Lock Lake.
Boy, a truly powerful magical artifact in the beginning of the game, the designers were friendly! I must admit, I never found the key to Mack's shed. But let's continue.
Go a bit north and follow the path east. Keep going, past a bridge, until you find some insects and a very filthy lake. You can search if you find a fish with a key inside, but I never found one. If you want to open his shed, you need to get all the way back to Britain, buy or steal a Powder Keg from the provisioner (which it seems I forgot to instruct, since he doesn't sell anything of much use) and SAVE! Put the powder keg right in front of the shed's door and double-click it. It should blow the door away, if not, reload the game and put the keg a bit to the right or to the left. It can be tricky in the beginning, but you'll see, it's not so hard.
Continuing, from Lock Lake, go south along the path and cross the first bridge on the east.
1.6 Cove - The City of Passion and Love!
As you cross the bridge, you can see a building to the north, this is the pub 'The Emerald'. Enter it and talk to Zinaida. Nothing much interesting about her, except that she sells mutton for a really low price, 3 Gold each mutton.
Next talk to De Maria, the Bard. He is wearing a purple shirt. Since De Maria has already sung many songs about you, he recognizes you directly. Ask him to tell a tale about the people of Cove. The story is about Ariana. She lives a long time ago and her duty was to preserve the Shrine of Compassion. Her son, Mikhail, became the mayor of Cove. His child, Magda, built the Lovers' walk for the new made couples to enjoy having fallen in love. Then, Nadia, Magda's daughter married a not-so-wealthy Julius, who left her and her child alone. Nadia's child came earlier as expected and she was worried her child could die. Everything went right and her baby girl was born. Later, they discovered Julius was killed in Yew by an unknown beast. Suffering, Nadia went to the Shrine of Compassion and with a dagger in her hand, she killed herself, leaving Nastassia on her own, having to be grown up an orphan child.
What a sad story. Anyway, go out and cross the same bridge you crossed a time ago. Now, go south along the path. This is the shrine of compassion! In the pedestal on the middle there's a gold ring, remember its color! Now, talk to Nastassia, who should be somewhere near. As you see her, your heart grips by seeing such a beautiful woman so sad. Ask her what you have to ask and discover many people aren't taking care of the shrines and many are in poor shape. Also, she wants to know something about Julius. Asking if you are going to Yew, say yes and accept to bring her some information. Suddenly, she kisses you. Now you two are in love!
Back to the entrance of The Emerald, follow the path east, then south. Enter this house and talk to Lord Heather. If he is not there, go out and follow the path south, then enter the building on the west. This is the healer and you may see Lord Heather here, along with Jaana.
What Lord Heather has to say is that he is the Town Mayor. Ask him to sign the bill Miranda gave you, and he will be happy no see someone is moving a finger to help the putrid stench of the Lock Lake. He thinks the Britannian Mining Company is the responsible for this smell. And, since Cove is the town of Passion, everybody that goes there is in love. Jaana and he are in love, Zinaida and De Maria are in love, Rayburt and Pamela are in love (and now you and Nastassia are in love!)
Talk to Jaana, one old companion. She misses the old life of exploring with the Avatar. Ask her to join, since she can heal your party for free. (Discover that, strangely, she has a hawk in her bag. What could that possibly mean?)
Continuing, follow the path a bit south, then east. Enter the next house, or better, inn. Pamela, the innkeeper, runs the Out'n'Inn. She says Rayburt (the person she is in love with) is so serious, intense and handsome. She likes his dog, Regal, too. One room for one person costs 8G for a night.
Now, go north, east of the Lord Heater's house. Keep going through the way and enter the house east, discovering there's nothing really useful. You can get the sleeping powder if you want. Now, going north, past I door to the left, enter the house to the north with two 'light sources' on the door. Inside, there's Rudyom, a mage you met in Ultima VI.
Talk to him and he is also mad. He is happy to sell spells and reagents for you. Since he has been doing some experiments with blackrock, ask him what this is. He has forgotten much and can't tell you. Asking about moongates, discover he thinks blackrock is the solution. And his flying carpet (should be very useful) was lost by some adventurers somewhere in the Serpent's Spine, in the vicinity of the lost river. Rudyom also has a wand, or better, transmuter that magnetizes blackrock and tries to transmute it magically, but it does not work. You can take that piece of rubbish if you want.
---Buy time!---
Now, if you want some very useful and basic spells and you are with low money, you should buy 2nd circle spell Destroy Trap (that comes really at hand in the future) and telekinesis (2nd circle). Next, for the 4th circle, buy Mark, Recall and Seance (remember someone saying about Mark and Recall spells?)
---Buy time!---
Now, in the big room, with some chunks of blackrock on the ground, there's a black book. It's Rudyom's notebook. Read it and acquire some knowledge of blackrock. Blackrock is completely indestructible by physical means. It can be found under earth in small quantities sometimes near iron and lead sources. It can not be melt and shaped by heat. Rudyom discovered that electrical energy and magnetic energy have a profound impact on blackrock. Combining it, it may become permeable, just like someone being able to put his hand through it! It can work as a teleportation device, but only if the magic, electrical and magnetic energies and an alignment of heavenly bodies are right, but still needs to be tested (the theory). Rudyom created a wand that should send electrical and magnetic rays to it, but it simply caused blackrock to explode.
Interesting, no? And what a cool name to this black rock, blackrock. Now, make sure YOU GET RUDYOM'S WAND! It is a crucial item and it would be nice to explode a huge quantity of BR, but leave at least 4 pieces of it here.
Now, leave Mr. R's house from the northern entrance. Go a bit west and then, enter a house. There, talk to Rayburt and he will introduce his dog, Regal, as well. Regal is a very intelligent dog that knows the meditative way of life. He and Pamela are the same person. Rayburt is a trainer, sorry, and he is specialized in meditation. The battle is done in the mind before the blows. If you win the internal battle, the exterior battle can be won easily.
Leave Mr. Dog and go a bit west. Between the two houses, in a field of flowers, go north, through this field. You should see a border of Lock Lake. Behind a house, you should find a dead fox and within it, a dead mouse and within it, a ring of regeneration! This ring, when worn, increases the regeneration rate of that character. But, after having healed a quantity of hit point, it vanishes.
Keep following the lake border and then, follow the mountain border. You should enter in a stone corridor, between two sides of mountain. Going north, you should find a Cyclops patrolling an area. Feel free to kill him, just change to the combat mode (by typing C in the keyboard) or opening you inventory and clicking on the 'pigeon' (can't get a better name to it). If you have given the armour to your characters in a fair way, you shouldn't have many problems dealing with Cyclops. I recommend you to not put Jaana on the front. Give her a sling or any missile weapons and tell her to stay away from the monsters. This can be done by clicking on the icon below the 'pigeon', with some red arrows and black and white dots. If any of your characters has the Hoe of Destruction, there will be almost no problem.
Enter the cave and turn east. Keep going and open the door. Go south through the corridor and kill another Cyclops. Pick or bash the chest open and get the food. Go back and instead of entering this door, go north past a cauldron (there can be a Cyclops here too) and perhaps there will be a Cyclops lair. I didn't have much trouble dealing with 3 Cyclops at once, but you should always save before facing any enemy (except it is too weak, like rats or bats). You will find nothing of useful or expensive in their laid. Go south and keep following the path. At a time, you should see some white things on the ground. These are caltrops and will hurt if you step on them. You can simply move them and more interesting, they can be piled, but only their brightness will become different. If you keep going south, you will eventually find an exit. No need to go out now, for many other treasures lie ahead.
Continuing our way south, the major monsters in the beginning are corpsers and some giant rats. Later on, there is a Cyclops. When you find a place you can go west or south, go south first. Keep going and battle another Cyclops. There's a glass item (does not have a big value). Go back and now, west. In your way, there will be 2 skeletons (not undead) and another Cyclops. Keep going until you find a way south and west (again) and from here, go south. There will be another one-eyed creature. But, this time, he guards treasure. Open the crates and barrels to find a green key, food and MAGIC LEGGINGS! Sure it was a good idea to go here, don't you agree? The flaming oil can be thrown as an explosive, but I never needed it. Go back where you went south and go west. Best another, you know what, and use the green key on the chest. Here, find a Lightning wand and a regeneration ring! Isn't this super? Go back to where you could have got out. (you may fight another...). Finally, go out of this dark cave and see the light again (if it's day to you)...
1.7 Minoc - will that ever stop?
Go east until you find a river (very close). Keep going north, always following the river. Near its source, there might be a headless, no need to worry about it. Now, follow the other river until you find some trees packed. (As if in a forest). Go north, not following the river anymore, but straight north through the woods. You can find a reaper (dangerous). With patience, you will find a road of dirt, without wheel marks. From this road, go west until you find a main road with wheel marks. From here, keep going north (can find another headless). Enter the first building you see, with red bricks and two signs (Britannian Mining Company ; Minoc branch). In it, there will be a chest, but it's locked! No matter how hard you try, it won't open. Go to the second room, to the north, and there will be a desk. Ger the blue strange key from it and open the chest on the previous room. Surprise surprise, LOADS of SS venom! You can get them, since you will make a huge profit out from it (it can be stealing, but this venom is used by people and has terrible effects. Selling it to Kessler will only bring the cure to this venom faster).
Go north from the B mining company and soon enough you will find some gypsies and their wagon. Remember that Chuckles have you a clue and in it, he said you should seek Margareta to have your future told. Well, go talk to Margareta. She'll be seated near a crystal ball. (Since she and others are gypsies, their W will be changed to V and other minor changes).
About your future:
Margareta says there is a woman in love with you in Cove, near a shrine. You know it's Nastassia (so don't forget to bring news!). A new evil threatens Britannia. It is he/she/it who's messed with ether, the substance that controls magic, and soon, he will gain more power with an event. You should ask a man in Moonglow for more information, since he has a powerful artifact that can tell you more about it. The Man with a Hook is not your true adversary, but finding him will prove to be necessary to accomplish your quest.
You should ask for an audience with the Time Lord. He is in trouble, but Margareta can't tell you what it is. He knows this new evil and to talk to him, you should go to Yew and seek the wisps. The Monks in Empath Abbey may tell you more about communicating with the wisps.
Margareta is exhausted and should rest for a moment. Now, talk to the gypsy man, probably he is on the left side of Marg. In his face you can see extreme sorrow. His name is Sasha and is a recent member of the Fellowship. He has been doing some business to the Fellowship, but is already back. His parents, Frederico and Tania, have been murdered in Minoc sawmill (in the same fashion you saw in Trinsic). Marg and Jergi, the leader, didn't like Sasha joining the Fellowship, but his love for them is the same love they have for him. No one deserves to have their parents murdered...
Now, talk to Jergi, the only other gypsy man. He will tell you he is the King of the Gypsies. Marg, his wife, is very wise. The gypsies have been dying out and have no more places to go. They were plagued with hatred since the days of Ancient Sosaria. Everyone always said they were thieves and worse, but what they only wanted was to live in peace, play music and dance. About the plot, he has to say that Frederico was his only brother and Tania, the most beautiful woman he ever saw. He and his brother fought for her love, but Jergi game up and his heart, broken. Later, he found Marg and finally, his emotional wound was healed. Frederico and Tania's only child, Sasha, has joined the Fellowship and he will have to decide whether to stay with his people or follow the Fellowship.
Continuing your way, turn west. You should see 2 fighters. Talk to the woman in green first. Her name is Karenna (have you noticed many books he wrote until now in your journeys?). She won't answer what her job is, since an awful murder has happened.
Jakher, the fighter, will open himself. He works with Karenna as a trainer of the fighting arts. He is dedicated to strength and strategy. Minoc was once the city of trade, but is now the city of gossip and envy. The latest scandal was the plan to build a big statue honoring Owen, the shipwright. Owen built three ships so far, and all them sank. The brother of Karl was killed in one of these shipwrecks. Owen, obviously depressed with these unfortunate events, started to drink heavily and entered the Fellowship. Karenna is a bit short-sighted with tactics (although Jakher finds her attractive). She thinks there are 3 solutions to all. 1. Hit them harder. 2. Hit them faster. 3. Hit them more. They were forced to live in the same roof for one training ground was burnt by a lightning bolt. Karenna is also a good friend of the gypsies.
Now, talk to Karenna again. She'll say both victims were good people and once, Frederico threw a rock at the FS hall window, and she was amazed by that.
Continuing, go west, across the bridge. You will see 3 people right away. Talk to the woman first. Her name is Julia, an old companion of the Avatar. In the last years, she had become a tinker, but she would gladly join you. She does not have the patience to be tinker for all her life. If you have Spark on your group, she says that young lad is cute and well-mannered. Minoc was once a safe and quiet place, well not so quiet since the commotion caused by Owen's monument. The Fellowship wanted to build a statue of Owen, since he's a success of the Fellowship philosophy. This would upset the local economy and drive the Artist's Guild out. Frederico and Tania were murdered in the sawmill (almost everyone will say that).
Talk to other man, I hope it's the one I chose. His name is Seara and is a Member of the Artist's Guild, making clocks. The other members are Xanthia and Gladstone. Xanthia makes elaborate candelabras and Gladstone is a glassblower and sculptor, and is in charge of most of the business affairs. Seara thinks Owen is a fool and his monument will represent the hurtful bad feelings. About the murder, he tells Frederico and Tania was looking for his son that ran to join the FS.
Talk to the other man, Gladstone. He makes mostly bottles and bowls in the Artist's Guild. He has nothing to sell at the moment, but some of his productions are in display. He says they were secretly marks as enemies of the Fellowship for refusing Elynor's invitation to join. Now, the Fellowship wants to build that monument, but they don't have much political power. The Britannian Tax Council taxes them heavily that paying these taxes is a challenge everytime. The Artist's Guild thought that by boycotting this monument, they would desist, but that did not happen. With that monument, all will come and want a ship built by 'famous' Owen and with more demands, Owen will buy more from the sawmill and slowly will drive the Artist's Guild to bankruptcy. (This looks somewhat like an evil plan of the FS local branch, no?)
Now, go west and talk to Elynor, the woman with a Fellowship staff. She is the head counselor of the FS branch. 'Minoc will be seen as the city where magnificent ships are built' (I don't think so...). Owen was deeply depressed for having 3 of his ships sank that he almost gave up his profession, but by the teachings of the Fellowship, he became this 'wonderful' shipwright that is today. Remember about that package, Batlin has sent a word you would be coming to deliver it. Give it to her now and say you have never opened it (or else, she'll become very mad). Asking about the murder, Elynor is not surprised that they were killed in that way. Frederico and Tania were antagonistic people. Both treated the FS members as diseased people. Asking about the Crown Jewel or someone with a Hook, she will answer she knows nothing. You should ask Owen about the Crown Jewel. Not forgetting, Elizabeth and Abraham just went to Paws to visit the shelter there.
Be quick and talk to the man in red. He is Gregor (the guy you stole the venom) is a FS member. He is in charge of the Brit. Mining Company - Minoc Branch (and this company produces many materials to keep Brit. going). Minoc is a place of social changes. About some establishments, the Checquered Cork is an inn, very famous with a rustic atmosphere. The Artist's Guild is only a small collection of people gathered to sell their trinkets. Gregor organized with Mayor Burnside the monument to Owen using his finest ore. He has more to say, but it exactly the same thing other said.
Now, talk to the man in blue, he will recognize you immediately. He is Burnside the Mayor, another Fellowship member. Gold runs through Minoc and where money goes, Minoc goes too. About the monument, he says people from all over Britannia will come to see the unveiling of this great statue. About the murders, he says the murderers are out of town and possibly far away now. This man has a secret. He thinks the FS philosophy is dubious at best and the members are chiefly fools and emotional weaklings.
Talk to the other man, William. He is another member of the Fellowship and runs the sawmill, taking logs from the logger in Yew and transforming them in planks here. He found the bodies this morning, when he went to open his business. FS teachings made it possible to him to resists becoming mad at the sight. The murder should have happened in the night, but he heard nothing! About Owen, well, he says the monument will be built in the bow of a ship.
Finally, after gathering so much information, enter the crime scene. Well, these two are much like the one in Trinsic, don't you think? Notice the serpentine dagger (take it as a proof) and the candelabra. Remember ever seeing this kind of candelabra?
For now, your job here is done (not in Minoc). Follow the path and before crossing the river, go south, through a minor way. Continue and you will arrive at the Minoc Mine, once the crypt of Covetous. Enter and, since this a mine, I can think there might be lots of serpent venom here. And there are lots of serpent venom! Search the crates and get all venom you can. Then, talk to the man, probably sitting in a chair or mining a bit. He is Mikos (seems to be a FS member, for the medallion). He is the Foreman of Minoc mine. He does not like the citizens of Minoc, since he thinks they argue too much, he is safe in his mine. Confirming, he will tell this mine was once Covetous. At this time, many miners are out, waiting for the machines to get fixed. There are two men fixing the machines and one gargoyle, Fodus, who is mining to maintain semblance of usual operations. The names of these two men are Owings and Malloy.
Go a bit west, when you find many lead chunks on the ground and a door. Enter that room and check the crates, etc. More serpent venom. If you continue, there will be only two conversations and 3 vials SS venom. Unfortunately, we didn't buy Unlock Magic from Nystul, so we will have to wait a bit until go north. From here, go south and talk to the gargoyle. He has the skin disease caused by consuming too much SS venom. He mines iron, lead and the secret ore... (Before talking he hallucinates thinking Mikos is there, punishing him) blackrock. The lode of blackrock is hidden somewhere in this mine.
Keep going south until you arrive at a door, and then, west, past a door, south. Walk a bit and inside a bag somewhat hidden by a table, there will be some other venom. Talk to the man you first see (not the one in red, to make things clearer). He is Owings and his job is to dig, but he can't find Malloy, so his current job is to look for Malloy.
Again, a bit south and talk to the man in red. He is Malloy and points Owing, saying he works with him (and surprisingly, Owings will agree, as if nothing happened with his conversation). Both work as engineers and are working for a special project for the Britannian Mining Company. A funny man dressed like the Avatar (Malloy remembers his name was Sullivan) came across them one day and sold a special map for almost 100g to them. They went and discovered the area the map was talking about was a property, and from the Brit. Mining company. The managers decided to take them to the court in Yew, but Mallow and Owings said it would be better if they worked to the Brit. Mining Company. So the company agreed and gave them this job. It is consisted of building a tunnel to New Magincia. It needs to be a secret, so the company couldn't 'bring more equipment' to them, so they wouldn't look suspicious. But these two would need some equipment, so they have sponges. Malloy checks a scroll (see it is VERY long) and it says they will finish this tunnel in, 173 years, so they should work faster. The only beings I recall having lived so long in Britannia were LB, the companions, some other important characters. There is a couple of mining machines that give lead and iron ore, but they aren't very thrilling. Go back to the entrance of the mine and, get out.
I guess the blackrock reserve was to the north, in the magically locked door... Follow the path and cross the stream through the bridge. Go east, then north, following the road w/ wheel marks, going until you can see a building to the north and a path that leads there. Go and this is the Artist's Guild. It some pretty things, but now, I have a test. Go to the center of it and at the table to the left, there are 3 rings. Tell me, which one is made of gold? To get the answer, read this line.
The one which is on the southern tip of the table, on the left side with a 'yellow' look.
Go to the southern part of the Artist's Guild and in the room on the right, there are many candelabras. Enter that room and talk to Xanthia (remember someone saying her worked here?). The success of the mine brought prosperity to Minoc, and this is not a place for murders to happen. She didn't know Frederico nor Tania but met Sasha once, when he was a guest at the Guild. Also, she thinks things can get worse in the Artist's Guild (and she thinks exactly what Gladstone thinks, informing he should tell you what they are). Ask her about candelabras and discover they were hired by the FS to make candelabras for all the FS halls throughout Britannia, and Elynor never asked her to join. Inform her you saw the kind of candelabra the FS uses in the murder site and, well, you should talk to Elynor immediately!
Go to the western side of the guild and before going out, check the room up. There are many crates and such. Open these and you'll find 1 poison dagger, cloth, wooden shields, pickaxes, ore, 2 gold and in a barrel, in a bag, 100 gold, 1 gold bar, 2 lockets, 35 starbursts (in the dead rat or something).
Now, go out and a bit west, you should see immediately the FS hall. Enter and talk to Elynor. Tell her you saw the Fellowship candelabra. She'll explain the is a "U" - Unity; and "T" - Trust; and W - worthiness. She explode saying someone should be trying to implicate with the FS. Also says Fred and Tania could have been murdered by her own people, because the gypsies would kill only to get a bit of gold. Only to add a bit of curiosity to you, check the drawers in Elynor's room. You should see a crystal ball and, looking at it, there is Lord British's castle...
Let us explore a bit more this city (now really, we'll check another mine). Go north and enter the house. You can smash that chest, but I think nothing interesting is there. Go north and check the path east (it's not connected and is small). Go north and you'll find a mine. There is nothing really interesting in it, you can explore on your own, to get some experience. The only thing you'll find is some food, experience concerning about the one used to improved your qualities and experience concerning identifying invisible walls.
Ok, now, exploring Minoc a little bit, let's check the east side of the city. From the entrance of the northern mine, go south through the small path and enter the bigger road. Go east and the next house north is the Town Hall, nothing interesting here, except Mr. Mayor is normally here and south, it's the northern entrance of the Artist's Guild. Go all east and enter the brick building. This is where Karenna and Jakher live. They train almost all the time and beware if anyone is shooting arrows to not get wounded (it may be hard, but is happened to me :)) You can get some weapons if you want, of course if you know how to get them without anyone noticing. If you want something rare, get the custom sword. It is equal to the normal sword, except it's prettier, I think.
Go south, east, then north (only a bit to find it's entrance) and enter on a building made out of dark wood. This is Julia's house. You can get some potions, (like the yellow and blue ones) since she is your companion I think there is no problem. Now, go south, west, south, west through the wheel path, past an inn (notice by the candle drawn in a wooden board hanging on the wall next to the door), go south, then east, enter that house. This is, well, Owen's house. If he isn't here (for me he isn't) how did I knew it was his? Just look at the thousands of books on the shelves. Now, go south and enter the house with a well beside it (both made of stone). This is the blacksmith and its owner, Zorn, is very good at his trade. You can watch him doing something and later get what he drops and check those cool serpentine swords in the crate.
Zorn has nothing much to talk about, but it's very interesting to see what he says, since it seems he has an incredible honesty. The recent commotions that took place in Minoc where caused because people tend to handle the others people's lifes and having their lives handled by others. Owen has a high opinion about himself and his monument will be 40 feet tall and it will be something good, since the pigeons will have a place to sit.
Go south and enter in the building with an anchor hanging on the wall. This is where Owen works! There are many things that you can get here. For instance, get the thousands of flounders or the gold sextant, or even better, 100 gold coins? It's your choice.
Talk to Owen. He, introducing himself as the greatest shipwright of all times (no modesty). He says he began to hear a voice inside his head, but couldn't tell anybody because this was to be considered insanity. But, the Fellowship came and taught what that voice is, it is the voice of reason and made him advance in his craft. He considers the Fellowship divine, since they taught him lessons when he thought his soul sunk where light could not enter. About out main quest, he saw a man with a hook wandering at night and the Crown Jewel left in recently and was scheduled to go to Paws.
Go to the Chequered Cork (now no directions, matey!) and talk to Rutherford, the barkeep. He truly has a strange name... Asking about the murders, you'll be considered innocent, because no one would keep running the town asking about the murders if the person was the murderer. Rutherford has some very interesting information that are critical to our quest. He knew Hook, knowing he lives in Buccaneer's Den and once he got into a fight with Hook and lost an arm and an eye. The Crown Jewel was in the night of the murder and left just after the murder was committed, maybe there's a connection? As if you didn't know the answer. The murder sound like Hook's handiwork, since he is cruel like nothing I've ever seen. About Owen, the monument will be taller than a man in horseback and Owen is on top, gazing through a telescope.
Now, it's time to leave Minoc! Before doing this, you should mark the blue virtue stone somewhere in Minoc (it may not be the correct stone, but it'll work). Go south from the shipwright, then east following the sea until you see some mountain with an entrance. Enter then go east, past some coins, north, east, notice skeletons, search the crates to get a magic gorget. Now, the other treasure is well hidden. You can see a big campfire, but without fire? There'll be an unburnt log, named debris, move it and under there's going to be a ring of protection.
Go out and follow the mountain range, first northeast, then southeast. You may notice this is going to lead to the Minoc Mine entrance, so you can go a bit east and will soon find that river and that bridge near the sawmill. Follow the path after the bridge, then the road. Go south for a long time, always following the road, then, when the road divides, ignore and go south again. A mountain will be seen and then, go southeast/south following it, then enter a cave. If you don't remember where this cave leads, the hit your head forty times with a matchstick and see if it lits.
Inside, from the entrance, go north and past those nasty caltrops, go west, south, past a narrow corridor and finally go out. Go south, find a path, then go west, south in the road of the trainer, west through a bridge, north, (we should ignore Nastassia for now, since we don't have any information), west, through another bridge, west to the road, past the Britain moongate, west past some fields, past a river, we are in Britain again! You can go to LB castle and get yourself healed by his fountain or by himself (buy Unlock Magic from Nystul too). But, now, what I really want to do in Britain is something completely different of what you're thinking. We aren't going to Paws immediately. We are going to... you'll discover. One clue! Rudyom mentioned it.
From the entrance of LB's castle, go west, then all the way north. There will be some fields to the left. A bit south there's a way between two of those, go through it. Then, going west, go north following the mountain range. Keep going and a time, two ranges will get very close to each other. After this narrow path, follow the range that goes west. You'll go west, and then the range will turn south, but don't give up. At a time, a river is going to be seen. You are very close now. Follow the river south and between it and the range, there's a small way of dirt and following it, to east, there's going to be the entrance to dungeon Despise and the magic carpet! If you found my instructions pitiful, then you can search on another walkthrough or email me.
To use the carpet, double-click it and the Avatar will always seat on a specific chair. The others may seat on any chair they like. What's best of the carpet is that it does not have a limit for burden, theorically talking. You can fill this with barrels to store what you don't need anymore. A good place to find barrels is in Minoc, in the Chequered Cork, but it's not necessary now. And, since this carpet flies, it can go through mountain ranges, sea and anything you can think on. Now, when I say 'fly to the west, I mean the arrow that indicates where you're going must be completely straight to the left.
Fly southeast until you find Britain, then go south until you find the FS shelter of Paws. Talk to Feridwyn and ask about where Elizabeth and Abraham have gone. Those two went to Jhelom, since there's no FS branch there and they want to spread the philosophy to others. Go back to your carpet and go southwest. After some time, there's going to be some small islands and find one that has a hut. Land there (it is possible, only hard) and enter the house. Get the strange yellow key and the reagents. This key is the best lockpick you can ever get. Never breaks and unlocks on the first trial (you know that chests that have their own key can't be lockpicked). A tip to land the carpet is to move the carpet to the west until the Avatar's seat looks to be under the top of the tree. See screenshot.

Now go southwest to Jhelom and land your carpet near 134South 35West, so my life will be easier.
1.8 Jhelom
Follow the way west (the road may change its direction), then north and enter a stone building. Talk to the mayor. His name is Joseph and he knows the whereabouts of Elizabeth and Abraham, or at least, has some information. They were just there trying to open a branch. There's going to be a meeting to decide whether it's going to open one. The mayor itself thinks its total foolishness. About Jhelom, the main sport is dueling and people wage who is going to win. There's also the Library of Scars where people are trained by the master De Snel. Nothing more here. Go out and enter the house to the west.
Talk to the fighter, namely De Snel. He operates the fighting school, which we already know. He teaches his students to be ruthless and fierce with his special way of fighting, which subdues his opponents. They have even some special weaponry, swords and daggers with the snake pattern. Show the dagger you found on the murder site. Don't ask him about a demonstration yet. Say you found that dagger in the murder site in Minoc. Tell him you want to go, and you'll be engaged by him and his 'demonstration'. Defend yourself. Eventually, he will be dead and search his body and find a Serpentine sword and a Fellowship Medallion. Strange... Go out, then north and enter De Snel's house. Open the nightstand and get that color-changing-yellow key. Back to the Library, open the room that was locked and inside you can get some gold bars and a book of the FS.
You can go fetch your carpet now, but it isn't necessary. From the Library, go south, west, south, west, north and enter the brick building on the right. Open the drawers and get a magic gorget. Now, go west, north, west, south and white a white-woodened building. This is the armoury. Talk to Kliftin. He was once a soldier but now is the master of the armoury. His business is excellent, but his best customers keep getting killed in duels. Every noon people gather to manage their businesses. Sometimes it's only to blood, but may also be to the death. There's a man, called Sprellic, that stole the honor flag from the Library and refused to return it, now he must fight to the death 3 of the best students of the Library.
Now, I don't like stealing but you can do it. Get, if you want, the armour and weapons in this room and enter the bedroom. Using your new found infinite-picklock key on the chest and it'll be picked at once. Get if you want those items then go out. Cross the bridge to the west and turn south and enter a pub/inn. There, you should find Dupre one of your old companions. Talk to him.
He got recently knighted and has been conducting some studies about all the drinking establishments throughout Britannia (or better, he is drinking in all pubs to see if they are good). Show him Spark and see his reaction, thinking you are trying to make him feel old. Jhelom is a fine place, he says, looks much like the older days of Britannia, where people thought everything could be solved by hitting it, not like today with those modern things. Perhaps people come here to escape the modernity. About the flag, he only says Timmons, Vokes and Syria challenged Sprellic to a duel and thinks this man has never been on a fight.
Now, check the register, it says 'Avatar' in a line... Talk to any of the barmaids, but I prefer talking to Ophelia. She says Sprellic is at his house preparing himself to the fight and she is taking care of all work, perhaps with some help of the other barmaid. Bet all you have on Sprellic. I know this may look insane, but I know what I'm talking about, trust me. Well, she also says Sprellic is the true Avatar among us... how strange, since you are him/her/it.
There might be some of the fighters here in the inn, but they say that they only want to kill Sprellic, but something more also. Vokes nothing really, Syria tells she is resting from being a mercenary and was on guard when the flag was stolen and got 10 slashes of punishment. Timmons left New Magincia to come here, but De Snel does not accept him.
You should Mark somewhere in Jhelom the green Virtue Stone. From the inn, go north, then west and enter that house. He is where Sprellic lives. Talk to him. He looks timid and now sees you're the real Avatar. He is the owner of the Bunk and Stool and regrets having left Minoc. About you're being the real Avatar, another person came there claiming he was the Avatar. He believed it. The stranger was very rich, since he booked both rooms to see which bed was better and ordered every food and drink they had. Also, was a member of the Fellowship. Sprellic spent hours cooking, and most of the food was left uneaten and had to give it away when it began to rot. When the 'Avatar' went to bed, he claimed it was too cold. No matter how many blankets he got, it was still cold, so Sprellic went to the city and only found a tapestry hanging on a wall. He ran with it and a woman ran after him, he didn't know what was happening. Eventually he escaped and gave the stranger the tapestry, finally falling asleep. On the other day, the stranger left the bill unpaid and took the blankets with him, with the tapestry.
Syria came and demanded the tapestry, he tried to explain he couldn't give it back and she hit him. She challenged him to a duel. Then, came Vokes and did the same thing, then came Timmons. Sprellic will ask you to become his champion, accept it. See why we couldn't lose the wage. I'm not telling I accepted to be his champion only for money, but he has a point but can't defend himself. Try to disencourage the barmaids about the bets, making them lose orbital amounts of money.
Now, there are two ways you can complete this quest, but it seems one of them was just spoiled by accepting being the champion of Sprellic. The other way involved less blood and is simple, just talk to Kliftin and tell him about Sprellic's case. He knows something about Sullivan, the Trickster, that has never been caught. He took the Honor Flag, but the other duelists do not know about this, so it may be possible to make another flag. Since he used to heal his comrade's wounds in the battles, weaving has become a hobby of his. The duelists won't say the flag is false, since this may make them look foolish, but anyway, it will take a few hours to have it completed.
Continuing, wait until more or less, 12 o'clock and wait the fighters to gather. Just talk to any of them, Vokes, Timmons or Syria, that all the three will rush towards you. It is hard to suffer from these weaklings, since you have many other companions that all have, you know, weapons too. The combination of Sentri with the Hoe of Destruction, Dupre with a halberd and all others with normal swords (and some pieces of armor ranging between scale/chain to Magic Plate). No major losses, actually, only Shamino got wounded. Now, let's harvest our seeds. Go talk to Sprellic.
Filled with joy, he will almost kiss your feet and tell you are the noblest person he has ever met and will be forever in debt. Continuing with the main quest, for now, that's tracking Elizabeth and Abraham, go to Britain. Here you can sell the excess of Silver Serpent venom to Kessler, but go talk to Batlin. Ask about the whereabouts of the twins. They have gone to Vesper trying to establish a new branch. Remember the Golden Ankh, LB's ship, is in Vesper? Also, you'll get another job. Tell him you delivered the package and he appointed to get some funds in Dungeon Destard. Feel safe, he says it's deserted. You can either go to Vesper or to Dungeon Destard, nothing will affect the gameplay, but I would go to Dungeon Destard first.
Fly to 71 South, 23 West. As you approach the cave, a voice will tell you it's a trap. You may have already guessed whose this voice is, but if you haven't, how bad... Enter the cave and turn to the right, then south. You're going to enter on a big room. You should have noticed the burnt marks along the path. Not very far, there's the chest near a pillar, near a FS staff, near a skeleton. And, by the way, there is some s here too. Pause the game and look for the surroundings. Open the chest and see only 2 FS medallions. The corpse has a bag and in it, there's a black potion, two yellow potions, 20 Sulfurous Ash, 10 Spider Silk and 5 Black Pearls. In a bag near some debris, there's a regeneration ring.
About the dragons, save before anything. They are very strong, have outstanding attacks that will most assuredly kill a party member. If you're feeling bold, attack them. I managed to defeat those beasts (3 at once) and got many gems. If you doubt, see the photo. There's a trick to defeat them, you should simply use a blue potion on each dragon. If they wake up, use again. This way you won't have problems defeating them. I only wonder how they force the potion down the dragon's throat, anyway.
Gather the gems if you want. You can explore further, but there are only some dragons and gems more, nothing interesting. I feel sometimes guilty when killing dragons, since they take centuries to grow and are far more intelligent than we can imagine. If you wonder why dragons love gems, the answer is in the Nordic tales. Once, a dwarf had an evil ring. This ring brought much wealth to the dwarf, but he became paranoic and was transformed into a dragon. Then, his only purpose for living was to guard his gold and jewels.
There is another entrance to the south, where the mountain "bends" the west to the east side. In it, there's a unicorn, but don't talk to it now. Continuing, fly back to Britain and sell any gems you want. The gems dragons have, in my opinion, are kind of ugly, so I never keep them with me. 30 gold for 1 gem. In the FS hall, talk to Batlin and tell him about the chest, then answer monsters. Accepting your excuse and apologizing for any trouble, Batlin says you can join now, just ask him "join". To a proper introduction, you should come when the members gather at night.
1.9 Vesper
I almost forgot, Mark Britain. I used the yellow virtue stone, you can use any other if you like. Now, fly to Vesper. Do you perhaps remember that the Golden Ankh, LB ship is there, on the docks? I didn't know Vesper had docks, but anyway. Vesper lies in the desert, but please land at 7 North, 126 East, to make my life easier. Enter on the house to the left.
The woman is called Yvella and she takes care of her daughter while his husband, Cador, is at work. Cador is the overseer of the Britannian Mining Company Vesper Branch. Yvella does not like his job since he must work together with those 'beasts', referring to the gargoyles. I never thought gargoyles were despicable, they are very nice indeed. Catherine, the daughter, disappears every noon, because she haves foolish notions gargoyles are friendly (which they are, mostly). About the people in the city, there's Auston, the mayor and Eldroth the town advisor, who sells provisions also. Sorry, but it was noon for me and Catherine wasn't there.
Now, leave the house and enter the other. You can search on some items, but there aren't many interesting things. Follow the path that goes south and turn west, enter a house. It's Britannian Mining Company Brach here in Vesper. The only thing that's worth coming here is the gem on the desk. Go out, then east, south. Enter in a building with wooden walls. Talk to Eldroth.
With his infinite wisdom, there are no stupid questions, only dumb ones. He tells you only that he is a provisioner and an advisor. His knowledge is vast, because what does not kills, wounds. He fears the gargoyles will come and attack them when they get enraged enough. A deep study on tactics showed him that the vest defense is a good defense and a gold coin not saved is a gold coin spent. Search on a barrel and find one of the rarest items in the game, Greaves. They're not so good, but are very nice.
Now, enter on the stone building to the left and talk to the lady. Her name is Liana and is the Mayor's clerk. Taking out the chitchat, you'll once discover some things, like Auston is spineless for a mayor, that there are well... unusual people in the city, like Cador, Yvella and Zaksam (the normals) and Mara/Yongi, Blorn, Eldroth and the gargoyles. Zaksam is a fighter (who also wrote a book to those who paid attention). Mara is too manly for her good, Yongi is just a drunk, who only runs a tavern to be able to purchase high quantities of alcohol. He hates gargoyles. Blorn is a thief and should be left alone (hates gargoyles most than anything) Liana preferred the time when gargoyles were called 'daemons'. No one will ever see their true nature.
Talk to Auston. He should be at a room somewhat hidden. He tells you Elizabeth and Abraham have gone to Moonglow, good! Vesper was once a peaceful place, but now it's not, since he also fears on a gargoyle attack. Auston has loads of information, but we already know them all, so proceed.
Go south and enter on a house to the west, see things, nice. Go out end enter the house to the east that is made of stone. This is the trainer. Talk to Zaksam. He has taught combat for many years in Vesper, but even so, he is not fond with some of the residents. He does not trust Auston's ability to run the town and that the Gargoyles will rob and attack the city a day. He accepted he would fight when Auston asked him, but this is a battle he does not look forward to, of course, since the gargoyles are much stronger than the humans that live here. A normal gargoyle must be fought by a fighter, not by a bartender. Gargoyles are much stronger (in muscle) than humans, far more indeed, just look at them!
Notice the book Zaksam wrote - To the Death! If you paid attention, surely you saw this book before. Now, go south through the road and enter a big establishment. Enter and go talk to the man in the kitchen. He is Yongi the barkeeper. Of course he will recognize Dupre immediately, since this Sir Knight has been doing some research. The name of this place is the Gilded Lizard. Why? No idea. When Yongi asks you who you are, just say you're "name", not say milord neither Avatar. Most people will find this behavior offensive. As you were told, he will talk your ear off about gargoyles, this, that, blablabla. In this case, it seems you lend your ear to him :). When concerning about information, nothing new really. Curiously, he has invisibility (5 i) dust on a crate...?
Talk to Blorn, who has a great deal of patience, since he never seems to go out of his chair. Please, do not tell him you're a gargoyle lover, or else... He has been recently 'humiliated' by a gargoyle, named Lap-lem "man killer". It does not matter yet if you agree or not finishing his job for him.
2.0 Isle of Fire!
Now, if you want to go to the isle of Fire (this is only possible if you have the Forge of Virtue add-on. If not, just continue to Vesper II. Go around the Gilded Lizard, in Vesper, south. There's a ship docked here, since LB gave you this ship, you may very well use it. I think that using the magic carpet to go to the Isle of Fire a bad idea, so use the ship anyway. Check it's hold and get whatever you need. Double-click the sail to begin to sail. Just use the mouse as in any other movement operation. I like going to the west first, of course, this when you already saw a bit of the isle (just go south). At a time, there will be a narrow passage that goes north, leading directly to where you want to go. To help you, the coordinated of the entrance of this passage are 57S 126 E. To get out of this ship, approach the shore and double-click the gangplank.
2.0.1 Test of Truth
It won't be hard to find the Castle of Fire. It has a dramatic entry, with carbonized grass and some iron bard on the ground. Enter it and go directly to the north until you find three statues. Talk to the statue of the old man. He is the Keeper of Truth and will ask if you want to go to a test, of course accept it. You'll be teleported to a room. Go south through the illusionary wall. Ask you walk, surely you'll notice that the carpet divided itself and goes to two different directions, meeting itselves in the end. In the middle, there is a skeleton, deep fried. As you may imagine, you should avoid it, going around it, in the blue carpet. Right after this big room, there is a hood on ground. What is it doing here? Just go north from it and, tchan chan, a secret wall and secret passage! Go north, east, then north again. Use the switch and the metal door will open. Get the locket in it, teleporting you immediately to the hall of the statues.
Having mastered the test of truth, the statue will aid you in your quest, and says a warning word 'The Psyche returns to the Core'. What did he aid you? Just press Z one time or check your status. Your intelligence has gone to 30, the maximum, and with it, Mana and Magic went also!
2.0.2 Test of Love
Continuing, talk to the statue of a woman. She is the Embodiment of Love, having an unearthly beauty, which for me, sound divine. To take her test, you should enter the portal (moongate) to the south. To enter the gate, just go south, then turn west when you see a dragon. Enter a small room full of books and talk to the exiled here. His name is Erethian and surprisingly, he knows that your name is Karl, since he has seen many of your exploits, from the defeat of Mondain to Exodus and such. He has a great deal of information, and all is very interesting for me. For him, many paragraphs will be dedicated.
He is a Follower of Truth, but instead of standing still, waiting for the knowledge to come to him, like those of the Lycaeum, he prefers to pursue it. In his pursuit, he went to where Exodus sought to rule the world (where you are standing right now. No, not your chair, the man in the screen!) He learnt much of Britannian history with books and old scrolls. Seemingly affected by blindness, the mage insults Iolo, saying he is the only one that still sings the ballads of the Avatar in the modern taverns. Iolo feels offended and almost fights with Erethian. About Mondain, he was such a powerful wizard that should have locked a magical matrix within his skull and his gem, the Dark Ruby, should have had some studies. And then, you simply smashed the gem and this caused much trouble at Blackthorn's regency, and someone (you) 'accidentally' let the skull of Mondain slip on a volcano. Mondain forced all the good sense from Minax to leave and you had to use the Quicksword, Enilno to deal with her.
DO NOT ASK HIM ABOUT HIS BLINDNESS! This offends him much and you and I wonder how this man reads his scrolls... Enilno was a magical and very powerful artifacts and should have been studied properly. And now, about the main reason you came here, Exodus. You merely severed Exodus, The Dark Core resides in this castle and the Psyche was taken by the gargoyles to inhabit the statue of the Principle of Diligence, this all in the underground. You wonder how much time this man has been out of circulation, since the gargoyles have left the underworld much time ago, more than 200 years ago. The Dark Core, without the Psyche is emotionless, but if the Psyche returns to the Core, making a great opportunity for study for Erethian and a great opportunity to leave Exodus lay his anger on Britannia and a great opportunity for you to send the Core somewhere and the Psyche somewhere else.
The machine you destroyed in the past was Exodus means of communication with the world. Destroying it just severed the connection, but Erethian stops talking before making any conclusions. The Dark Core was Exodus' "brain", storing his memories and perhaps even his emotions, some information in the Core is completely trivial, but others are truly interesting, like how to conquer the world. Finish this long talk with him and take your time reading the other books on his library, even what seems to be a piece of the usecode. I found Erethian most interesting, and his knowledge wasn't explained well here, so I apologize.
Behind some crates there's a secret door or fake wall. Open it and enter the moongate. After being teleported, go south and grab the bucket near the well, it will be very useful. A bit more south, you'll see some sand, so go there and talk to a Stone Golem. Its name is Bollux, and asks you to help him help his brother, Adjhar, who is dying. Take his book. Asking who its master was, the golem says Astelleron was its master's name and he was very lonely, so he created his two sons.
The book tells about the Stone of Castambre. You should collect blood from a tree and *dirt*. Forget it for now and go to Astelleron's house, to the west, and grab the two books concerning about the stone. Now, go back to the sandy part and enter on a door to the north. Enter this tunnel and grab a pick. Go to the end of the tunnel, being teleported to a hallway. Keep going through here, to the south, and you'll see the Stone of Castambre with a tree growing from it. Place your bucket under the rock and hit it with a pick. Get the blood and go back to where Bollux is, but there is a lever here.
The lever is on the north part of the stone and only the top bit of it is shown. It is very hard to see it, believe me:
But once you find it and use it, a secret path in the hallway will be opened. And across the secret passage, there is going to be an altar, full with blood. On the west side of the altar there's a Death Scythe, attack power of 50, one of the most powerful weapon in the game. To the east, there is a Firedoom Staff, but it isn't very good, since it hits mostly your companions instead of your enemies. Now, the most special gift in here is on the skeleton south of the altar. In it there are 8 GLASS SWORDS, EACH ONE WITH ATTACK POWER 127! Unfortunately, they can be used only one time, but this is no excuse to leave such items behind.
Back to Bollux, use the bucket with blood on each of the stones around him, then use the incantation scroll that should have fallen from your book. Once this is done, Bollux will sacrifice itself giving its heart to his Brother. But the heart inside Adjhar and use the scroll again. This time the magic will work and the other golem will live. Talk to Adjhar, and notice the evident difference between the speaking capacities of these two. Tell him Bollux's sacrificed itself for him (for me, these two golems should be treated as he, himself, and so on, but my hand are tied...) Adjhar tells you his sacrifice was unnecessary (you think you noticed a tear on Adjhar when he says Bollux was a fool). Give Adjhar MacCuth's 'The stone of Castambre'. Iolo will say he thinks it is kind of humorous to see the two golems swapping their hearts to the eternity... How great the living golem remembers what was written on the page with dirt, and you must make another heart for Bollux from the Stone of Castambre. Forgot to say, you should place your friends away from the blood in the rocks, since it catches fire when the spell is cast.
Go back to the stone and place the bucket below the rock again. Use the pick and get some blood, then use the pick again to extract another heart. Quickly, go back to the site and place the heart on Bollux, place the blood on the stones and cast the incantation. This time Bollux will gain life and the tree that grows from the Stone of Castambre will also gain its life. Talk to Adjhar and ask him about his job, then ask to have the Talisman of Love. With the talisman in your hand, you'll be teleported again to the main hall in front of the female statue. She/it will increase your Dexterity to 30 and warn you about the threat that is afflicting the world now.
2.0.3 Test of Courage
Talk to the warrior statue. He is the keeper of courage and to take his test, go through the portal to the south. I have to warn you. This test is the most challenging one, physically talking. You will face many enemies that can be easily avoided in the real world in most cases. The challenges go from a simple skeleton or a headless to a immortal dragon . Continuing, go to where the statue asked and see that in that room (it is to the south) has something black, that looks like a broken pillar. It is the Dark Core and in front of it, there's a mirror with a demon trapped. Using the Core makes you see Exodus' time from his eyes. Now, talk to the demon.
His name is Arcadion and will notice that you're not his master. He is in service of Erethian the mage *his tone of voice suggests he could rip Erethian limb from limb instead of serving him. He has been serving him for over than 200 years. You should accept to free him, and to do this, you'll need a special gem. One can be found in this island. Now, prepare yourself, save the game, and enter the portal.
After entering, go south, through a invisible wall. Unlock the gate with a lockpick and continue. You'll enter on a nasty room. A mage has sacrificed a child to summon a Liche (that does nothing at all) and there are many bodyguards (skeletons and headless). If it wasn't enough, near the two red moongates there are many dead bodies thrown on the ground. Kill your enemies, as if it wasn't enough to say. After the battle, check the body from the mage and get his key. Now, loot for anything you want. On the bodies near the gates there are magical items. I found another key, exactly the same of the mage, a magic gorget, magic leggings, a magic gauntlet, and incredibly 1 MAGIC ARMOR!
I need your attention now. East from here there are two rock golems. They are hard to kill and the best is to simply run from them. To do this, save first of all, then run east. As you see the locked gate, pause the game. Open the gate with your key. Run across the gate. The golems should try to attack you, but all they'll do is punch, but not hit. As soon as all your companions cross the gate, pause the game. Close the door and lock it. Now you can use this , attack them through the gates! Simply select the Avatar's attack mode to manual and equip him/her with your best weapon (everything but Glass Swords). Now, attack the golems through the bars, by double-clicking them.
From now on, if any of your companions gets seriously injured, equip him with a regeneration ring and tell him to flee. If your characters flee from choice, by having too low a energy, they'll drop some of their belongings and this means they can drop very important quest items. Go north, and kill the spiders and scorpions. Go to the first passage to the north and then, a bit west, use the lever. Go back and enter the second passage. Here, use the lever again, always taking care with the enemies. Go West from where you went to the passages and pass through the secret opened walls. Save. Go north and quickly turn to the west. Enter a small room by touching the metal door. Use the crystal ball and see that a glass sword is in the black floor where you should be standing on and there's a key where the ball was.
If you have a Glass Sword, place it on the floor and get the key. If not, don't get desperate. You should have noticed that there's a Drake lurking. Kill it and get its gems. From the room of the ball, go around and then turn exactly to the east, and there should be another passage, with a dead woman's body and a locked chest. The woman has a magic shield, useful. Pick the chest and get the glass sword, now put it where you know and get the key. Back to the corridor, use the key on the door to the north, between the woman and crystal ball. There'll be some crates with food, get if you need them. Save the game here. I would say it's better if you lock the door behind you.
Go north again and turn right when you can. Enter the little room to the north and get the magic helm. Save now. You should mark this place for two reasons. 1. By experience, I got one of mine companions killed in this test and didn't notice. Luckily I had marked this place and was able to return and resurrect him. 2. Because you'll need to get back to this part twice. Mark the black virtue stone. Save.
Go south, there's a golem, then turn east, through the metal doors that will lower. Turn south in the crossway and run as fast as you can to the east. There'll be some slimes here and there was another golem some steps backward. When you can, run north and a horde (about 5 to 8) gremlins will attack you. Ignore them and keep going north. Now, there are some gazers troubling your life. If they get in your way, you'll be forced to use lethal force. When you can, turn west where you see some broken pillars. From here, a bit up and enter the room. If there still are some gremlins annoying you, finish them. Rest a bit, and save if none of your friends got killed. Swap the magic helm for the normal great helm. Recall the black virtue stone or go all the way back, it's your choice.
Place the normal helm on the first helm's pedestal. Go a bit south and turn east, north. There will be some trolls and a Cyclops, but it's possible to ignore them. Go east from the top and again, save. Just notice the burnt body in front of an opening. It has a magic axe for you (I personally don't like it, it hits your friends). Save. Go north. Now, check another burnt body and get its Glass Sword. Surely you've noticed a big dragon standing on her nest. She will probably talk to you. Her name is Dracothraxus.
She was made immortal by the Keeper of Courage, and if you want to complete the test, you should defeat her. Equip your glass sword and use it against the dragon. She'll be killed for a moment, but the will rise again. As a reward, you'll be let the chance to get a gem from her. As she opens her mouth, you can see a small but shiny blue gem. Keep your guts and reach it, wondering if it's worth the risk. Now, she'll say the door won't open until you defeat her. Check the bodies on her house and you can get some interesting artifacts, like only a triple crossbow with 64 bolts. I also do not like this crossbow and any kind of missile weapon since it can hit your companions, and it does hit them a lot.
Go all the way back to the entrance of the test. Be careful with the drake on your way and any other remaining golem. When you arrive at that morbid place full of corpses, I would say it's better to get out through the blue moongate, that's to the west, in the same place when you first stepped in here.
Talk to Arcadion in his mirror. He sees you have the gem and to free him from the mirror, you should break it with the gem. Equip it on your weapon hard (your right, Avatar's left). Now save, and double-click the gem, then click on the mirror. Arcadion will be freed and for a moment of personal glory, he is again imprisoned, but this time on your gem. Admitting Erethian was right, he would not be freed from this mirror, only imprisoned to other place. He is bound by magic far olden than any of you wield.
This magic originated when this world was attacked by those of his race (which we call daemons) and was defeated by the being of great power. These inhabitants were powerful and wise and didn't want the complete destruction of the daemons, so they only bound these to this world. For a note, it seems that Zog, with only his bones left in the Museum, cast Armageddon in this land and vanquished these who Arcadion tells you.
Arcadion can lend some of his power to you, by replenishing your mana. Talk to Erethian now. Ask him about powerful artifact. This guy once tried to create a sword of great power, but he could not. If you wish you can continue his work. Of course, accept and you'll be teleported to the main hall. Erethian will cast many powerful spells, creating forging equipment, but how will the well have water? He just redirected a small subterranean river. Now, if there's any blacksmith reading this, this is only a game, please, don't smash your computer simply because programmers do not know how to forge :).
To equip this place, a hammer and a bucket should be needed, so he casts another spell. A mirror and some flowers appear instead of what you need, noticing the ether is disturbed and babbling about any interdimensional beings, he casts An Vas Ailem, Kal Bet Ailem and swaps his mistakes for useful items. Yes, I have no idea what Ailem means.
Explaining the sword to you, Erethian says the hilt (where you hold the sword) is made of a immutable very black metal (for us, blackrock). The blade is an alloy of some substances with the purest metals known to Britannia, of course with the black metal. He warns you, you shouldn't fear to hold the hilt while the sword is hot, since heat does not travel well on the black metal. *To the blacksmiths, the primary material to use was wrought iron for sculptures and due to its very black look altogether with the scale, iron is often called "the black metal". I lack the specific knowledge to tell you this, the details are many.
Now, let's feel like a blacksmith. Put the sword blank on the 'fire pit' (what would be the forge) and equip the hammer. Fill the bucket by using it on the well and then use the bucket on the water through (what would be the slack tub). Do this 3 times. Now, with the sword blank placed correctly, use the bellows until the fire is high. With time, the blade will begin to heat. If not, change the position of it so that the top of the full flame is below the metal. When it is a very bright red, place it on the anvil and double-click it. You'll use the hammer automatically. You'll notice that the edge has improved. More hammering will reveal that you've taken out the flaws. Hammer it until you think it's good enough 'worked as well it can be'. If it loses its heat and you can't hammer it, just heat it again. Now, it's time to put it in water (this would be something like hardening concerning to blacksmithing). Heat it and place it on your hands, then double-click it and click on the water through.
You see that the sword is far too heavy to be wielded, even with two-hands. Talk to Erethian and ask this dilemma. If a magical source is bound to the hilt, it would be able to work as the stabilizing force. Arcadion would be great for this task and Arcadion himself is happy, because he will be able to use more destructive powers with the sword. Equip the sword and the gem in your hands, then talk to Arcadion. Command him to bind, and 'the blade shifts and shimmers almost as it was alive.' A lightning bolt will appear and you'll swing the blade. Now, it is good. Arcadion's powers are now Magic (restore mana), Fire (cast Delayed Blast), Death (instant death to something near) and Return (teleport to the Isle of Fire).
Now, with such a powerful artifact, we should be able to defeat Dracothraxus. Rush to where she lies, by recalling or by simply walking. As you step in her room, she'll sense her destruction, and will wish you good luck. Now, quickly, get near her and pause the game. Talk to Arcadion and tell him to use his power of Death on Dracothraxus. Arcadion says he has already seen Draco, and this time she won't get away alive. If she gave him the gem, nothing of this would be necessary. As you know, Dragons are very intelligent but her will was not her own concerning this matter, and his will is not his own too. Arcadion gets quiet with such an answer and finishes the bloody task.
After the sword is swung, Draco will be revived again and cheer, since she is free now. This was a test of courage both to her and to you, what I believe it was really an outstanding test for her, since facing the artifact of your death but still fighting bravely is something most humans do not do. Your treasure lies in the room north, across the blue gate. I do not even need to say what to do. In the following room, filled with golems, but don't panic, they aren't going to move, there is the talisman of Courage (named in the game simply locket), get it and be teleported in the front of the Keeper of Courage.
You have unsurpassed courage. You have proven yourself with Valor, Sacrifice, Honor and Spirituality. Now, receive your reward in Humility. After giving you the reward, he speaks urgently, laying upon you a geas, that your quest is seek the talisman of infinity and there's a scroll in this castle about this talisman.
(Just check your strength, it went to 30!)
Go to Erethian's room. There's an open scroll going up to down. Read it and I'm sure most people don't understand fully what's written in there. Get it and talk to Erethian. Ask him about the talisman of infinity. He'll ask for the scroll, give him and he will see it's written in a kind of code. Translating the code to you, you'll see that the talisman is in the great Void, to get it, you'll need to craft two lenses, one concave, and other convex. The light that passes through the lenses will create a passage to the ethereal plane. Then, the three talismans will be needed. Seeing your plan, the fool stops telling you anything. Luckily Arcadion knows something about this.
Simply for education, leave Erethian's room and talk to Arcadion, asking for help. To send the core to the void, you'll need the lenses, three talismans and the torches on each side of the core should be lit. The lenses can be those made to LB and Lord Draxinusom to see the Codex in the Void, which should be lying in the museum forgotten. After everything, the talismans should be placed on the core as wedges in a pie.
Now, head to Britain by ship or by recalling or even by casting "Help". I found it especially useful to go there using a ship. (Britain is to the west). The museum is northeast from the inn, east from the FS hall and south from LB castle. Get the lenses quickly and surely, then to go back to the isle of fire, simply ask Arcadion for Return. Head to you know where and place the lenses one on each side horizontally, lit the torches using ignite if they aren't lit, place the talismans as if they were wedges in a pie. The talisman of infinity will appear, it has a blue glowing look.
Together with the talisman, Erethian will teleport to this room and says he won't let you banish the core to the void. Casts a powerful spell, Vas Ort Rel Tym, but stops for some reason and begins other pointing towards the talisman, Vas An Ort Ailem (uses again Ailem, which seems to be something related to destroy). You both recognize the sound of a spell going awry, Erethian looks with a crooked face and, dies... The core is then fetched by a cloud and is sent to the void.
Someone in your party will say LB would like to know Exodus was finally terminated. Recall yourself to Britain and rush. Talk to LB in his castle but he sensed the passing to the void. This lifted from his shoulders a great weight. Knee to receive his reward. Now, your strength was doubled, going to 60! Wow!
To continue our quest, go to Moonglow. A quick way to do this is to Return to the Isle of Fire then use the blue moongate outside the castle. Don't forget to get your magic carpet! Since getting it is of utmost importance, use the Golden Ankh to go to Vesper and then locate the carpet, which should be in the human side, to the north.
Land on 43S 180E in Moonglow. Moonglow is an isle to the east of if you want, directly east from Britain. When you land, talk to the red Fox near a door. His name is Frank and is a devout follower of honesty. He hasn't much useful information; it's only funny to talk to him. First, say you're "name" and he will like it, saying he is always honest when dealing with others, and by the way, you voice crackles too much. He is now on a quest for honesty and you would have more friends if bathe more often, you stink literally. About your companions, Dupre is a drunken sot and has no will when confronted by a tankard of anything. Iolo charges too much for his bows. Wow, breath could gag an ox and you yellow teeth are the source of this smell. He hasn't seen anything like it since he saw Shamino run in fear. Of course Shamino will react, and Frank, in his deep knowledge of the people, will say he has bellicous manners. You have a big potato between you eyes, did you know that? And you're dumb, should have studied more vocabulary! Enough of being disrespected by a fox, tell him goodbye and he'll say you have the manners of a pig by breaking a conversation so abruptly.
Now, talk to the mage on the room to the left. Her name is Mariah and is an old companion of yours. She seems to have lost her mind, as she tell you everytime you ask about ink wells, pens or shelves, she'll answer "Yes, they do". Her face turns sad. "But I only sell". And most impressive, if you buy a spell, she'll sell you a potion for its normal price, how incredible! Mariah has great prices on high level spells, but we are coming back later, when we have an impressive amount of money.
You can go upstairs and search the incredible collection of books for any information you think it'll be important. Don't expect to actually read the books, the Avatar will choose a page he seems interested and then close the book. Thank God they can be read with our letters, translating runes is quite exhaustive. Now, go north and turn east, continue until you see a thicker road going north, follow it then go east and enter the local Fellowship branch. Talk to the man there. He is called Rankin (and for some reason he knows your name). Elizabeth and Abraham have gone to the gargoyle island, Terfin. He says they were giving lessons of how to lead the local branch, which is the newer in Britannia.
Now, if there's a woman here, talk to her. She is called Balayna and is the clerk of the branch, keeping records of meetings and administrative decisions is her job. She thinks Moonglow is a nice place, with good-characted people. Every night at 9 they gather to have their meeting. Now, what's more interesting is that she thinks you travel a lot and when you go to Britain, she thinks Rankin is not suitable for the branch leader. Once she overheard Rankin talking to a future member, before persuading him to join, that he had doubts about the FS. He though they were mere sheep and the leaders were only mischievous people, trying to steal money in a legal way.
She does not have anything more important to say. Now, go south and then east again. There will be a house, which belongs to Balayna. Go south again and turn east again. As you walk along the path, the dirt will become stone, with some sculptures in plants and fountains. Enter the big building. It is the observatory. Talk to Brion. You can tell him about Zelda's feelings, and he'll say he never thought she could be like this. You are free to use the telescope, with it you can see the land without actually being there. He has an orrey, very big indeed, and it shows the astronomical alignment, something so rare that only happens one time each 800 years! To see the orrey anytime you need, he can give you a orrey viewer, made of crystals, but he needs an extra crystal. You should go to the tavern and speak to the merchants that eventually provide him with crystals and get another one. He knows of Elad, who has wanderlust but can't leave the island, he is too bound by affection to her and Penumbra was/is a mage that put herself into sleep 200 years ago... Now quit the conversation, hearing his fancy objects (the green cheese in his object room is the most filling food in the game). Take a look at his crystal ball and see a strange place, we'll visit it later.
Now, head south across the woods and enter the tavern. Talk to Phearcy only to get acquainted to him. He has nothing good to tell you, except you want to know about the people in the city. If there are more people here, talk to Addon who was the adventurer Brion talked about. He resides normally in Yew with his wife, Penni. Many items in the Lycaeum and the Music Hall have been brought there by him, and nothing more of the land scares him. He says overnight on some beds Elad has free in exchange of some stories of adventure, because Elad likes them a lot. He has the crystal Brion asked, so buy it for 20 Gold Pieces. Go back to the observatory and talk to Brion. Tell him you have the crystal and then ask to have it back. Use it and see the giant orrey, which is very nice.
Back to the tavern, go west and when there's no road going south go north a bit and enter the healer. Addon can sometimes be found around here. Talk to Elad. He is the healer and his father told him Moonglow was much smaller in past times. Elad was brought up and lived in Moonglow for his entire life, and has the feeling of moving, but he can't. He is just too bond to his place and to his duties as a healer. He knows plenty people and plenty about them, but anyway, it's the same old thing again. He charges 25 gold for healing, by the way. As you leave, he'll ask to join you, but does not wait until you answer and steps back on his collocation. He has too many things to do, but perhaps you'll let him join in the future? With that, he lets you leave, saying "goodbye my friend".
Go to the Lycaeum and go north, through that thick road, then turn west, north again and continue. There is a long house, where Effrem and Jillian live, together with their baby Mikhail but they do not take part in the story very importantly, let's move on. There will be a dead end to a house with a creepy music playing. Read the plaque. It says "Hammer here to enter". I think that perhaps we should get a hammer, but where's one? Every smith has one, but there are no smiths in Moonglow, so go to the healer and go west. There is a small brick building. Inside it there is a hammer. Get it. It is not stealing, no one accused you, not even that voice. Place the hammer in front of the door and the plaque will change. Now it says "Pick item carefully to keep going". The only items I know that "pick" are a pickaxe or a lockpick. I think the plaque is referring itself to a lockpick, since it says "carefully". If you do not have a pick in your inventory, nor in the carpet, there's one at the observatory. Go upstairs and east, in the southeast room, on the nightstand of the left there will be a single pick standing like saying "Get me!" Go back to the house and place the pick. You should have noticed this house is from Penumbra, as you heard on other conversations.
Now the plaque says "A golden ring of truth faces thee". Now, here is where the golden ring enters! If you do not have one, Zelda has one on her room in the Lycaeum, beside the hand mirror. Place the golden ring and the plaque will say "Grasp not at threads". Well, it says thread, so it must refer to something of tailoring. Go south and past the long house belonging to Effrem, enter another one with no connection to the road. Carlyn lives here and does some work. She hasn't got any useful item to buy. Wait until she uses wool in the spinning wheel to get a spindle of thread, or use the wool yourself on the spinning wheel. Place the thread in front of the creepy door and the plaque will change again, now saying "The royal mint shall not hold thee back". The mint has gold in it and makes the coins of Britannia, so get a gold coin, just one will do it, and place it in front of the door. The plaque will change again, now saying "key". Use the key on the locked creepy door and enter Penumbra's house. There, you can get the blue, red and yellow potions, she has no use to them and pick the chest on a room to the east. Get the 5 amazing rare lucky arrows and a bloodmoss. Now, cast the linear spell awaken on her, (remember, there is not mana or reagent involved in linear spells).
Talk to Penumbra, who looks the same after having slept for 200 years. She knew you would come. To stop her partying, she will feel a disturbance on the ether. Her head will ache tremendously and she'll ask you to find something impenetrable, tell her you know that blackrock is impenetrable and go fetch some, but where? Rudyom had some! Rush back to your magic carpet and then rush back to Cove, rush inside Rudyom's house, rush the blackrock pieces in your backpack/carpet and rush back to Moonglow, land the carpet and rush to put your blackrock pieces on the four pedestals. Talk to her.
She isn't feeling the painful ether anymore. Being able to think normal again, she sees the problem is coming from a dungeon nearby, like Despise, and inside it there's a Tetrahedron-shaped generator, which is generating the damaging ethereal waves, all this with her mind's eye. You must find the ethereal ring to pass the defenses of the generator and it has last been seen with Lord Draxinusom from the gargoyles in Terfin. You must go there and ask him for the ring to then let her do an enchantment on it to regain its full working state.
2.3 Terfin
Land at 168S 114E, in the small island of Terfin. Enter the small house to the north and talk to the winged Gargoyle. His name is Draxinusom, an old acquaintance of you. Back in Ultima 6, you two helped each other to stop the conflicts in Britannia. He is sad nowadays, no young come for his guidance. He is almost the only one to follow the Altars. Another one who does this is Teregus, who is a fine, sensible gargoyle. Now, the majority of gargoyles have wooed to the FS. Lord D. isn't sure to like or not the FS. Perhaps they are very enlightened, perhaps not. He thinks they might be forceful leaders who teach a doctrine of submission. The FS here in Terfin is directed by two winged gargoyles, Runeb and Quan, the first means in gargish, "Red Mist" (what is left of his opponents) and the other one has no meaning. About Inamo, remember him? He was murdered in Trinsic. Tell Draxinusom this and he will be astonished and again, very sad. About our beloved Ethereal Ring, D. had to sell it before moving to the island. It is being kept in the island of Spektran, owned by the Sultan of Spektran. It is rumored that the Sultan has one of the safest safe in Britannia, seems to be enhanced. At least his belongings are well kept... As you leave, he'll say he is an old, sad and lonely gargoyle, being one of the few to follow the ancient ways.
Leave to the east, go north and past two muscular statues, enter the Hall of knowledge. Find Teregus in there. He is very proud of Inamo, and was very near on his conflicts with the Fellowship. Tell Inamo isn't well, and it is too late to him. Tell him he was murdered. Leave the gargoyle. He is too shocked by the situation, let him grieve for a moment. Leave to the south.
Keep going and enter the building to the west, talk to the Wingless gargoyle. His name is Quaeven "Problem Finder". He takes care of the Recreation Facility and the Learning center. In his forehead, the FS pendant lays, ask him about the FS. It helped him greatly, for he was poor and nobody cared about him. Now, he was helped and wants to help others too, like donating funds for a poorhouse in Paws and promoting Banquets throughout Britannia to help morale. He wants one day to hear the voice (which we already heard). The voice helps you to win at Buc's Den, which can be quite interesting.
Now, exit to the east, go south, turn east, go north and enter the FS building. There, talk to Quan. He knows that Elizabeth and Abraham have just been here and that they have left to the Meditation Retreat near Serpent's Hold. He hasn't got anything very interesting to know, we already heard all what we need about the FS. Talk to the other gargoyle, named Runeb. He seems very anti-social, is "very busy" at the moment. Leave him be and go south. Enter the first building to the east. There, talk to the wingless gargoyle.
His name is Sarpling and provides the residents with magics and items. He supports FS fully. Nothing more, he isn't a very talkable much person... Now, let's search his room. Inside the chest beside his bed, there's a note from Runeb about some Altars and their destruction. Go back to Sarpling and tell him about the note. He will say all was Runeb's plan, the destruction of the Altars and the assassination plot. About the plot, which we didn't know, it was supposed to happen like this. If the destruction went wrong, they would kill Quan to take over the FS in Terfin. Go to the Hall of Knowledge and talk to Teregus about the rumors. Tell him you have a proof, and he'll say you should solve this with Runeb. Go back to the FS building and talk to Runeb, that he wanted to frame Quan for the Altars. Now, he had a warlike past, so, as Teregus also said, he will begin a fight with you, after having said he would have to kill Sarpling. Kill Runeb, it is very easy, really.
2.4 Spektran
Now, it seems everybody is passive about what happened, so go back to the magic carpet and fly to Spektran, which is Northwest from here. Land close to 145S 89E. Go north and touch the metal wall. It will lower and enter the building. Talk to the man. His name is Martingo and will shake your hand as you say you're (name). He constantly speaks to someone, like a person he likes the most on his "harem". Tell him you want the Ethereal ring, and he'll say it is in the vault and you may get it if you want, the only thing to do is to get the key to enter the vault. Now, it seems that the vault is very safe, for this madman is saying you can even try to steal it!
Prepare for battle! Save before anything and go to the northern room. There will be a stone harpie. Get close to begin combat. This fight is very boring, since the stone harpie has some excellent points. It should be hard to kill her without the death of any of your comrades. For me, Sentri got killed, who I resurrected later with Jaana and Shamino got -4, and fell unconscious. Arcadion will not let you kill instantly the beast, because he thinks this being does not deserve such a death he will deliver. Get the key from a bag and open the door. Inside, get the Ethereal ring and equip the Avatar with it. Get the rings of regeneration, protection and invisibility if you want, they can come at hand in the future, perhaps. Go back to Moonglow, land near Penumbra's house and talk to her. As you give her the ring, she'll ask who told you about the generator menace, it seems we found a bug/hole in the plot! Tell her you heard the generator story from "The time lord" and you must get your hourglass enchanted. I promise you, we'll fix this problem right now. Before leaving Moonglow, mark it as the black Virtue Stone.
2.5 Changing plotline, finding wisps. Empath Abbey and Yew
Before changing the plotline, go to the Meditation Retreat. There is a man at the entrance, talk to him. His name is Ian and knows where Elizabeth and Abraham have gone, to Buccaneer's Den. This helps us a lot. Now, he wants us to join the FS before entering the Retreat, so let's go back to Britain, after a long time. Here, you can sell all the silver serpent venom you collected for 50 Gold a vial, I managed to get 1400 Gold from Kessler, and he took it all from his coinpurse! Also, if you want you can sell your gems to Sean, for 20 each. Find Batlin at his place, the FS root in Britain (which is beside the museum, which is between two statues). Talk to him and tell you want to join. He'll say that dungeon shouldn't have dragons and things... blablabla... You must get to the night meeting to be properly introduced. You can wait patiently until 9p.m., but I prefer to sleep x hours in his bed... At 9 o'clock, talk to Batlin and the ceremony will begin. Iolo, Shamino and Dupre will try to convince you to not join the FS, just answer them to stay there until the end of the ceremony. Batlin will ask two questions, some of the following.
"According to the Traveler’s Companion, how many parts of the body should one wish to protect with armor." 6
· "In the Book of the Fellowship, how many bandits can be seen surrounding on the old man in the illustration on page three?" 6
· "How many times must Ginseng be reboiled?" 40
· "How many runes in Britannia?" 31
· "On what page is the An Zu spell?" 42
· "How many Black Pearls?" 1
· "Where Mandrake Root found?" 2
Nice. You'll take a sip from a cup and then receive the Medallion. Batlin will say that Britannia should now know the FS newest member, the Avatar... Don't bother using the Medallion. Stash it anywhere you want, inside a barrel in your carpet is a good thing. Now, board the magical carpet and flu to 67N 48W. Your old friend Nicodemus the mage is here. Use Unlock Magic at the door, otherwise skip this part. Well, I didn't have many Blood Moss with me at the time, so a bought 20. He sells one for 3, Sarpling at Terfin sells for 2, but the price is almost nothing. Buy anything else you want from him. I remember you, in the future we are going to do a shopping spree, buying anything we want before entering major places of danger. Go to 48N 8E, it's a camp with some fighters. You can fight them, but the main treasure are the Magic Armour and the Magic Bow. There are many ordinary armour, but they can be worth getting.
Remember the Gypsy at Minoc who told you to contact a very powerful being through the Wisps at the forest? That's what we are going to do now. Go to 77N 59W. Enter the building, the Empath Abbey. Talk to the first monk you see. His name is Kreg and is looking for a potion of invisibility so that he can work in his potion of silence. I think this story is somewhat suspect, but nevermind. Talk to the other monk there, perhaps you'll talk to Aimi, or to Taylor. Anyway, Aimi helps in the production of wine and also takes care of the garden, planting only flowers - she likes the aesthetics very much - . She paints also, you can find the equipment in her room. Help her out, buy a bouquet, it's only 10 gold. But she does not know anything about Kreg... Didn't I say he was suspicious. Anyway, talk to the other monk.
His name is Taylor, and is very interested in the flora and fauna from the surroundings. He knows much about the animals that live in the forest, including the wisps. But, as a "scientist" is, he doesn't believe in those wisps, he never saw one, but it seems that only the Emps know how to talk to the wisps. One day he came across an emp, who only tried to make contact because he had some honey in his bag. They seem to like it. He'll offer you a smoke bomb to get some honey in the Bee Cave. Accept it. About other things, he does not recognize Kreg. This fellow is becoming increasingly suspect.
Exit the Abbey and go south, then turn west. continue following the path and get a smaller one. This will lead you to a house, which the visible door faces east. Enter it and talk to the woman. Her name is Reyna and is the healer of these parts. The forest is so spread out and she doesn't know much about the areas, just that the Abbey is very near, going north there's a scholar and northeast from the Abbey the court is located, together with the prisons. She buys flowers for her mother, that passed out not much time ago, but nobody from their family lives near enough to put flowers at her grave. Surprisingly, you have some flowers you bought from Aimi, give her, she'll get very happy.
Now, go out through the north exit and continue this way. Keep going and enter a house, talk to the man. His name is Perin and is the scholar around here. Nowadays he has been studying the effects of death on people, his 'specimen' is now Tiery. He tells you about the healer, the Brotherhood of the Rose and the courts/prison. He has an outstanding collection of books in his home, many only seen here.
Now, go south until you reach some mountains. Touch them and follow their line, beginning to the east (you kind of go around them). Until you reach the Bee Cave at 56N 54W, Shamino will tell you. You choose now, if you follow the east way, you'll face two naked people. They are called Mama and Papa and eat mice and honey (when the bees are sleeping). In a part, they say they were left there since they were kids, and Iolo thinks they were abandoned and could be brother and sister! This is an interesting hypotesis, bad for these two. If you follow the west way, the homey path will begin to look clear. Never turn when there's no possibility left. When you reach the end, there will be 4 lumps of honey and some water, some honey near there too. Get the four, each time you get one, pause and get another, pause and so on. The bees will attack you as soon as you get one lump. Use the smoke bomb and get out of there.
Go south and perhaps you'll find a ranger. TAKE OFF YOUR FELLOWSHIP MEDALLION. He usually is at 52N 56W or 50N 52W. His name is Tseramed and hates the Fellowship. Introduce him to your companions, then begin the everytime-conversation. He knows much about the surroundings and hates the bees. He hunts them to get their stinger, then to make his special arrows that make people sleep. He has made rides into the cave, and had a glimpse of the two naked ones. Tser has traveled to the highest mountains to the depths of swamps. Ask him to join you when you have the chance. Now he is in your group, he says he hates the FS, especially Abraham, because his wife woke up terribly ill and Abraham forbade her to go to the healer. This caused her death and is buried in the cemetery nearby. He will ask what you prefer, magic or weapons, then close or long range. Say what you want, just for curiosity.
Now, let's give you some freedom, since traveling at the forest and guiding people through it is impossible with words. I'm going to show you the coordinates and you can choose where you want to go.
- 61N 66W, under a rock, there's a invisibility ring, very pleasant.
- 52N 44W lies Iolo's home, with a note from Gwenno, his wife. She says in the note one day she came to met a pirate who had traveled the seas many times. In a gambling session, she found that the pirate knew something about the mysterious Serpent Isle and has gone there for exploration. She gave the map to Lord British who promised to give the map only after our affairs are done here.
- 45N 5W there's a drake camp, sometimes with no drakes, but I've already seems two of them here. Great for getting gems. Be careful with the wisps, don't change to attack mode with them nearby!
- 42N 47W Ben's house. He is a logger.
- 39N 35W Bradman's house. He teaches Dexterity for 30G one sessions. He moved to Yew to stay close to Iolo and Tseramed, two great archers. Both of your group will thank the compliment.
- 63N 30W A camp with some fighters, normally. Has in a bag some useful reagents. The fighters use mail armour.
- 55N 28W Sacrifice spot, with a mad mage. Kill the mage (it can be hard, he keeps teleporting and may launch a death bolt on you, it happened to me and I got -42 and got spawned back at Paws. There's a magic shield together with plate leggings, two powerful protective items.
- 53N 28W Camp with some paladins and perhaps a mage. Nothing to loot, just the occasional plate armour of the paladins and money.
- 46N 12W The wisp house.
- 53N 8W Silverleaf trees, home of the Emps.
- 46N 38W Penni lives here, remember her? The wife from Addon, who we met at Moonglow and gave us a crystal to build the orrey viewer.
- 53N 40W Smith the horse's house. He is Iolo's horse and there is a tradition that every game smith appears, he gives an out of date clue about the game (he gives a clue of the previous game)
Talk to the Emps at you know where. You should first talk to Trellek, he has green eyes. First of all, give him some honey, don't be rude. Tell him you want to talk to the wisps and he should come with us to do this talking, but since the dawn of time, there's a problem involved. The permission of Saralek, his bounded one (wife). About Julius, he says he went here and saved the emps from a great fire, but died from intoxication from smoke, he is what emps call 'hero'. Now, search the area and talk to Saralek. She tells you Salamon must give her permission before Trellek can join us. Search some more and talk to Salamon. She already knows your affairs and gives you a contract that you must deliver it to the woodsman to make him stop cutting down silverleaf trees. About the emps, she tells they are what we, 21st century people would call vegetarians (my example, don't push me). They hate any kind of violence, even for getting food. The best food they have is honey, which you could give her a bit more. Go back to 42N 47W.
Enter the house and tell the woodsman you want no more cutting of silverleaf trees. You tell him automatically what are emps and he will be far more kind-hearted than you capitalist woodcutting pigs! Thousand of trees are cut down in the Amazonic florest each day only to feed the big pig of capitalism! (Cough cough, Marxist moment, cough cough). Anyway, with the contract signed go back to the emps and give Salamon the signed contract. Now, contact Saralek and she will take a step back on her decision, not letting Trellek coming with us. But she has an idea, if you tell her you wanted to talk to the wisps, she'll answer he can contact the wisps through his whistling, and perhaps can do a whistle to imitate the sound. Go and talk to Trellek, he will make the whistle for you.
Now, go back to the cozy wisp home at 46N 12W and whistle. The wisp will come and contact you. 'Xorinia' was expecting 'Trellek' but found 'Avatar', The Wisps are from the Xorinite dimension and it is called Xorinia by other wisps. Their job is basically to gather all the knowledge of the world. There's normally a fee for getting information, which we will see. The Undrian Council ('government') seeks information stored in the most intelligent being in Britannia, Alagner. He has a 'notebook' which they need to get to absorb information and they propose a trade. Information valuable to us, about the Time Lord and such, for the notebook. Alagner is currently located at the isle of New Magincia. About the mysterious Time Lord, they say they have been contacting him for what we call 'centuries'.
What a pleasant conversation, talking to a wisp. Go back to your carpet and the direct place to go would be New Magincia, but stop by LB castle to heal yourself at the fountain and stop at Cove and talk to Nastassia. Tell her about her father and she'll try to speak with her mother, telling her husband didn't die as a vagabond, but as a hero.
Land at 78S 129E, the plains of New Magincia.
2.6 New Magincia
Enter the house to the north and talk to the man, he is very busy, so let's go straight to the point. Ask him first about the Wisps. He knows that the Wisps have no loyalty to anybody, they could be spying on us at this very moment, the way they get knowledge is honorful sometimes but disguting others. To borrow his notebook, you'll need to get the Answers to the questions of Life and Death. To do so, you must seek the Tortured One at the wasteland of Skara Brae. And the spell Seance is needed to speak with the undead. Go to your magic carpet and travel to Skara Brae. You can land at 48S 39W, but it's possible to land in Skara Brae, at the cemetery, I made it once :)
Cast Seance, normally only once to pass this part (if you don't have, you can get it with Mariah for 80 Gold. It required the reagents Blood Moss, Mandrake Root, Nightshade, Spider Silk and Sulfurous Ash. Talk to the skeleton (who has a Death Scythe, by the way) and pay him his 2 Gold fee to cross the Misty Channel.
2.7 Skara Brae
Beautiful place, isn't this? First of all, note the dead trees and total absence of any green. To begin with, the roads mentioned are made of dirt and stones delimitating them. Go west a bit and turn south, enter the torn building. There, you will find 3 ghosts. Talk to the male one, and it will be perhaps...
Quenton was a fisher. He has useful information (that will be repeated again and again), so let's hear from him first. One day he met Gwen and married her. They had a child, they named her Marney. A short time afterwards, some pirates kidnapped Gwen (because of her incredible beauty, they thought she was a noblewoman, as will be related later) and when they figured out she was the wife of a fisher, she was raped brutally and sold to a brothel. Marney got sick after her mother's vanishing. Quenton had to fish to get some money, but couldn't since he had to take care of his daughter, then he got some money from Michael, who he shouldn't trust. Obviously, he couldn't pay the loan and Michael got Blade, a mate, to slew Quenton. After that, a friend of Quenton took care of Marney but she eventually died and the father remained as a spirit until then, her daughter's spirit is held by Horance the Liche. About the people of the city, Quenton knows Mordra, the local healer, who had a plan to stop the Liche, it involved Trent the blacksmith and Caine, the alchemist. After a time, a maelstrom of fire wiped the island. Trent had his wife killed when the undead were taking her to Horance, Caine, the Tortured One (who we are looking for) instead of making them free, made them slaves. Each night at midnight, they go there to give Horance some power, but don't recall that. And finally, about Horance, who firstly was a peaceful mage that wrote poetry, but then his poetry began to change, to worse and he got reclusive. Then he built the tower and one night, the dead came out from the graveyard and went to the tower.
What a mighty paragraph! Now, talk to the female ghost. Her name is Paulette and, being a good barmaid, says some rather provocative words. You notice how low the cut of her bodice is when she bends to clean the tables (or at least tries to do it). When she saw the huge fire, she went to her room to hide, but the smoke knocked her unconscious (with a punch, I might add :)) and she wouldn't believe what happened, if there were not scorches all over the place.
Talk to the man now, he is not a ghost, he is a zombie by the way. He "brought up" the Keg O' Spirits and it was one of the most popular taverns throughout all Britannia. He even presence some weird things. The night when Horance became undead was of full moon and thunders sounded, but there were no clouds in the sky. Then, he head some "Moo"s, but these weren't cows, as he glanced, the dead from the graveyard have unburied themselves and went moaning to the tower. He repeats many things Quenton said and Paulette said too, so finish your conversation. This tavern is specially a strange place. Once the game nearly crashed, I heard lots of sounds like "Ticrew" and suddenly all the chairs by the big table were facing another direction. My companions ran in horror and one of them vomited.
Go out from the Keg O' Spirits and follow the way west. Past some HUGE fungi, enter the brick building to the west. Talk to the woman there, she can be at the cemetery also. Her name is Mordra Morgaelin (remember that name!) and she makes some tests with her Ankh, I think they are to test your health or to test whether you are really the Avatar. She had the information about Quenton that he didn't mention, like the names of the pirates and such. (These were sentenced, too). She says Caine had no guilt by the destruction of the isle, since she passes the instructions to the Mayor, Forsythe, and he seems to have misquoted the mandrake root quantity, to higher, the only reasonable explanation to the huge fireball afterwards. She hates the mayor, as you see (who wouldn't). If you dare, you can get the reagents from her bag, there are many.
Go out now, and turn north, continue and enter a building. To the end, on a corner, there will be the mayor, Forsythe. What a nice man, he admits having made a mistake when telling the reagent quantities to Caine, and this can be proved by his low memorization capabilities, he isn't very accurate when describing Mordra's plans... What a mayor...
Go out, then west. Continue and enter another ruined house. This is the Smithy and the smith here seems to be working on a sort of cage. Talk to Trent. He is VERY angry with everything you say, sparks almost fly from his eyes. Horance stole Rowena from him and her minions killed her on her struggle. The skeletons were so numerous that they hold him and he watched the death of his beloved one. The only thing left from her is her musicbox.
Go talk to Mordra again. Begin a conversation and ask her about Trent, then from Rowena. She will say that, to take Rowena from that kind of hypnosis, you must get a very personal thing, perhaps from Trent, and show her it. Go back to the Smithy and grab the music box, it is standing at the table. Go north from here and turn east. Continue the way and you'll eventually turn north, enter the house. The man here is the Tortured One, and he, according to Alagner, should know the answers to the Questions of Life and Death. He will only tell these if you free the souls from this place. Poor souls, he is in constant fire. Agree to save them.
Go south, west, then turn north when a monolith with a plaque that says "To the Dark Tower". Follow the way and when you're about to reach the tower, some lightning will strike. Nothing deadly, I assure you. Enter the tower and be careful with the skeletons, they have Magic Axes, which aren't so much of a weapon but are still magic. Talk to the lady ghost, this is Rowena. Now, get the music box and play it. She will wake up from her nightmare and will give you a ring (which strangely lands on your hand physically) to tell Trent she still loves him. Here, you can talk to Horance too, but it's a rather unpleasant conversation.
Go back to Trent and give him the ring. At first he will ignore but then he will cry a bit and change dramatically his expression. He does not feel the flames anymore, they were coming from his Hatred. Now his eyes are in a deep shade of blue. To complete the Soul Gate, he needs just one more iron bar, which can be found at the graveyard. Talk to Mordra then, and ask about Trent, Caine, Horance and get the ingredients, or at least the list. You should get a invisibility potion, a cure potion and a vial of mandrake essence JUST ONE VIAL. These three ingredients can be found at her home. Invisibility is the black potion, cure is the red and mandrake is the shimmering red/orange/white potion. Get the vial too. In the graveyard, get an iron bar from the walls and go talk to Trent. Give him the bar and wait a second, he will finish the Cage. Now, take it with you. I found that the easiest way to do this is to get someone strong, like Dupre, take his backpack off (and place it in a visible place!) and put the cage where his backpack should be. It weights 25 stones. Talk to Mordra again.
We must lower the cage on the well to get some of the force from the spirits, this is a little evil we must do to overcome a greater. Then, we should wait until midnight and when Horance is feeding, the cage should be placed over him and then the magical concoction sprinkled over him. Go talk to Caine now. Say formula to him, tell him you know the proportions and ask for the instructions. The instructions are the following, we must place the three potions under the connection tubes and the vial at the nozzle, then light the burner. If you're having trouble, look at the photo…
Get the formula and head to the Dark Tower. Go to the back of it, still inside, and cross the illusionary wall near any of the stairs. You will see the Well of Souls. Double-click the cage and then click on the Well. The cage should get a blue and white colour. You must now wait until midnight. There is a clock to know the time. Read the books there, including the one made of human skin, and use the invisible potion (not invisibility) on someone to get a "What is this!" complaint. Note: to wait faster, you can sleep using your bedroll or using any stone bed, but I recommend you sleeping until 11, and wait the final hour.
When all are lying on their beds, including Horance (this one took a while to find his bed), double-click the cage over Horance and then use the concoction of him. All will wake up and the evil spirit that inhabited Horance will vanish. To continue, the Well of Souls should be destroyed, but first, Rowena should be taken back to her husband. Locate Rowena and tell her that, you will have to, perhaps, ask a companion to leave before making Rowena join. I would choose Jaana, but feel free. Take Rowena back to Trent and they will embrace themselves, then he will put the ring back to her finger... What a lovely scene. Back at the Tower, Horance tells you that to destroy the well, someone should sacrifice him/herself. We should ask this to everybody from the town.
Now, ask all the members here are the tower first. Mordra will refuse, magical powers are bound to her and her sacrifice would destroy Skara Brae and a bit of the mainland. Quenton will refuse, he must see his family again. Paulette will get angry and won't answer your question. Markham will say he doesn't have the courage. The mayor would offer himself, but not until all have their opinion told. Go back to town and ask Caine, he will refuse, then ask both Trent and Rowena. Both will deny then talk to the last one you think should have a paper here, the mysterious Ferryman. He is bound to his duty... forever. Back at the tower, ask the mayor again to sacrifice himself, then he will agree with that. He will join your party and take him to the Well. He admits not being a good mayor, no more speeches now to save him, he jumps on the well and the spirits are freed. Talk to Horance again and he will be very grateful of your doings. To thank you, he will give his Firedoom Staff (I do not like this weapon). In order to know the secrets of this world, he became that...
Go back to Caine and ask for his half of the bargain. You are a fool, he says. There are no answers, only questions. Go back to the lively Ferryman and ask to return, free of cost. Finally, some fresh air! Skara Brae is a tense part of the game, but still easy to me. If you've forgotten someone's backpack or your companion at the Tower, how bad, go get them!
Sit on the fluffy chairs of the magic carpet and fly graciously to New Magincia.
2.8 New Magincia, again?
As you land on New Magincia, enter Alagner's house. Talk to him and tell him what he was seeking, the answers to Life and Death. Tell him there are only questions, no answers. Now you began the way of enlightenment. He will give we the key, but we must find the notebook on our own. Go south and then turn west when you see a two-store building. Open with the key the door to the west, step on the blue carpet. Open again another door using the same key and get anything you want from the crates. Use the lever on the northwest corner of the room and a wall will open. In this room, use the two levers and enter the room to the left. There get the magic bow if you want and the 60 superpowerful arrows, Magic Arrows, Burst Arrows and the rare Lucky Arrows (20 of each). Now, in the room to the north there is a teleporter. Step on it and you'll be teleported, duh. Walk along the path and you'll be teleported again before reaching the door. Go around the wall and use the right teleporter. After being teleported, use the lever on the wall. Step on the left teleporter and you'll be taken back to the begin. Find your way to the first teleporter and ignore it, go north and through a illusionary wall.
We are almost there! In this room you must build a stair to reach the closed balcony. To do that, remove all the chairs around the table and the light source. Then put a crate on the floor, almost below the table in order to create a step to climb it. Then place 3 crates one in from of the other. Place one crate above the second and two above the third. You should now be able to reach the balcony (see the picture for a visual explanation). Climb your crates and unlock the door with the key Alagner gave us. You can now plunder what you see here. Get the absurd amount of reagents (except Mandrake Root, there are only 4), the 100 gold pieces, the potions, a regeneration ring, a wand, dust, potions and finally, the so needed notebook.
Read it, it's truly fantastic. In there Alagner discusses the real meaning of FS's teachings. He then divides the Fellowship into 3 circles and only the inner circle, and the smallest of course, the important have direct contact with the Guardian, who is an evil being who threatens Britannia. To go out of this place, go south until you reach again the room with the magic bow. Unlock the door and use the lever. Exit this building and fetch your magic carpet. Fly calmly to Yew and land near the House of the Wisps. 46N 12W (it can be seen of the map as a square in the middle of the forest).
2.9 Yew and Time Lord
There, use the whistle again and tell Xorinia you have the notebook. It will absorb the information without touching it and then give you a message. The Time Lord requests out audience. He is trapped on the Shrine of Spirituality. To reach it, we must use the Orb of the Moons in the place directly NW of here. About the Guardian, it knows that he can be described as vain, greedy, egocentric and malevolent. He takes pleasure of conquering worlds. He is trying to enter this realm via a Moongate, not red nor blue, a Black Gate (hence the name of the game). This will happen on the event called Astronomical Alignment. Outside this realm, the guardian is powerful, but inside it, he will be unstoppable.
Get your carpet and land at 64N 45W. Go east through the woods and you'll find a moongate. Save. Stay on the east side of it and use the Orb of the Moons. A red moongate will appear. Now, you can be injured or go to another moongate. If you're injured, just repeat the process. In this new moongate, enter it normally and you'll be taken to the Shrine of Spirituality. Talk to the man trapped in a cylinder.
He hails you and missed you very much since the last time when they met, at Exodus. His name is Time Lord and his job is to make the flow of time consistent, by means mortals cannot understand. He sent the red Moongate to fetch us at our home, but it went wrong, instead of taking us to the right place, it was directed to Trinsic. After the time of recovery he had, he fixed that Orb of the Moons location to make it possible of a rendezvous. The Guardian has built a generator at the Serpent Spine mountain range that disrupts the use of the Moongates and the Orb of the Moons. Say yes to his question. We must go to Serpent Spine and enter the dungeon there. Face the trials and get near the generator. Then we should Mark the place to come back there afterwards, if we don't get what to do inside the generator and need to come for aid. Inside the generator, we must get the small sphere, it'll be useful in the future. Now, get the carpet again and fly to New Magincia.
There, near Alagner's house, land and enter. You'll see Alagner torn into pieces on the ground, quenched in blood. The Guardian will say "Thank you for the information in the notebook, Avatar. It was most useful, hahahaha". Look into the crystal ball and you'll see the scene, Alagner lying on the ground with a man with a hook standing near, two nobles with red clothes (probably Elizabeth and Abraham) and a gargoyle. Go out and north, talk to the shipwright. Ask for the Crown Jewel and Hook. The ship left not much ago and a man with a Hook boarded it with a gargoyle. Man, we couldn't get them this time. You can make a pit stop here and solve the quest from New Magincia, but I prefer to do something else.
3.0 Equipping and Serpent's Hold
Before going to the dungeon Deceit near Britain, we should equip ourselves with some better equipment. I'm going to list some places you should go, only to collect money, the shopping spree will be later.
· At 168S 28E, the Parrot Isle. Remember when we hit a parrot with a mallet? He told us about a secret location. Go to this place and land the carpet somewhere flat and find the small mountain, go around it and enter the cave. Be careful with the invisible caltrops at the entrance, for some reason, it's considered stealing moving them, so open your inventory and place the caltrops into your backpack/barrel/anything else and then drop it somewhere safe. Enter and here you can have 7 gold bars, much money, below a powder keg there's a Silver Serpent venom, lightning whip (useful), four glass swords, magic boots, magic gauntlets, two magical rings. Stash your equipment and go to...
· The isle just west. Here, land your carpet and save, it may become necessary. Go west and up a ladder, you'll enter a small cottage with some pirates and a mage. Kill them (for some reason a powder keg appeared in my backpack, perhaps it's a trap). Here you'll find some reagents in a bag, blackrock pieces and in the southeast corner of the hut, there's an almost invisible bag. It there's the key to the chest (with nothing in it) and some starbursts and magic boots.
Get you carpet and fly to Serpent's Hold, just east from here. You should land at 167S 44E. Go east following the path and you'll see some walls. Enter the building (notice the statue without a face and blood) and open the first door. Here, talk to a paladin. His name is Sir Pendaran and is a knight at the Hold. His job is to protect the population, since the ruling faction has gone soft (LB and others). He says Jehanne is his lady and seems to be very fond of the Fellowship.
Talk to a woman with red arms. Her name is Lady Tory and is a counselor. Her baby was taken away by harpies. Some knights have seen them flocking near the Shrine of Honour. Accept the quest to rescue the boy. The captain of the guard, Sir Horffe is a gargoyle and Lady Leigh is a healer. Richter the armourer, joined the FS and since then, became less compassionate. Menion is the only man that isn't a knight, but trains people and is spends his time reclusive forging weapons. He find Sir Richter attractive, also. Sir Jordan is blind but actually is very aware of the surroundings and runs the Iolo's south (Iolo will be very proud of his shop).
Talk to the gargoyle, Sir Horffe, only to get acquainted.
Talk to the nobleman, his name is Sir John-Paul. He seems to know that you're the Avatar supposed we should like to solve a crime. Recently, a statue of Lord British was depredated and we should get the criminal. First of all, we should speak to Sir Denton who has a fond for mystery-solving. Talk to another paladin.
This is Sir Denton, ask him to help you. To begin with, we should ask Sir Richter, he was the first to notice the crime and searched the statue. Ok, now you can get much information about this guy, he is like a machine! Never getting out of his armour, he tells you about all the people of the island and in a very systematic way! You get the information that you want.
Go to the kitchen and double-click the only trout that is not facing the same direction. Actually, it's a corpse and within it, there's a key. Get it. Go out of the kitchen then turn north. Continue and open a black door, talk to Sir Richter. Tell him you're (name). Ask about the statue and he will say that someone who does not seek Unity did that (he is a FS member). Then, he'll give you some stone chips that have blood on them. We should ask Lady Leigh to examine. Go to the west quarters and enter the second room to the north. There, talk to Lady Leigh and she'll examine the stone chips and the result is that the blood is gargoyle blood.
Go talk to Denton, and he'll say we should report this to Lord John-Paul, but perhaps Lady Tory should have some information, she is very attentive and notices slight changes of behavior on people. Ask her this and she'll say that she saw Sir Jordan a bit nervous after the incident. Go out from the hold and enter the first house to the south. There will be Sir Jordan running Iolo's south (he won't believe Iolo is there with you). He heard a woman scream in the night of the incident and believes it was Lady Jehanne. Go back to the keep and talk to Sir Horffe. He will tell you he was trying to stop the criminal and fought with him.
Talk to Lady Jehanne, she is in the second room north, to the east. She'll say that her Sir, Pendaran, changed much after he joined the FS. Then, he became obsessed with the soft government that eventually defaced the statue. Then that night, he came back with another's blood on his sword, then she screamt. We've got out man! Go talk to Sir Pendaran and firstly, he'll deny having stolen, saying you are a worm to believe first in a woman than in him, but then he'll admit it and say it would be better if he could apologize before all his fellow knights. Talk to Lord John-Paul and he will provide punishment for Pendaran.
One quest solved, we still have got another! Get your carpet and fly to 142S 9W, at the shrine of Honour. Fight the harpies (if there are any) and rescue the child, who is sitting at the altar. Then take him back to Lady Tory, she'll ask you to put him into his cradle. Go to the first room north, to the east and put him into the cradle.
Now, if you're fond of getting highly powerful weapons, follow this guide. Go to the second room south, to the west and move the clothing in the SE corner of the room (put them in your backpack to provide "stealing") now get the key. Go to the armoury and use the key. I recommend grabbing mostly the fire sword and the magebane. First of all, the fire sword acts like a never-ending source of light and the magebane sucks any mana a mage has, impossibilitating him of using spells. Get the magic sword, sword of defense (damage 6 and acts like another shield) and the great dagger. To open the chest on the meeting room, you have to go to 48N 138E, where there's an X (two glass swords too) and a chest. Inside the chest there are all kind of useless stuff, but there's a key with a glowing end. Use it on the chest and inside, you'll find 5 Nightshades, 5 Sulfuric Ashes, 5 Ginseng and 5 Mandrake Roots, nothing important and that deserves such traveling to get. The key you got in the trout open a chest on the south of the island. To enter the cave, you must get a ship (I didn't manage to land the carpet) and enter the cave. Go right all the way boarding the water and open the chest. Inside there's a key to open the armoury (we found another under the clothes, so this is useless). To end our pillage, go to the second room south, at the east part and open the right chest. Get the magic boots, and other boots you want. The chest on the left must be picked and inside get a Great Helm.
3.1 Shopping Spree
We are now going to do some shopping. I've selected the most useful spells from the mages that sell the cheapest and we are going to spend a maximum of 3490 gold in buying spells (spells we have, like Seance, are added too). Then, we are going to buy reagents until we reach 80 of each one (this may seem a lot, but it is better to be prepared than to don't have one in a critical time).
First of all, go to Mariah in Moonglow. Buy the following spells, from a decrescent order. Maybe you don't have to buy it, it will be listed.
- Time Stop for 60 gold. You can skip this one, if you want.
- Swordstrike for 80 gold. You can skip this one too.
- Resurrection for 40 gold. DON'T MISS IT!
- Invisibility all for 100 gold. Very useful
- Restoration for 80 gold. DON'T MISS IT!
- Mass Might for 40 gold. If you're going to train your characters to their maximum, skip this.
- Cause Fear for 80 gold. Skippable.
- Dance for 100 gold. Funny and skippable
- Charm for 60 gold. Skippable.
- Seance for 80 gold. We already have it.
- Recall, Mark, skip them.
- Sleep for 80 gold.
Now go to Nicodemus in Yew. From him, buy:
- Summon for 185 gold. Skippable.
- Mass Death for 185 gold. Very useful indeed, but damages your party.
- Death Vortex for 185 gold. Funny to use, but skippable
- Death bolt for 155 gold. Very useful.
- Tremor for 135 gold. Skippable.
- Mass Sleep for 115. For times when mass death is out of question
- Explosion for 115 gold. Skippable.
- Dispel field for 115 gold. Useful.
- Paralyze for 65 gold. Skippable.
- Enchant for 45 gold. Useful.
- Destroy trap for 45 gold. Very useful.
- Locate for 25 gold. Almost useless, but interesting.
- Detect Trap for 25 gold. If you have a premonition, use this
Buy the following reagents in the required amounts:
- Mandrake root for 5 gold
- Nightshade for 5 gold
- Spider Silk for 3 gold.
Go to Rudyom in Cove now. Buy from him the spells:
- Armageddon for 185 gold. Skippable and useless, only funny.
- Mass Charm for 155 gold. Skippable but useful.
- Great Heal for 115 gold. Useful.
- Lightning for 85 gold. Skippable.
- Telekinesis for 45 gold. Very useful.
- Awaken all for 25 gold. If you don't have the patience to use the linear spell, buy it.
Buy the reagent Black Pearl for 5 gold.
Now go to Nystul at LB castle in Britain. Buy the following spells:
- Unlock Magic (we already have) for 95 gold.
- Reveal for 95 gold. Skippable.
- Mass Curse for 95 gold. Skippable.
- Protect all for 85 gold. Skippable.
- Mass cure for 55 gold. Very useful.
- Create food for 35 gold. Very useful.
Go to Sarpling at Terfin and buy the following reagents from him.
- Blood moss for 2 gold.
- Garlic for 1 gold.
- Ginseng for 1 gold.
- Sulfurous Ash for 3 gold.
We are going to train our fellows to their max, this part is skippable. It's absolutely possible to finish the game with their original status. The party members need only to be dexterous and strong. Intelligence if for spells and only the Avatar can cast them in this game.
- If you're searching for strength, talk to Menion in Serpent's Hold to train for 45 gold. +2str +1comb
- If you're searching for dexterity, talk to Sentri if he is in the party or talk to Karenna at Minoc for 20 gold. +1 dex and +1 comb.
- If you're searching for combat, talk to Zaksam at Vesper for 40 gold. +2 comb +2str
- If you're searching for a good mixture between the skills, talk to Inforlem for 50 gold. +1 str dex comb
3.2 The cube generator
Fly to 8N 29W and go a bit south with your carpet. You'll find an island and if pay enough attention, there's a chest below some cattails. Land your carpet (it's hard, see photo) and pick the chest. Inside you'll find a poison dagger and magic leggings. Go back to your carpet and land it at 8N 29W. Enter dungeon Despise. First of all, you should equip someone with a fire sword, or wield a torch or cast light spells. If you go west, you'll find a monolith that spits fire bolts on the four directions. To pass, destroy the traps and continue going west and you'll find a monk. If you go east, you'll find some dead miners and many of your party members will vomit. If you continue north, you'll get to the safest way to find the generator.

I suppose you went north and you'll find a monolith spitting fire bolts. Use Destroy Trap on a bold when it has just been spit (it just appeared) and the trap will be disabled. Do this on the east and north parts of the monolith and go north. Turn east and in a wall you'll find a sign saying "Round and Round". You must be west from this part. Go east past the sign and continue going east after being teleported. Go south and turn, don't go straight. Keep following the way and turn south, continuing you'll find a magically locked door and to the west, a clear passage. It's all up to you. Continuing west you'll find the generator but if you go through the locked door, you'll find many, I mean MANY magical items. I chose to the this path first (we'll come back)
You'll have to unlock three doors and at the end, a room will become clear. You can get some food in the bags and inside a nightstand, there's a key that opens a chest and inside it, reagents, many reagents. A mage will perhaps appear. Now it's a tension part. Save your game. A bit north from the fire wand, there's a completely invisible stair. Climb it in the S-N way and you'll find 4 people, hostile. They all have magical items and you should concentrate your attacks on the paladin, he is wearing a complete set of magic armour. Kill them the way you want, I found it pretty easy. Grab the armour the paladin had and the key too, use it to open the chest on the SW part of this tower. Then, the mage has some reagents and potions and a key. The pirate had magic bow and arrows and the fighter had a fire sword, if I remember right. Use the keys you got to open the chests and grab a great dagger and lightning whip (if you want, of course) and the other chest has a sword of defense and two wands.
Step on the southern teleport and incredibly, you'll be teleported. Exit to the north, through the fake wall and ignore the chests. There are invisible walls blocking your way. Go south and continue until you find another magically locked door. Enter the room and use the lever. Check the mage's corpse and get that blue key. Get any potions you want too. Go south and turn west, go north and before entering a room with barrels, go west through another fake wall and you'll stumble across the chests we saw earlier. I found it easier to open all the chests before getting what's inside them. Distribute the magic armour fairly between your companions and get the Silver Serpent venom too, a glass sword and 15 starbursts (these are almost useless, but fun). Go to the room where you found the dead mage and step on the pad to the left. You'll be teleported back to Despise, before entering this first room.
Go north passing by the ex-magically-locked-doors and turn west. Follow the way and when you can go north, be careful, there are some caltrops on the ground. Move them and continue west. Go around that massive fire field and until you find the cube generator! But before being able to enter it, there's a moongate that teleports us back. Mark this spot and leave Despise. I found it easier to exit by using the orb of the moons and then, find Yew again. Use the Orb of the Moons on a "square" to your left and a moongate will appear. If you're lucky, you'll be teleported. Keep using the moongates until you find the Yew moongate. Use the orb on it and enter another red moongate, you'll be teleported to near Skara Brae, enter the moongate again and you'll find the Time Lord. "You're not going to trust the Time Lord are you? Be careful my friend." The Guardian will say. Talk to the Time Lord and he will say we must find the hourglass from Nicodemus to trespass the outer defenses of the generator and perhaps, the inner defense will be composed of moongates also. We will be able to contact the Time Lord with the hourglass.
Go to Nicodemus' house at Yew and talk to him about the hourglass. He will remember it and remember also that he sold it to a antique shop dealer in Paws because the magic of the hourglass ran out. If the Ether corrects itself, he will be able to reenchant it.
3.3 The Tetrahedron generator
Get the carpet you left at the entrance of Despise and go west, to Dagger Isle. In the way, at 7N 50W, you'll find Selwyn's Tower. I made a stop here to see what it contained and the results were better than I imagined. To enter the tower, you must be behind and walk until the roof disappears so that you can see inside. Then cast Telekinesis on the lever you see on the southern part and enter the tower. A ghost will appear, kill it (if that's possible) and now get what you want. I found very big indeed quantity of reagents along with a wand, a firedoom staff and some potions. The reason I went here was for the reagents, now most of them are near 100.
Land at 0S 178E and enter dungeon Deceit. This dungeon is very dangerous with many traps and if your companions aren't in good health, heal them before entering. Go north and use Unlock Magic on the door (needs to be only in one). You now have two options, east or west. If you go east, you'll find a lever together with a trap that will eat your HP and the lever opens two metal doors we saw earlier. After the metal doors you'll find a drake, a spider perhaps but nothing more that I saw was worth getting into this danger.
Go west from the entrance and rush past the arrow traps. You shouldn't have problems, most arrows won't have effect, but anyway, it can still hurt you badly. Open the double doors and as soon as you enter this T intersection, lightning will struck upon any of you, be careful, it can damage without noticing. If you go south, you'll meet Eiko and Amanda, two half-sisters that had their father, Kalideth, killed by a Cyclops named Iskander Ironheart. There are 3 powder kegs here too, so it's not worth getting here, unless you want to meet these two.
Go north, it's the safest way and there will be skeletons on the ground and perhaps some ghosts will attack you. The skeletons have nothing useful, except for a Curved Heater. Go west from here again and north, past a fake wall (it's obvious it's fake) and the way will divide in two, before that, magically locked doors you need to unlock (just one). If you take the second passage, you'll find a/some dragons and treasure. In the treasure you'll find magic armour, plate leggings, gems, rings and a key. Get the key if you want, it only leads into another trap. Take the first way and go south when you can, then east. You'll find an exit to a valley, or something like that. Here lives Iskander Ironheart. Talk to him and he'll admit having killed Kalideth, but he did that in self-defense. The mage attacked without provocation because of the magic sickness. He won't flee nor attack the two, just wait until they come and if they decide to fight, let the destiny choose. When he was younger, he killed the seven gazer princes, who where trying to steal his leader's eye (which is considered a delicacy among not-so-civilized people) and became known as Wonder Boy. He once saw the Tetrahedron but when he approached it, amnesia struck him and he was at the doorway again...
Go back into the dungeon and take the first way east. As you go, you'll find another fake wall and some "invisible" caltrops. Move them and use the lever. Use the next lever too. Go south and you'll find a locked door. You can use the key you got from the dragons but there's only normal plate armour and when you enter, lightning will struck. Go south and keep going, you'll find an altar. Stay very far from it and get the regeneration ring. As you do this, poison field will appear, that's the point of staying far. Go back a bit and turn east in a corridor with a cobweb, across the fake wall. Go north and ignore the energy fields, just squeeze between them and kill the headdresses if there are any. Unlock another magically locked door and you'll find the Tetrahedron generator. To enter it, just stay close the little stars it has on its front, from where those useless bolts come from. Inside you'll find an ethereal best. It is very possible to kill it normally, but you can use Arcadion's power to finish it or a glass sword will do. Double-click the caged prism (golden cage) and you'll be teleported back outside the generator. It will explode, get the prism on the floor. Magic should work normally by now.
3.4 Sphere again
Find your way back to the carpet and check if everyone is OK, if you haven't left anyone behind, either dead or unconscious. If there's anybody dead, take him to LB and he will resurrect them for free or use the spell. Go to Paws at 63S 2E and talk to Beverlea. Buy from her the hourglass and get it from the shelf (it won't appear on your inventory). Go to Yew and talk to Nicodemus. He seems to have regained his sanity and will enchant the hourglass again without charge. Now, recall yourself back to the Sphere generator and go past the red moongate and enter it. This is a puzzle involving moongates as the Time Lord predicted. The correct way to enter the moongates, at least on my game, is down, up, down, down, up. Double-click the sphere and the Time Lord will be set free. He'll talk to you through the hourglass. Unfortunately the Guardian is intelligent and engineered the generator that upon destruction, the Moongates and the Orb of the Moons would stop working. The Guardian is building a Black Gate from blackrock and we should find something that can destroy blackrock (Rudyom's wand). We must now find the other generator, that should be Cubic, at an isle near Serpent's Hold, possible at the Meditation Retreat. After we destroy this one, we should go to Buccaneer's Den and try to find out where the Black Gate is. Get the small sphere and go all the way back to your carpet, if you haven't recalled yet.
3.5 The Cube generator and Ambrosia
Land at 178S 85E at the Meditation Retreat isle. If you talk to Ian and if you're a FS member, he'll give you a key to the entrance of the barrier and warn you not to go to the northern cave of the isle. I think it would be interesting to enter the cave. There isn't much to get in the Retreat, so let's go directly to the cave. Enter it and go west. Continue and you'll find Gorn, someone you already met before. The Guardian has charmed him, so you can ignore. Anyway, Gorn came from Balema, another world, through a moongate. From a time on, he began hearing Brom, a voice inside his head. It began speaking about what to do and what not to do but with time, it began passing Fellowship teachings, sound familiar, no? Dupre says. When you decide to find Brom with him, he'll tell you to stay away, Brom has just said we lie. Ok, anyway, go north then turn west. If you continue, the warrior woman called Iriale Silvermist will attack you. If you talk to her, she'll attack you anyway. She is protecting the cube from anyone with just a FS medallion, a sword and a spiked shield.
Go on and turn east when you find a puddle. Go north and you'll find the generator. The Guardian will say "Avatar, you're not welcome here" for a unknown reason. As you approach the generator, a high screech will come from it and will damage a bit. Go away and talk to the Time Lord through the hourglass. He says you should get a mineral called 'Caddellite' and make something to tap our ears before entering the generator and inside, the most probable enemy will be the Guardian himself, but only as his voice. We should contact Brion at the observatory in Moonglow for more information.
Get your carpet and fly to the observatory. Talk to Brion. Ask about Caddellite and he will tell you that it's not native from Britannia and is found in meteorites. We should seek the north-east seas. Then he asks why we need it. Tell him we need helms to be made of them, then he'll recommend Zorn from Minoc. According to him, he is capable enough to do such a helm. Then he sends you to his brother. Talk to him at the Lycaeum and he'll repass you again. No bother, we can go there by ourselves. Get your carpet and fly to the compass area on the NE part of the map. Land at 87N 183E. This is the lost isle of Ambrosia, as the fairy Kissme who lives north tells you. If you talk to her, the conversation will be mostly useless, but she gives useful information such as that a Caddellite meteorite landed here a long time ago and the isle tore apart. The caddellite is mostly at the Hydra's pit she adds. You can search here for some treasure. All I managed to find was at the SW part, there's a magic helm and a magic sword, together with some food. (some warriors will begin fighting as you approach this camp).
Enter the cave just N from where you saw Kissme and go west. Stick at the wall you have on your left (if you're looking to the west. Keep going and eventually you'll find a lich locked magically in a room. Ignore it and continue. After you cross a part, some false walls will appear. Ignore them. The only thing you have to worry about is the eventual slime and/or the FS member with a double-handed sword. Go south and you'll find another magically locked door. You know what to do with it and go south. Keep going and you'll find a skeleton and a spider. The skeleton has a protection ring if I recall right. Back up a bit and go west. Keep going and you'll find a square room you seem to not be able to enter. There's a secret door at the northern side of it. As you enter, the Hydra will talk to you. The name of the three heads are Shandu, Shanda and Shando, all brothers. I won't bother to describe them, since they only know how to talk about how you're dumb for echoing what they say and treating you like 'food'.
As the conversation ends with them suspecting you are trying to steal the caddellite, they will attack. Just finish them, they are very much like a dragon but it is said it is far weaker in health. Go south and unlock another door. Keep going and you'll find the meteorite and some chunks beside it. You need one chunk for each party member, there's a total of 13 chunks (they are pretty heavy). Take them back to the carpet and go to Minoc. Land at 54N 51E and enter the stone house. Talk to Zorn and ask for making the helms from Caddellite. He will amaze himself when he sees you went to Ambrosia, the lost island, and then you will amaze yourself when watching him working. Equip the Caddellite helms and go to the Meditation Retreat again. Approach the Cub generator. When you enter it, SAVE! It is important to save. There are many deadly traps here. It consists on taking the right paths along a maze, sometimes making them appear and disappear.
I made a solution for this cube. When it's written an arrow looking one way only, you must get to the end of the line (there are many invisible walls). If there's an arrow that bends, you must bend immediately where it indicated, but I can't confirm the veracity of this guide, since I may have lost something. The red arrows are to what something refers to, NOT a direction. When it's written (until the 1st fireball appears) mean that you must walk slowly until a fireball appears, then walk backwards to avoid the blast radius. Anyway, keep alert for any changes in the ground. In the two cases this is written, the path appears. Here's the solution:

After you double-click the cube, you'll b taken back to Britannia and the Time Lord will begin to talk to you. He says the Astronomical Alignment is at hand and with the cube, the Fellowship members won't lie to you. We must go to Buccaneer’s Den and search for our beloved Hook. Get the cube before leaving and fly to Buc's Den, at 92S 71E.
3.6 Buccaneer's Den
We are on the final lap of the game. I'm not going to describe the fellows in this part, since we should rush and discover the whereabouts from Hook and the Black Gate.
Land where I said and enter the house to the left. Talk to the man here and ask about the Crown Jewel. The Cube will vibrate and then suck the truth from him. He'll say that the Crown Jewel goes frequently to the mainland then comes here, stays for a night and departs the next morning to the Isle of the Avatar, then it repeats the same way backwards. This nice man is the owner of a long tradition of Budo's. He joined recently the FS and is very happy, since they gave financial support so that he wouldn't bankrupt. Nice nice...
Out, go north and enter the first house to the west. This is the House of Games, the gambling area. It's possible to win a giant amount of money here. Anyway, talk to a pirate, that's normally sitting on a chair. Ask him about Hook. He'll say Hook lives in the backs of this establishment and we should talk to Sintag to get the key. Go to the back and talk to the guard. Ask for a copy of the key, then open the door. Follow the way and you'll get to Hook and other's quarters. Enter the first room and open the chest. There you'll se a key, get it, and two notes, one with an order to sail to the Isle of the Avatar and other with a murder list (LB and you are not checked). Go west and get another key in a chest and open a secret door to the east. Follow the way south and turn north. You should find a chest in the end and unlock it with the key you got from the second room. Inside there is a magic armour and magic shield, yay!
Go back and you can now head to the isle of the Avatar, but if you want a free "membership" of the famous Baths you can follow this way. Go back to the quarter room and in the NW corner of stone wall, there's another secret door. Follow the way and use a lever that will open the door to enter the FS hall here. Continue your way north and eventually, turn east. Pick the door and go south, through another door. As you continue, you'll find some crates and bags. Use the lever that's behind the western crate and a door will open, leading to some sort of treasury with gold, gems, an antique armour and a great helm. Use another lever here and you have free access to the Baths.
Go north from here and get to the door you picked not long ago. Go north and you should have noticed this is a torture room. Talk to the troll and keep talking until you tell him to stop torturing. He'll end the conversation, enter combat mode and you will automatically begin attacking each other. Open the bag inside him and use the two keys on the two cells. Free the innocent (one is Alagner's helper and other is the guy who was trying to be the Avatar, it's he who stole the Banner of Honour, back in Jhelom). Go back to your carpet and spend the time you want in Buc's Den. If you have the magic carpet, I recommend saving in a different slot before entering the Isle of the Avatar, better if you save while landed in Buc's Den.
3.7 Isle of the Avatar
The reason I said to save in Buc's Den is that some people have reported that while flying above the Isle of the Avatar, they heard the Guardian laughing and when they got there, they couldn't go on because there was a locked door (that shouldn't be). It's better to be safe than commit the error and have to restart the game. In the isle, there are mainly pirates and such, I'm going straight to the point. To get where we want, circle the isle and land at the south part of it, more precisely at 173S 179E. Go north and Big G will laugh, why you ask? Just click the big statues and you'll see "Guardian statues", meaning either someone changes them to look like the Guardian or they are just the guardians of the Shrine of Humility.
Unlock the first doors with the golden key that we got from Hook's room, the second too, then go NW following the mountains and you'll see a cave, enter it. Here, unlock these doors with the same key we used earlier and go W. Why there's a big throne looking at the nothing standing here? Well, anyway, it should be big enough to let the Guardian sit. What to do here? The metal doors won't open, search the tapestries and notice a puddle of water in the base of one... Go near and go through it, you'll see a lever, use it. Go back and pass the doors, now open. Go north and when you can, go north again. Use the lever and the doors will close and open. Continue and enter the room north, with 3 winches, 3 levers each on one pedestal. This is no puzzle, the solution is very easy. Use the left lever and the left winch will sound, then use the middle lever to open a door.
Go West, fight the FS member, then turn south in a room. Examine the body (which seems to follow the Virtues, because of the Ankh) and get the key there, then use the lever that's almost invisible near the barrel, a door will open, go south, then east, continue and unlock the door with the key we just got. This room is annoying, to pass it, use the first lever, then the lever most right you can reach, then the one most left, go north, east a bit and use another lever. Go out from this maze and go east. Pick the north gate and use another lever, go back to the maze and use the lever on the pedestal (or use Telekinesis in the beginning). Go south, kill gargoyle(s) and continue. Go west when you can, the north, east and get the key that's on the well. Go back to the maze room and go north, kill the FS members, then continue east. At the end, use the two levers to open the doors (that should lock the dragon) and enter the dragon's lair.
It's an unfortunate end for those who came here, notice the huge quantity of corpses and a seemingly fresh one of a blond woman. Kill the dragon and get the magic armour (a full set) and a glass sword too. Now, go north and continue following the border NW. You'll find a room, DON'T ENTER IT NOR USE THE LEVER, IT'S A TRAP! Instead, read the scroll on the stone. It says that the throne of change keeps you at bay, but the throne of virtue shows the way. Go north through the shallow water and then, go south (don't enter the Ex Por room, you'll be teleported). Keep going on the way and touch the metal doors. Save now and step the teleporter. Use the key on the ground on the door and face this opponent, who uses a Juggernaut Hammer and has another full set of magic armour. Get his key too and go east. Use the key we found at the well on the doors. Go back and step again on the teleporter.
Use the lever to open passage and go north, interrupt the FS members meeting and move the Medallion from the altar and the doors shall open. Go north, pick the door and continue through this illusionary wall. Save here, approach the middle of the room, but not too close and a liche shall appear together with many fire fields (that's why to step back). Kill the liche, but take care not to let anyone be hit by the lightning bolts that shoot from the wall. Manage to go north, either by waiting the fire fields to extinguish or by rushing beside the lightning bolts. Step on the teleporter in the north room.
Go east, then north and kill the skeletons. Save, this is important. Continue your way and kill another liche (these guys are very boring, they mostly don't affect us much but are still a peril. Three energy fields should appear now. The way back is blocked by invisible walls. If you don't have dispel field, you are doomed. In my game, I didn't have it but I managed to get past. I just uses Time Stop some moments before encountering the liche and got past it (who didn't appear) and the energy fields didn't either, how charming (phew, I almost had to go back and buy it!). Go east and past the fake wall, you'll get to the Throne of Many Changes area. It is to the south. Sit and what it really does is to teleport you to a identical area. To prove it, move the shield from the wall to the ground and it will be back on the wall after you sit.
In this room, go to the Southeast part and go past the invisible wall. Check the skeleton and get a blue key. Sit on the throne again and now go NW, again through a fake wall and open the door. Kill the mage, he has some interesting magical items, like a wand, a firedoom staff, magic armour and a green key, which can be used in his chest, which has some potions inside. Get his spellbook, it may become useful to you, but it doesn't have restoration nor resurrection, it's focused mainly in offensive spells. Sit again and this time, go NE. Kill the skeletons and continue. Sit on the Throne of Virtues and a lightning will struck you, symbolizing that the throne of many changes will take you to the correct path. Sit on the throne of many changes and go NW. Kill another liche and go north. Save before stepping the teleporter. You are on the Black Gate's chamber! The Guardian will tell his followers to stop you, the Batlin will begin a conversation.
He'll say that we won't succeed, big G is too powerful. Britannia's destiny is in his and the FS's hands. Being as he is, he'll ask you. Being the snake he is, he'll offer to join. Hook, Elizabeth and Abraham and Forskis will say different ways that the concept of 'kill' can be interpretated and then attack you. I found it pretty nice to cast Mass Death, reduce your health and the others health to 2 and kill those bastards around you. This is risky, but it worked. Then Batlin won't die and will see Hook's death with resignation. The battle is not over, he says. You should go back to earth and leave them, then he will vanish.
Place the sphere, tetrahedron and cube on their respective places to deactivate the barrier, then the Guardian will taunt you to make a decision, and with a little tone to make you go home. Ignore him and use the Rudyom's wand on the gate and finish the game! Enjoy the final cutscenes and the credits. If you keep the credits rolling until the end, another option will appear, that is to read the quotes the developers left in the game. See what they are made of. Congratulations! Perhaps we'll see us again in the Serpent Isle.
3.8 Appendix
3.8.1 Tables
Locations and their coordinates (copy protection answers too)
| Britain | (0, 0) |
| Buccaneer's Den | (60S, 60E) |
| Cove | (0, 60E) |
| Empath Abbey | (90N, 60W) |
| Jhelom | (120S, 60W) |
| Lycaeum | (60S, 180E) |
| Minoc | (90N, 60E) |
| Moonglow | (60S, 180E) |
| New Magincia | (90S, 120E) |
| Paws | (0, 0) |
| Serpent's Hold | (150S, 60E) |
| Skara Brae | (30S, 60W) |
| Spektran | (120S, 90E) |
| Terfin | (150S, 120E) |
| Trinsic | (90S, 0) |
| Vesper | (0, 120E) |
| Yew | (90N, 60W) |
| Great Forest | (60N, 30W) |
| Fens of Dead | (60, 0) |
| Blood Marsh | (30, 90) |
| Bog of Desolation | (30, 30) |
| Spiritwood | (60, 30) |
| Serpents Spine | (0, 30) or (30, 0) |
| Dagger Isle | (0, 0) |
Main weapons and their respective damages and locations, below.
| Ambrosia | (93N, 187E) |
| Covetous | (58N, 95E) |
| Deceit | (2N, 177E) |
| Despise | (8N, 30W) |
| Destard | (70S, 23W) |
| Isle of the Avatar | (150S, 180E) |
| Wrong | (60N, 22E) |
| Demon Sword | ??? | Isle of Fire |
| Glass Sword (breaks) | 127 | (23S, 43W),(25N, 178E),(48N, 137E) |
| Death Scythe | 50 | (53S, 64W),(45S, 154E) |
| Juggernaut Hammer | 25 | (157S, 53E),(88S, 55E),(176S, 188E) |
| Hoe of Destruction | 20 | Mack’s Shed |
| Firedoom Staff | 20 | (7N, 50W),(60S, 69E),(136S, 165E) |
| 2-Handed Sword | 11 | Common |
| Lighting Whip | 10 | (23N, 36W),(55N, 144E),(62S, 78E) |
| Halberd | 10 | Common |
| Magic Axe | 8 | (157S, 53E),(23S, 76W),(23N, 15E) |
| Fire Sword | 8 | (100S, 12W),(5S, 24W),(128S, 3W) |
| Magebane | 7 | (16 N, 38 E),(18N, 12W),(157S, 53E) |
| Sword of Defense | 6 (3 Def.) | (128S, 3W),(143S, 173E),(74S, 62E) |
| Magic Sword | 6 | (157S, 53E),(5S, 24W),(77N, 196E) |
| Custom Sword | 6 | Trainers |
| Sword | 6 | Common |
| Great Dagger | 5 | Common |
| Poison Dagger | 1 + poison | Pirates |
| Serpentine Dagger | 1 | De Snel's |
| Dagger | 1 | Common |
Missile weapons, damage and location
| Bow | 8 | Common |
| Arrow | same as bow | Common |
| Burst Arrow | bow +2 | Common |
| Magic Arrow | +4 | cast "enchant" on arrows |
| Tseramed Arrow | +1 (sleep) | Tseramed, in Yew |
| Magic Bow | 12 | (48N, 74W),(46N, 7E),(85S, 126E) |
| Crossbow | 10 | Iolo starts with |
| Bolt | 10 | Common |
| Magic Bolt | +2 | cast "enchant" on bolts |
| Triple Crossbow | 28 | Common |
| Fire Wand | 10 | (84S, 67E),(20S, 37W),(68N, 30W) |
| Lightning Wand | 8 | (79S, 89E),(7N, 50W),(18N, 6W) |
Armour and effectiveness.
All magic |
5 |
All plate |
3 |
All chain/scale |
2 |
All leather |
1 |
Exceptions: Magic armour, magic gauntlets, plate armour, great helm,. |
5, 3, 4, 4 |
Sword of defence |
3 |
Spiked/wooden shield |
2 |
Curved heather/decorative shield |
3 |
Buckler |
1 |
Protection ring |
1 |
Reagents and their cheapest prices.
| Black Pearl | Cove | Rudyom | 5 |
| Blood Moss | Terfin | Sarpling | 2 |
| Garlic | Moonglow, Terfin | Mariah, Sarpling | 1 |
| Ginseng | Terfin | Sarpling | 1 |
| Mandrake Root | Cove, Yew | Rudyom, Nicodemus | 5 |
| Nightshade | Yew | Nicodemus | 5 |
| Spider Silk | Yew | Nicodemus | 3 |
| Sulfurous Ash | Terfin | Sarpling | 3 |
Potions and their cheapest prices
| Black | Invisibility | Mariah 90 |
| Blue | Sleep | Kessler 15 |
| Orange | Awaken | Wis- Sur 10 |
| Purple | Protection | Kessler 15 |
| White | Light | Kessler 50 |
| Yellow | Healing | Kessler 150 |
| Red | Cure (poison) | Kessler, Wis- Sur 150 |
| Green | Poison | Kessler 15 |
Spells, reagents, prices, cheapest locations, descriptions.
| Linear | |||
|---|---|---|---|
| Awaken | -no reagents- | Wakes someone up. | |
| Douse | -no reagents- | Extinguishes a light source | |
| Fireworks | -no reagents- | Creates moving lights that can scare beasts with experience | |
| Glimmer | -no reagents- | Creates light for short period of time. Know trick with it. | |
| Help | -no reagents- | Teleports you to LB castle. Said that can be used only once. | |
| Ignite | -no reagents- | Ignites a light source | |
| Thunder | -no reagents- | Creates a thunder in the sky, not a lightning bolt. | |
| Weather | -no reagents- | Changes the weather | |
| First Circle: | |||
| Awaken All | GN, GR | R(25) | Awakes all things in the surroundings of the caster. |
| Create Food | GN, GR, MR | Ny(35), M(60) | Creates one piece of food below a party member. |
| *Cure | GN, GR | Ni(25), R(25), M(80) | Cures poison |
| Detect Trap | SS, NS | Ni(25), R(25), M(100) | Tells the exact location of a trap, if one is near. |
| Great Douse | GR, SS | W(30), Ny(35) | Extinguishes all light sources in the surrounding. |
| Great Ignite | SA, SS | Ni(25), W(30) | Ignites all light sources in the surroundings |
| *Light | SA | R(25), W(30), Ny(35), M(40) | Creates light for a small period of time. |
| Locate | NS | Ni(25), W(30), Ny(35) | Tells your sextant position, even underground. |
| Second Circle: | |||
| Destroy Trap | SA, BM | Ni(45), R(45), W(50), M(100) | Disables a trap you found. Normally must be cast in the object the trap created. |
| Enchant | BP, MR | Ni(45), W(50), Ny(55) | Makes missiles stronger and will always hit the target |
| *Fire Blast | SA, BP | R(45), W(50) | Creates a small fireball |
| Great Light | SA, MR | R(45), W(50) | Creates light for a considerable period of time |
| Mass Cure | MR, GR, GN | Ny(55) | Cures all your party members of poison |
| Protection | SA, GN, GR | Ni(45), Ny(55), M(80) | Protects slightly your party members |
| Telekinesis | BM, MR, BP | R(45), Ny(55), M(60) | Enables you to use a item unreachable |
| Wizard Eye | BM, NS, MR, SA, BP, SS | M(40), Ni(45) | Lets your person see ignoring natural barriers |
| Third Circle: | |||
| Curse | SA, NS, GR | R(65), W(70) | Makes the changes of others hitting any party member low |
| *Heal | GN, GR, SS | M(40), R(65), Ny(85) | Raises ones HP about 3-10 points |
| Paralyze | SS, NS | Ni(65), R(65), W(70) | Unables somebody to move |
| Peer | NS, MR | M(60), Ni(65) | See the entire world and know your position in it |
| Poison | NS, BM, BP | Ni(65), R(65), W(70) | Poisons the enemy |
| Protect All | SA, GN, GR, MR | Ny(85), M(100) | Protects slightly all your party members |
| Sleep | NS, SS, BP | M(80), Ny(85) | Makes the target fall into sleep |
| Swarm | (none) | Ni(65), W(70), Ny(85) | Summons a horde of insects |
| Fourth Circle: | |||
| Conjure | SS, MR | W(90), Ny(95) | Summons a beast to fight (weak) |
| Lightning | BP, SA, MR | R(85), W(90) | Creates a lightning bolt of medium damage |
| Mark | MR, BP, BM | M(40), Ni(85), R(85) | Marks a position so that you can come back. Use it in a Virtue Stone. |
| Mass Curse | SA, NS, GR, MR | W(90), Ny(95) | Lessens the chances of all enemies to hit any party member |
| Recall | MR, BP, BM | M(60), Ni(85), R(85) | Teleports the mage and the party to the designed area previously marked. |
| Reveal | SA, BM | W(90), Ny(95) | Reveals a once invisible object. |
| Seance | BM, MR, NS, SS, SA | M(80), R(85) | Enables the party to talk to undead. Important. |
| Unlock Magic | SA, BM | Ny(95), Ni(85) M(100) | Unlocks magically locked doors. Important. |
| Fifth Circle: | |||
| Charm | BP, NS, SS | M(60), R(115) | Make enemies join your side for a time. |
| Dance | MR, GR, BM | M(100), R(115) | Makes your enemies dance. |
| Dispel Field | GR, BP, SA, SS | Ni(115), W(120), Ny(125) | Dispels a field, either sleep, poision, energy or fire. |
| Explosion | MR, SA, BP, BM | Ni(115), R(115), W(120) | Creates an explosion where the mage designate. |
| Fire Field | BP, SA, SS | M(80), W(120),Ny(125) | Creates a field of deadly fire. |
| Great Heal | GN, SS, MR, GR | R(115), Ny(125) | Takes one back to full health. |
| Invisibility | NS, BM | M(40),Ni(115),Ny(125) | Makes one invisible |
| Mass Sleep | GN, NS, SS | Ni(115), W(120) | Makes all enemies fall asleep |
| Sixth Circle: | |||
| Cause Fear | NS, MR, GR | M(80), Ny(145) | Makes the enemies flee in terror |
| Clone | SA, SS, BM, GN, NS, MR | M(40), R(135), W(140) | Creates an exact copy of a being to fight beside the creator. |
| Fire Ring | SA, BP, MR, SS | Ni(135), W(140), Ny(145) | Creates a ring of fire fields around the target. |
| Flame Strike | SA, BP, BM | Ny(145) | Creates a fire field in the feet of all enemies around. |
| Magic Storm | MR, NS, SA, BM | M(100), R(135) | A deadly mist of energy that strikes lightning at opponents |
| Poison Field | NS, SS, BP | Ni(135), R(135) | Creates a field that poisons who gets in it. |
| Sleep Field | GN, SS, BP | M(60), R(135), Ny(145) | Makes one fall asleep when entering the field. |
| Tremor | BM, SA, MR | Ni(135), W(140) | Shakes the earth but won’t spare the mage and party |
| Seventh Circle: | |||
| Create Gold | MR, SS | R(155) | Transforms a piece of lead into 10 gold nuggets |
| Death Bolt | BP, NS, SA | Ni(155), Ny(165) | Kills instantly the desired target. |
| Delayed Blast | MR, SA, BP, BM, SS | Ni(155), R(155) | Creates a powerful explosion and gives time to take cover |
| Energy Field | MR, BP, SS, SA | M(100), Ni(155), Ny(165) | Creates an impenetrable field of electrical energy |
| Energy Mist | MR, NS, SA, BM | M(60), Ni(155), Ny(165) | Creates a mist that goes from caster and damages enemies who stay in it |
| Mass Charm | BP, NS, SS, MR | R(155) | Makes all opponents forget their reasons of fighting and get to your side |
| Mass Might | BP, MR, GN | M(40), Ny(165) | Raises all the party member’s stats to their maximum for a period of time. |
| Restoration | GN, GR, SA, MR | M(80), R(155) | Heals totally, cures, disables all negative effects of the party members |
| Eight Circle: | |||
| Armageddon | All Reagents | R(185) | Destroy all life in the planet. |
| Death Vortex | MR, NS, SA, BM | Ni(185), Ny(195) | A swirling vortex that kills all who enter it. |
| Invisibility all | MR, NS, BP, BM | M(100), Ny(195) | Makes all the party invisible. |
| Mass Death | GR, GN, MR, BM, NS | Ni(185), Ny(195) | In the cost of leaving all to 2 HP, kills all surrounding enemies instantly. |
| Resurrection | GR, GN, SS, SA | M(40), R(185) | Brings a companion from the dead |
| Summon | MR, GR, BM | Ni(185), R(185) | Summons a powerful creature to fight beside the mage |
| Swordstrike | BP, MR, NS | M(80), Ni(185), R(185) | A pinwheel of swords flies towards the opponent. |
| Time Stop | MR, BM, GR | M(60), Ny(195) | |
Trainers
| Karenna | Minoc | Dex +1, Combat +1 | 20 gold (10) |
| Jakher | Minoc | Str +1, Int +1 | 20 gold (10) |
| Zaksam | Vesper | Combat +2, Str +1 | 40 gold (13.3) |
| Menion | S. Hold | Str +2, Combat +1 | 45 gold (15) |
| Bradman | Yew | Dex +2 | 30 gold (15) |
| Perrin | Yew | Int +2, Magic +1 | 45 gold (15) |
| Inforlem | Terfin | Str +1, Dex +1, Combat +1 Int +2, Magic +1 | 50 gold (16.6) 50 gold (16.6) |
| Jillian | Moonglow | Int +1, Magic +1 | 35 gold (17.5) |
| Penni | Yew | Str +1, Combat +1 | 35 gold (17.5) |
| Rayburt | Cove | Int +1, Dex +1, Combat +1 | 60 gold (20) |
| De Snel | Jhelom | Combat +2 | 40 gold (20) |
| Markus | Trinsic | Combat +1 | 20 gold (20) |
| Zella | Britain | Dex +1, Combat +1 | 45 gold (22.5) |
| Chad | Moonglow | Dex +1, Combat +1 | 45 gold (22.5) |
| Denby | Britain | Dex +1, Int +1, Magic +1 | 75 gold (25) |
| Sentri | Britain | Dex +1 | 30 gold (30) |
| Lucky | B. Den | Int +1 | 35 gold (35) |
Food
| +31 | Green Cheese |
| 24 | Mutton, Ribs, Chicken, Ham |
| 16 | Beef, Deer Meat |
| 12 | Sausage |
| 9 | Big Cheese |
| 8 | Flounder, Potatoes |
| 6 | Jerky, Fish n' Chips |
| 5 | Fruitcake |
| 4 | Bread, Trout, Pumpkin |
| 3 | Cake, Banana, Egg |
| 2 | Apple, Small Cheese, Carrots, Rolls, Garlic |
| 1 | Drinks, Grapes, Leeks |
| 0 | Silverleaf, Bucket of Rum (or wine) |
3.8.2 Cheats
1st. How to steal
To steal securely, you must open your inventory, just press i, then drag the item into your backpack. DO NOT drag the item and drop it on the ground. DO NOT eat food from others directly. Every item that enters your backpack becomes yours, no matter what.
2nd. How to attack and not get retailed.
As a dragon follows you (or any strong beast), open a door and get your companions behind it, then lock it if possible. Switch the avatar to manual mode and enter combat mode. The enemy should be near the wall, moving from a side to other, attack him as you would attack normally, but the weapon will land of the enemy even with a solid door is in between.
3rd. How to assault the mint in Britain.
To assault the mint, go there when the clerk is there and close the door. Now, put her into sleep and kill her. Get her keys and explore the mint. Be careful with the guards. To lose interest, cast help. Now, when you finished raiding the bank, make LB resurrect her and trade your gold nuggets and bars for real gold, now you’re rich!
4th. How to steal for shops in Britain.
Firstly, go there at night when nobody’s near and attack the glass cases, only this. The alternative is to do this invisible.
5th. Become rich REAL quick.
Go to the House of Games in Buccaneer’s Den. There, equip your Fellowship medallion and choose between the rat race and the roulette. The medallion is important that it increases your rate of gain from 1 for 4 to 1 for 6. In the rat race, there are 4 slots, so place 100 coins on each one and make the rat race. You will win always 300 gold, because no matter what you do, one rat will win and the 100 gold there will transform into 600 gold and you will lose 300 gold in the other bets. To win in the roulette, bet 100 gold in any colour, then spin the roulette. When it is stopping, “steal” your 100 gold and put it in the correct stop (the decisive thing that point the premium colour is the black pixel in the right of the roulette). You get MUCH gold each time.
6th. How to activate cheat mode.
In DOS, type ultima7 abcd. This will active the cheat mode. Press F1 to bring a list of commands. Press F2 to bring debug menu, F3 to bring teleport map, F5 to cast a spell, 4 will drop one’s contents to the ground.
7th. Cheat room. This room is accessed in Trinsic, right in the beginning of the game. It is located in the back of the chimney in the blacksmith’s house. To reach it, you can either try to land the carpet nearby and walk while it’s lowering and get to the room or make stairs from crates in the city. There you will find 8 sets of magic armour, the most powerful weapons in the game, a complete spellbook with many reagents and a nice teleport room which you can teleport yourself to anywhere in the game, can be used to bypass copy protection.
3.8.3 Funny things to do
1st. Go to LB and wait until he stands below a golden plate in his garden. When he is there, double-click the plate and it will fall and decepate the monarch. Read his will in his body to discover a slight secret.
2nd. Teleport yourself to 209,407,0 with the cheat mode (Hex).
3rd. Create an Avatar corpse and carry it with you.
4th. 5a8,508,0, Hex coord of the house of the dead, where all NPC who are killed go.
3.9 Final Words
This game is copyrighted by Origin systems.
Thanks to Dan Simpson for the tables (sorry if I haven't asked you!)
Thanks to Richard Garriot for this great game and to all the other developers too.
And most importantly, thank you who had the patience to read this gibberish full of mistakes I wrote.
FINISHED 23 JULY 2006 01:30 A.M. with 38690 words, 168.906 letters, 3271 lines, 53 pages, 1163 paragraphs. Written 50 pages by hand with notes to complete this burden.
July 23, 2006 finished error correction.
Written
by Karl Jan Clinckspoor,
karl11@REMOVE_TILL_mAIl_Junk_mailterra.com.br
ka_ja_net@REMOVE_TILL_mAIl_Junk_mailmsn.com
Contact me anytime!